
avg —
Mimosa Salad with Sardines
Instructions
Prepare all the necessary products. Boil the potatoes, carrots and eggs in advance – they need to be completely cooled, otherwise the salad will "float".
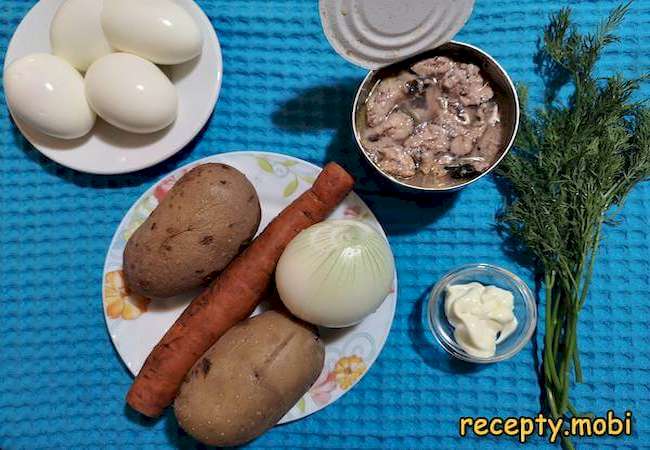
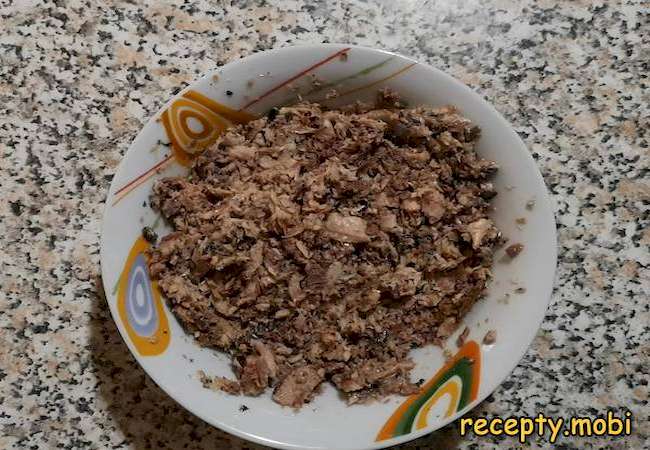
Open the can of sardines and drain off the oil. Transfer the fish to a convenient plate and mash it with a fork. It is easy to pick out the large bones (the spine) straight away.
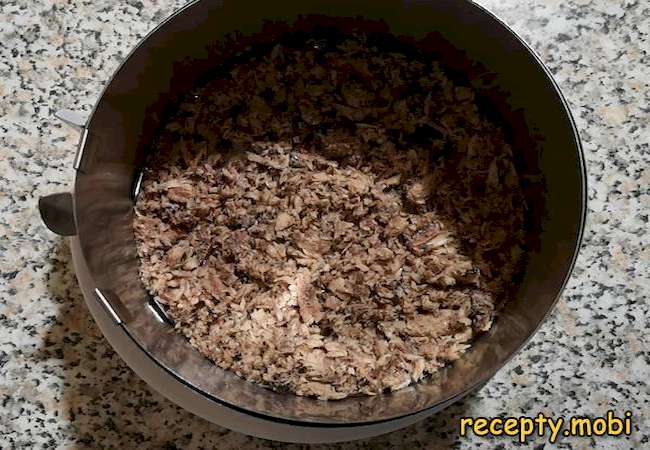
Place the sardines as the first layer in the pastry ring on a flat plate and press them down lightly. Compacting is needed so the layer holds its shape after the ring is removed.
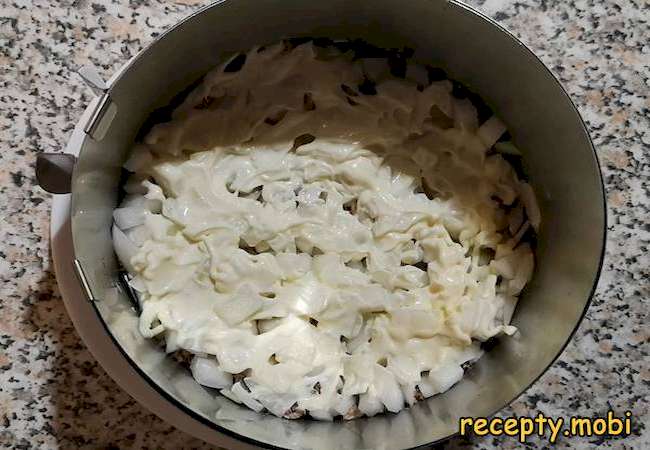
Cut the onion into small cubes. If the onion is too sharp, pour boiling water over it and drain it in a sieve – the bitterness will go.

Spread the onion as the second layer over the sardines and coat with mayonnaise. The mayonnaise acts as a "layer in between" – it does not let the juices through and binds everything into a single whole.
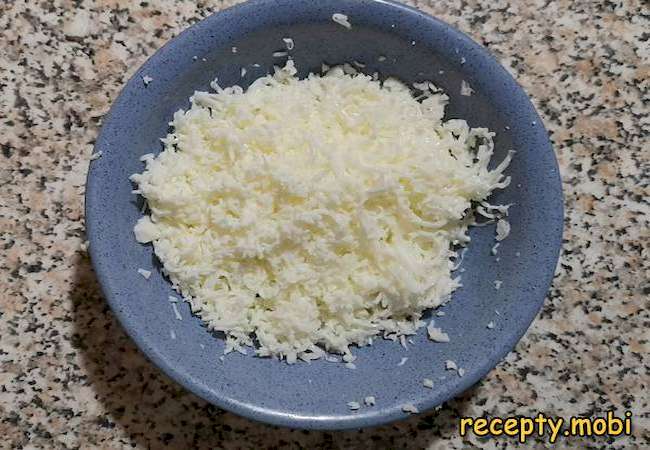
Remove the skin from the boiled potatoes. The potatoes should be completely cooled – warm ones "fall apart" when grated.
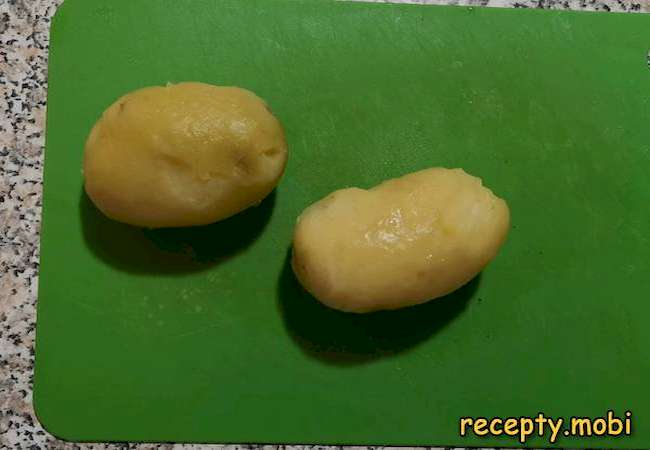
Grate the potatoes on a vegetable grater. A coarse grater is more convenient – it gives the right "Mimosa-style" texture.
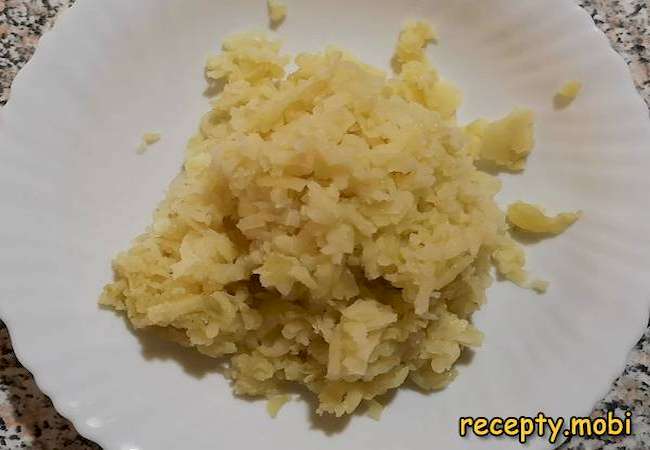
Spread the grated potatoes evenly as the next layer and cover them with a net of mayonnaise. The "net" is thin strips of mayonnaise – they soak into the layer better than a solid mass.

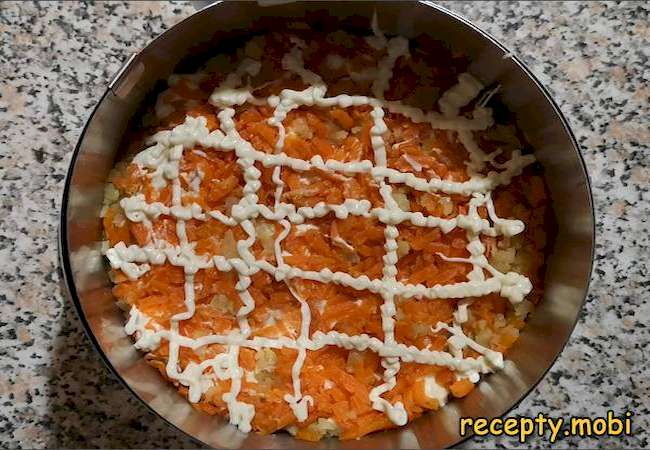
Peel the carrot and grate it on a vegetable grater. The carrot gives a bright orange layer – one of the "signature" colours of mimosa.

The next layer is grated carrot, which I cover with a net of mayonnaise. An even spread is the key to a neat slice at the finish.
Separate the whites from the yolks of the boiled eggs. The separation is needed for the final "Mimosa" decoration – the yellow top should be on its own.
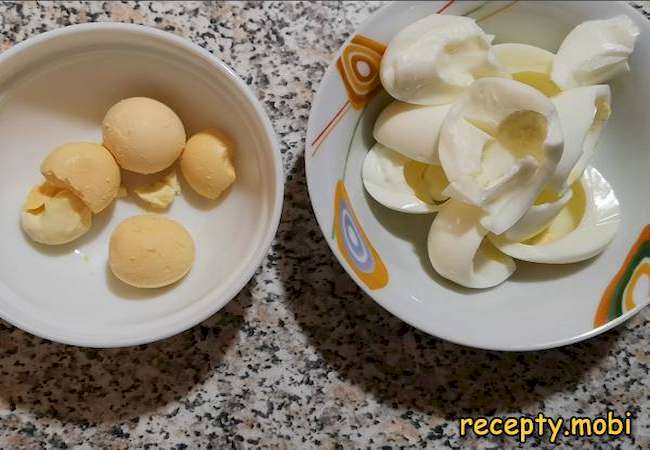
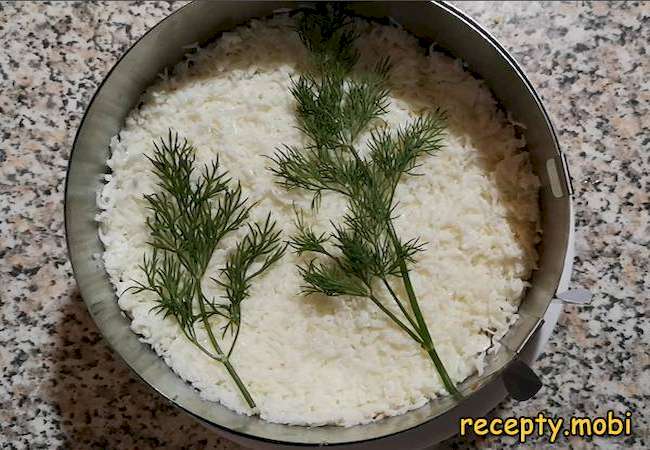
Grate the whites on a fine grater. A fine grater gives an airy "fluffy" structure, like that of the flower.
Distribute the whites evenly over the carrot-and-mayonnaise layer. Do not cover the whites with mayonnaise – they will become the "base" for the yellow yolks.

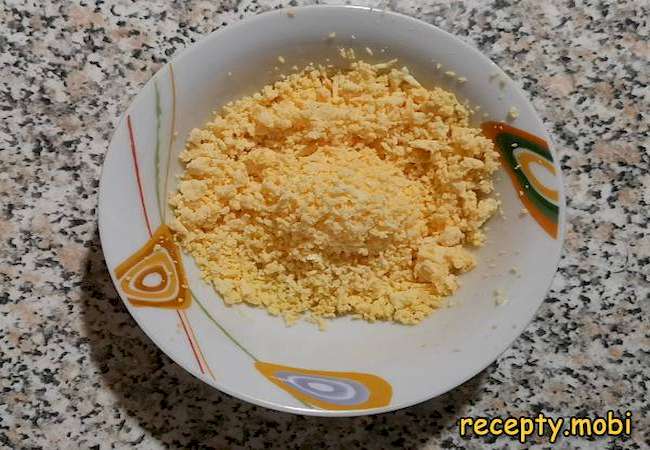
Grate the yolks on a fine grater. They will become the top "golden" layer – an imitation of the mimosa blossom.
To decorate, place a few sprigs of dill on the salad. The greenery imitates the leaves of mimosa.
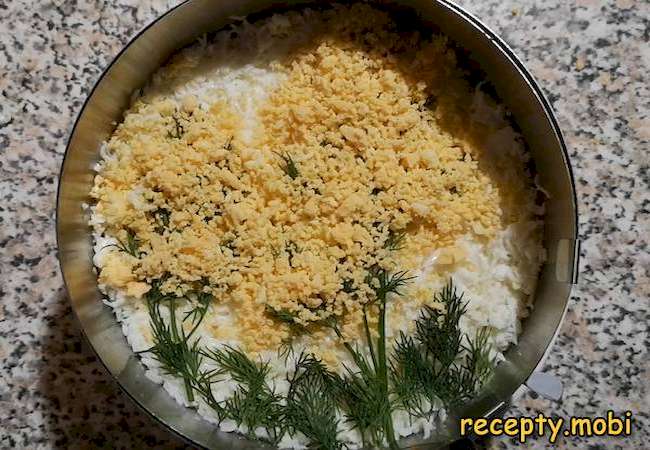
Sprinkle the dill with grated yolks – the composition resembles a real mimosa. The mimosa-style decoration is not compulsory: you can coat the layer of whites with mayonnaise and cover it on top with grated yolks in a solid layer. Put the salad in the refrigerator for several hours.
After a while, take the salad out of the refrigerator and carefully remove the pastry ring – run a knife along the inner wall, then lift it upwards. The Mimosa salad with sardines is ready.Bon appetit!


Tips
- 1
Boil the vegetables and eggs IN ADVANCE and cool them completely – warm ingredients "fall apart" when grated and make the salad "float".
- 2
Drain the oil from the sardines completely – otherwise the bottom layer will "swim" in oil and the whole construction will turn out too greasy.
- 3
Apply the mayonnaise between the layers as a "net" rather than a solid layer – this way it soaks in and spreads better.
- 4
The salad should STAND in the refrigerator for at least 2 hours – the layers will set, the flavours will merge, and the shape will be perfect when the ring is removed. A similar approach works for other layered salads.
Video
FAQ
What can replace sardines? +
Alternatives: canned salmon (a more delicate taste, but more expensive), pink salmon in its own juice (more budget-friendly), canned tuna (drier, less traditional), sardines in oil (closer in taste to sardinella). Sardinella gives the classic "Soviet" Mimosa taste – it was exactly what was used in the original recipe. If you take another fish, check that there are no large bones. Do NOT use smoked fish – its taste is too strong and will overpower the other layers.
Why is the onion often left out of Mimosa? +
Because it adds a "sharpness" that not everyone likes in a festive salad. If you do not like onion, you can replace it with spring onion (milder in taste) or leave it out altogether – it will not affect the taste much. If you use it, be sure to pour boiling water over it (30 seconds in a sieve over the sink); the bitterness will go and a light sweetness will remain. Red onion is not suitable for Mimosa – it gives the sardinella an unattractive purple tint.
How long does the ready Mimosa keep? +
In the refrigerator in a closed container or under cling film – 1–2 days. On the third day the mayonnaise loses its freshness, the fish smells stronger, and the eggs "give off" an odour. At room temperature, do not keep it for more than 2 hours (fish with mayonnaise spoils quickly). I do NOT recommend freezing it – the structure is completely destroyed. If you are making it for a big celebration, assemble it 3–4 hours before serving, not earlier.
How to remove the pastry ring neatly? +
Run a thin knife or a silicone spatula along the inner wall of the ring – this will separate the salad from the metal. Then slowly lift the ring upwards with both hands, holding the salad from above with a spatula. If the salad "catches", wait another 30 minutes in the refrigerator and it will become firmer. A second method: line the inner wall of the ring with cling film before assembling – then it will come off "like a cake", with no risk. Important – the salad must cool completely and "set" for at least 2 hours.
- Comment
or post as a guest
Be the first to comment.


