
avg —
Chicken Kiev Cutlets from Chicken Fillet
Instructions
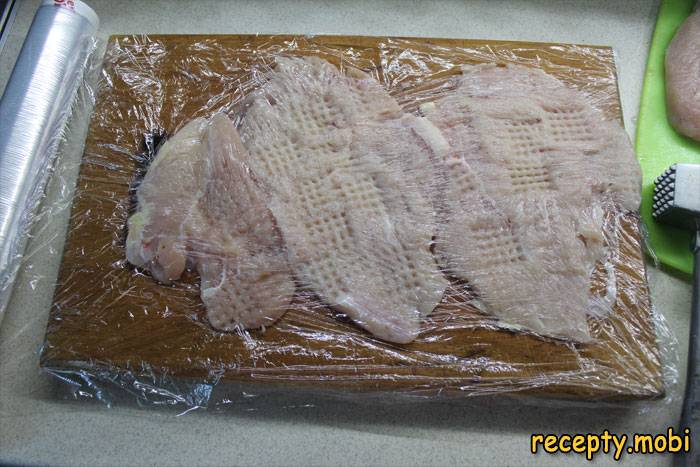
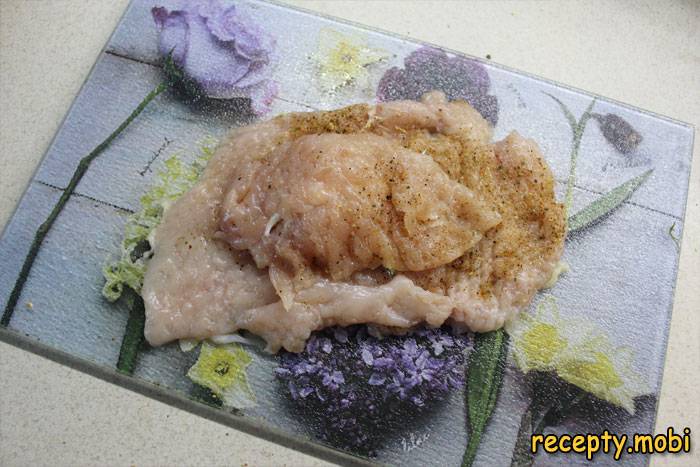
I pound the chicken fillet through cling film to a thickness of 5 mm, using the smooth side of the mallet. The thickness really matters: thinner than 5 mm and the meat will tear when rolled, thicker and it will not cook through evenly. The film stops meat splatters flying around the kitchen and keeps the fibres from being damaged by the toothed side of the mallet.
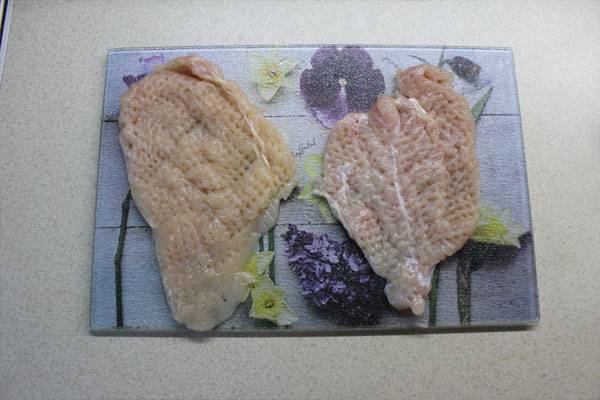
I season the cutlets with salt and pepper and sprinkle them with dried garlic on both sides. I rub the spices into the fibres with my hands for deeper penetration, rather than just scattering them on top. Dried garlic is better than fresh here – it does not burn during frying and gives a more even aroma, unlike fresh garlic, which can scorch in the breading.
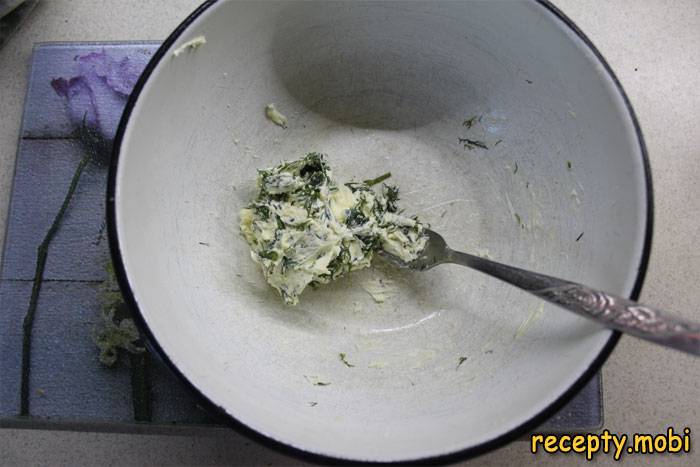
I mix the softened butter with finely chopped dill until smooth. I wrap it in film into a «sausage» shape and put it in the freezer for 10 minutes until firm. The frozen butter is the key to the whole recipe: it melts slowly in the heat and does not run out in the very first minutes of frying. Soft butter will ruin the whole recipe.
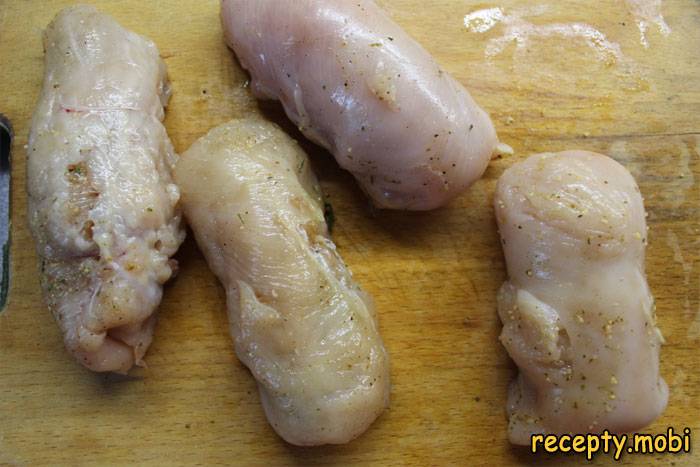
I cut the small inner fillet of each breast into two parts – it will be the «lid» of the cutlet. In a classic chicken Kiev the small fillet with the bone stays on the outside as a «handle», but for the home version without the bone it is easier to simply use the two halves.

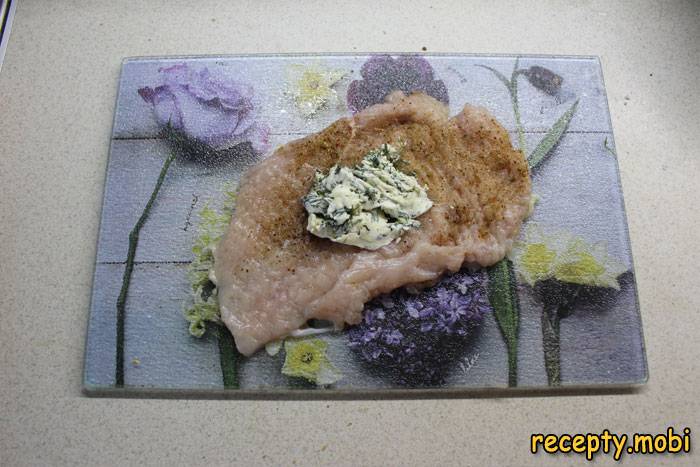
I place the frozen dill butter on a large piece of the pounded fillet – about 25 g of butter per cutlet. I spread the butter in a long sausage down the centre, leaving the edges free for folding over. The butter should feel firm, otherwise it will smear across the meat as you roll it.
I cover the butter with half of the small fillet on top and wrap everything tightly into a cutlet shaped like a «pear» or «boat». I pinch the edges carefully – there must not be a single gap. If there is even the tiniest hole, the butter will leak onto the pan within 30 seconds of frying.
I shape the rest of the cutlets the same way – even «pears» of the same size. An identical shape ensures all the cutlets cook through evenly in the same time – important when serving a group, so you do not have to finish off the underdone ones separately.
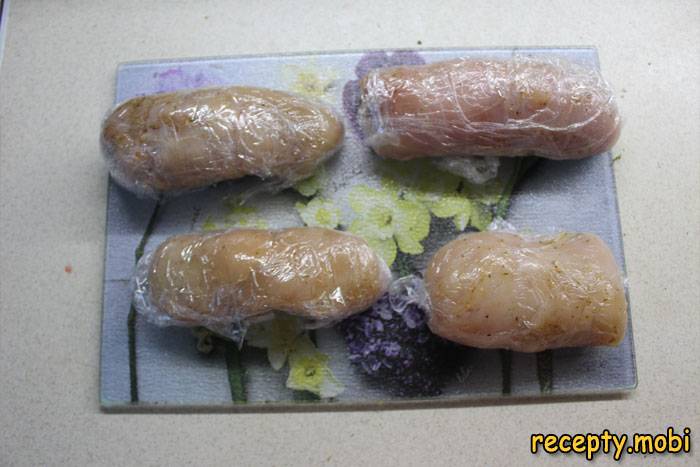
I wrap the shaped cutlets in film and put them in the freezer for 25 minutes – the meat should set slightly but not freeze through completely. This pause helps the cutlets hold their shape during breading and frying, especially if you are working with warm meat.
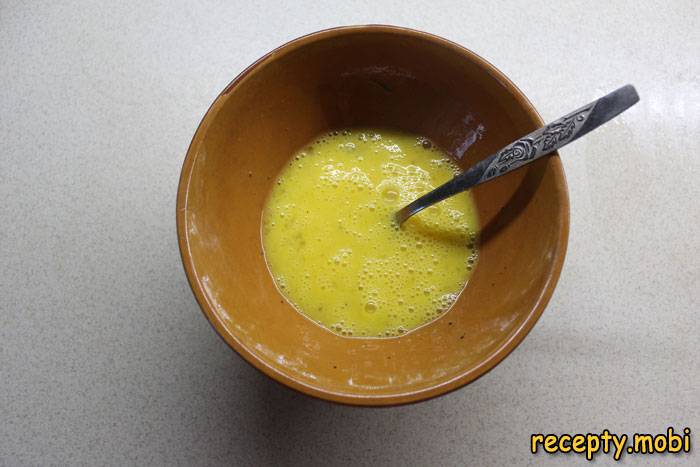
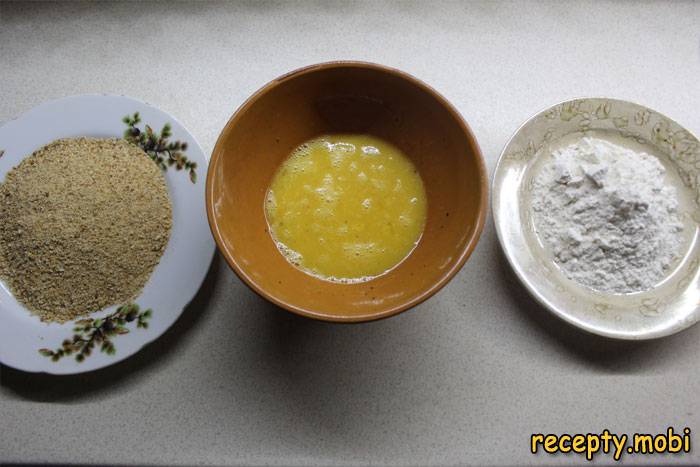
I prepare the batter for breading: I whisk the eggs with milk, salt and pepper until smooth. The milk in the batter makes the egg mixture thinner and more elastic, which gives an even coating of the cutlet. Without milk the eggs give a thicker layer of breading.
I put the flour and the breadcrumbs into two separate flat dishes – deep plates work best. I set up a «conveyor» of 3 dishes: flour, batter, breadcrumbs. This is the classic French double-breading technique «pané à l'anglaise».
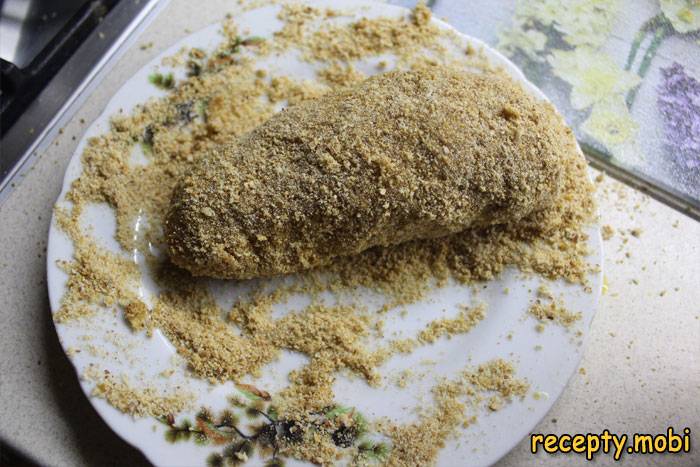
I roll each cutlet in flour (it absorbs the moisture), dip it in the egg batter, then coat it in breadcrumbs. For the crispiest crust I repeat the double breading: batter once more and breadcrumbs again. Double breading is the secret to the signature crisp crust.
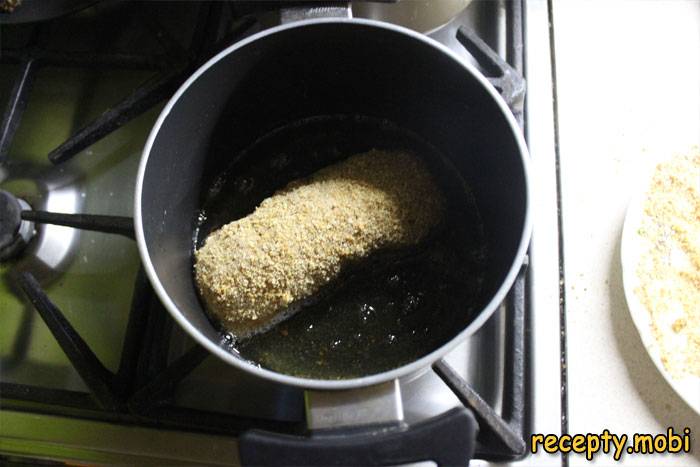
I fry the cutlets in plenty of vegetable oil (the oil should come halfway up the cutlets) over low heat for 5–7 minutes on each side, until golden. Over high heat the crust will burn while the meat inside stays raw – this is the most common mistake.
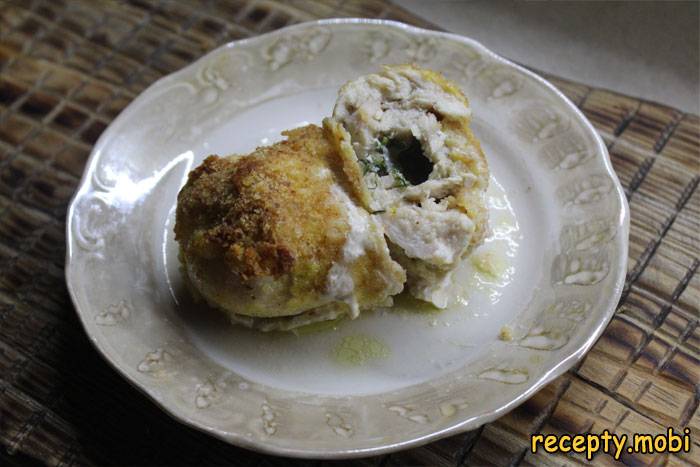
The chicken Kiev cutlets are ready! When you pierce a finished cutlet with a knife, a fountain of green dill butter should «pour» out – that is the signature presentation. I serve them with mashed potato and green peas, just like in the Soviet restaurants.


Tips
- 1
The butter must be well frozen, until firm – otherwise it will leak out in the first seconds of frying and the «fountain» trick will not work.
- 2
Pinch the edges of the meat tightly with no gaps – the slightest hole will let the butter leak onto the pan during frying.
- 3
Fry over low heat for 5–7 minutes on each side so the chicken cooks through evenly. I use a similar principle to make chicken schnitzels.
- 4
Double breading makes the crust as crisp as possible and protects the meat from drying out – do not skip this step.
FAQ
Why does the butter leak out of the cutlet during frying? +
The main reasons: the butter is not frozen enough (it should be firm), there are tears or gaps in the meat (pinch the edges carefully), the meat is pounded too thin with holes (pound it gently), or the heat is too high (fry over low heat). It may also be that there is too much butter for the size of the fillet. Use 25 g of butter per cutlet. To be safe, dab a little egg white on the joins – it works as a «glue» during frying and seals any micro-gaps.
Can chicken Kiev cutlets be baked in the oven instead of fried? +
Yes, first fry them in a pan until golden for 1–2 minutes on each side, then transfer them to a baking dish and finish in the oven at 180 °C for 15–20 minutes. This version is less greasy and more diet-friendly. You can skip frying altogether: bake straight away at 200 °C for 25–30 minutes on parchment, drizzling with oil for a golden crust. Without the initial frying the crust will be less crisp, but the meat will be just as juicy.
What can replace the dill in the cutlet filling? +
Parsley (the classic neutral option), basil (a Mediterranean character), coriander (an Asian accent), or a mix of Italian herbs all work. Each herb gives the dish its own character: parsley is universal, basil is bright, coriander is unusual. You can leave out the herbs entirely and make classic «Kiev» cutlets with plain butter and a pinch of salt. Frozen spinach also works – it gives the filling an unusual green colour.
How should chicken Kiev cutlets be served? +
The classic Soviet presentation: with mashed potato, green peas and a pat of butter on top. For a restaurant presentation: on a bed of stewed vegetables with a sprig of dill and a wedge of lemon. The cutlets are served only hot, straight after frying – a cooled crust will soften and lose its crispness. Be sure to pierce the cutlet with a knife before eating to release the fragrant «fountain» of green butter – that is the main appeal of the dish.
- Comment
or post as a guest
Be the first to comment.


