
avg —
Homemade Smelt Canned Food
Instructions
I choose large fresh-frozen smelt weighing about 700 g – the fish should be whole and undamaged, with shiny skin and a pleasant sea smell. I thaw it naturally in the air at room temperature for 2–3 hours – I never use the microwave or hot water, as this ruins the delicate texture of the flesh. From each fish I carefully remove the head, the tip of the tail and all the innards, making a cut along the belly with a sharp knife.
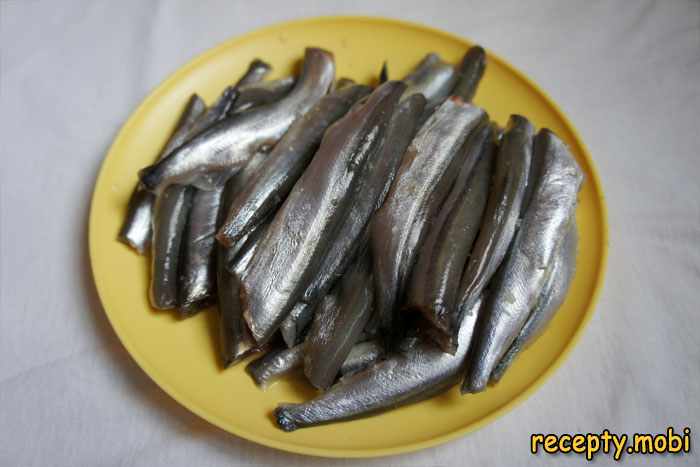
I pay particular attention to cleaning the inside of the belly – under a stream of cold water I carefully scrape off the dark film that lines the fish's abdominal cavity. This black film must be removed, as it gives the finished food an unpleasant bitterness and spoils the taste of the whole dish. I rinse each fish under running water and lay it on paper towels so the excess moisture drains off – this takes about 10–15 minutes.
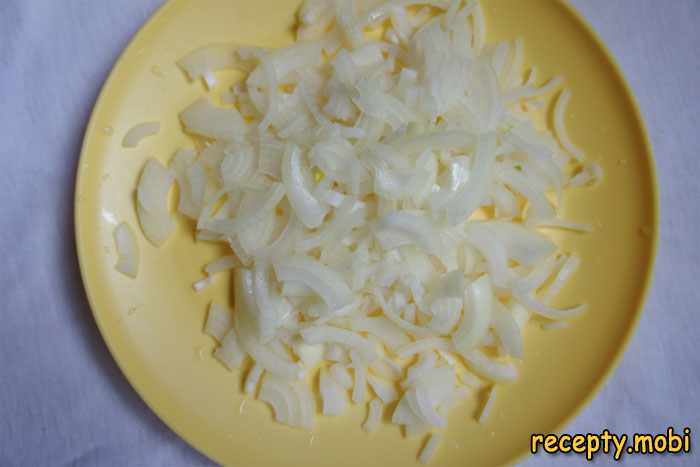
I peel two medium onions (about 150 g in total) and cut them first into quarters, then slice each quarter into thin strips across the grain. Cutting them this way lets the onion soften faster during frying and spread evenly between the layers of fish. I heat a frying pan with 2 tbsp of vegetable oil over medium heat until it just starts to smoke.
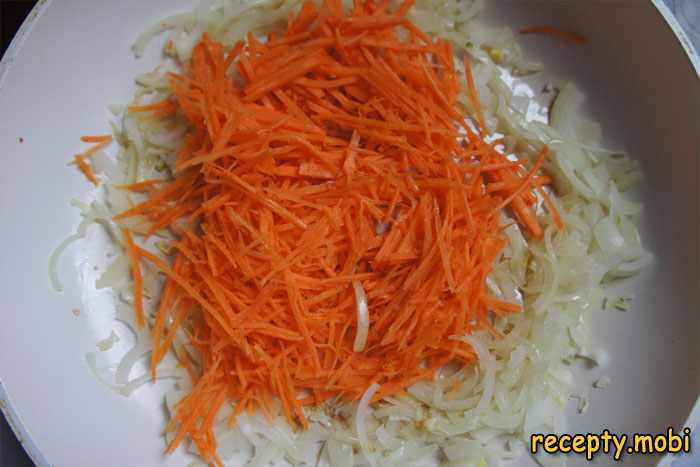
I put the sliced onion into the hot pan and fry it over medium heat for 5–7 minutes, stirring constantly with a wooden spatula. The onion should turn translucent and lightly golden at the edges – a sign of proper caramelisation, which gives the finished food a pleasant sweetness. Do not fry the onion to a dark brown colour, as this will give a bitter aftertaste.
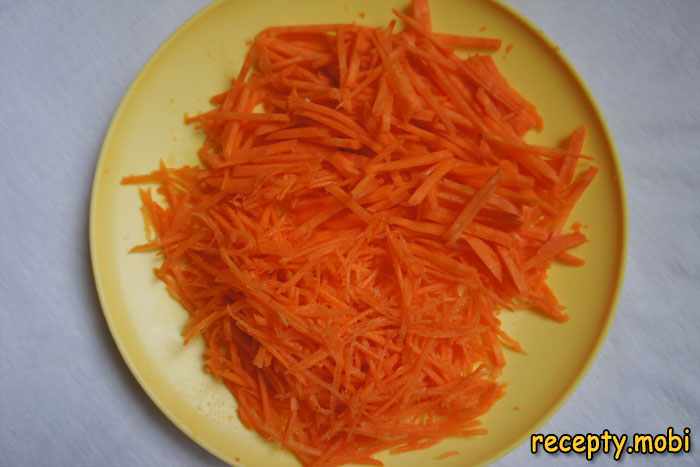
I take a large carrot weighing about 150–180 g – it is the large root vegetable that gives the sauce a lovely orange colour and a natural sweetness which balances the acidity of the tomato. I peel the carrot with a vegetable peeler, rinse it under cold water and cut it into thin strips about 4–5 cm long – you can use a Korean-carrot grater for an even cut.
I add the cut carrot to the fried onion and sauté the vegetables together over medium heat for another 7–10 minutes, stirring now and then. It is important not to over-fry the vegetables – they should become soft and lightly caramelised but not burnt. I take the cooked vegetables off the heat and let them cool a little while I make the tomato sauce.
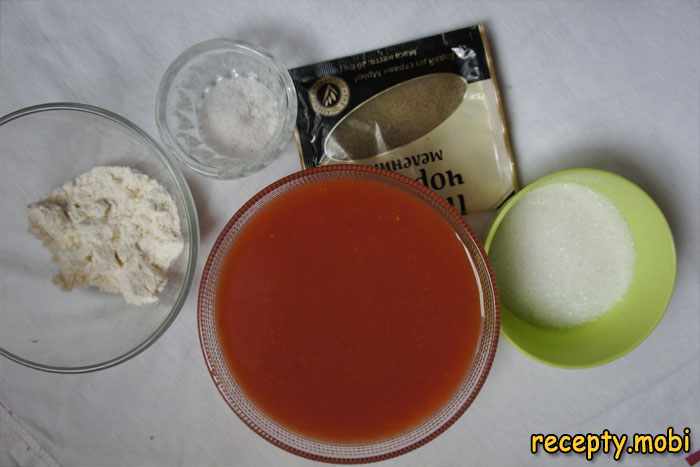
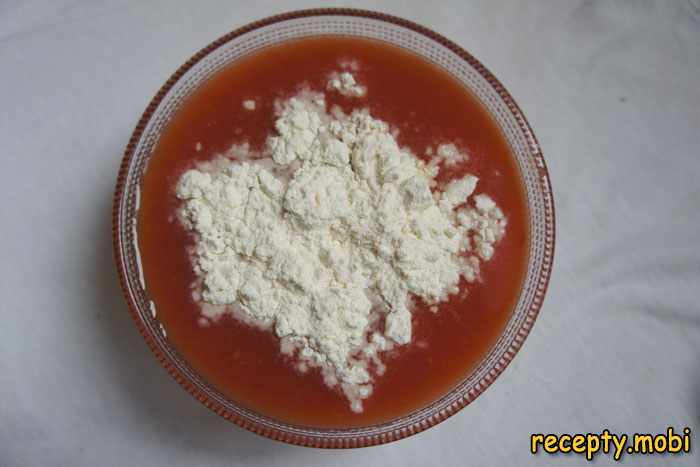
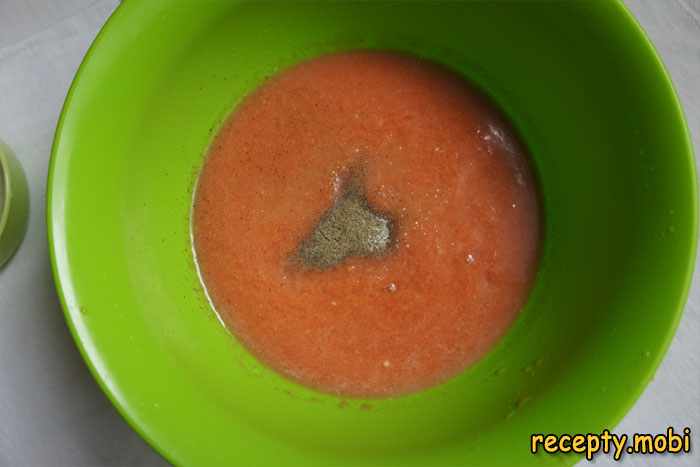
I make the tomato sauce: I pour 400 ml of tomato juice into a deep bowl (homemade is ideal – it is richer and more aromatic). I add 1 tbsp of plain flour – it thickens the sauce and helps it coat the fish better. I also add ½ tsp of ground black pepper for a little heat and aroma.
I thoroughly mix the tomato juice with the flour using a whisk for 1–2 minutes, breaking up all the lumps until completely smooth. The flour must dissolve fully – if any lumps remain, they will be noticeable in the finished sauce and spoil the texture of the dish. I use a whisk with fine wires, as it copes better with this task.
I add ⅓ tbsp of salt and 1 tbsp of sugar to the tomato mixture – the sugar is needed to balance the flavour; it softens the acidity of the tomato and makes the sauce more harmonious. I whisk until the salt and sugar dissolve completely – this takes about 30 seconds of brisk stirring.
I take a thick-walled pot or saucepan of at least 3 litres with a tightly fitting lid – this is critically important for even stewing. On the bottom I lay an even layer of sautéed vegetables about 1 cm thick, then carefully arrange the first layer of prepared smelt in tight rows, bellies down.
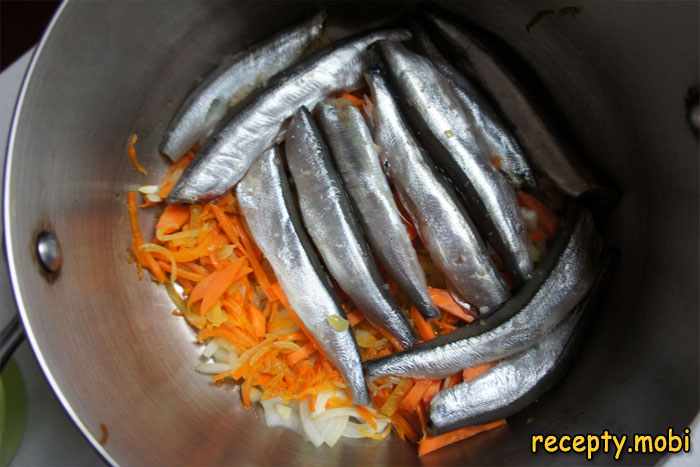
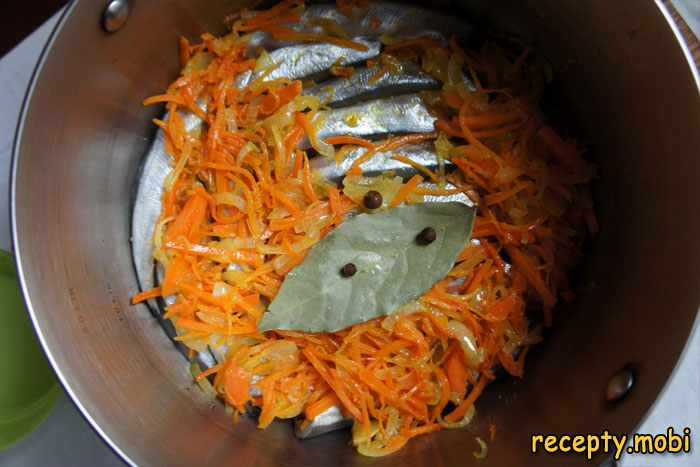
I cover the first layer of smelt with part of the remaining sautéed vegetables, then lay down the next layer of fish. Between the layers of fish I evenly distribute 2 bay leaves and 5 allspice peas – the spices will gradually release their aroma during the long stewing. I keep alternating the layers until the fish and vegetables run out.
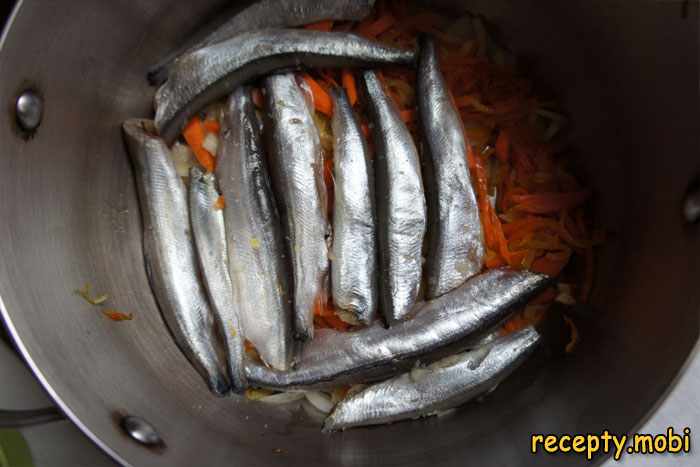
I always make the top layer from vegetables – this protects the fish from drying out and makes for a nice presentation. I spread the remaining onion-and-carrot mixture evenly and press it down lightly with a spoon to compact the contents of the pot. The layers should be tight but not squashed.
I carefully pour the prepared tomato sauce over the arranged layers – it should completely cover the contents of the pot. I put it on medium heat and wait for it to come to the boil (about 7–10 minutes). As soon as the sauce starts to bubble actively, I reduce the heat to the lowest setting and cover tightly with the lid. I stew it for 55–60 minutes without stirring – it is important not to disturb the layers.
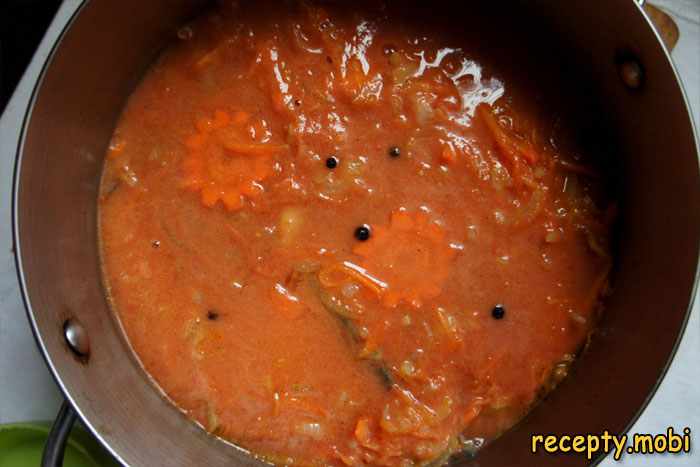
I check for doneness by carefully lifting the lid: the carrot should be completely soft when pierced with a fork, and the smelt bones should crush easily between your fingers. If the bones are still firm, I carry on stewing for another 15–20 minutes. I take it off the heat and let it rest under the lid for 15–20 minutes – during this time the flavours come together and the food becomes even tastier.
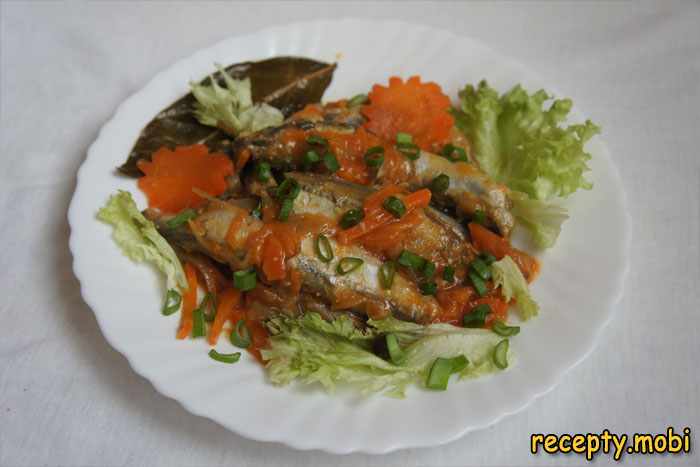
I carefully transfer the finished food onto a serving plate with a wide spatula, trying to keep the fish whole. I spoon over the tomato sauce with vegetables from the pot. The homemade smelt canned food is ready! I serve it as a cold snack on its own or as a hot side dish with mashed potatoes. I keep it in the fridge in a closed container for up to 5–7 days.


Tips
- 1
To soften the bones completely, increase the stewing time to 1.5–2 hours over the very lowest heat. The longer the fish simmers, the more tender the bones become – ideally they should literally melt in the mouth.
- 2
Instead of smelt, sprats, Baltic herring, anchovy or small smelt-cucumber work well too – the cooking time stays the same. Each fish gives its own unique flavour, but the technique is the same.
- 3
Use thick-walled cookware (cast iron, or aluminium with a thick base) with a tightly fitting lid – this ensures even heating and prevents the liquid from boiling away.
- 4
The food becomes much tastier the day after cooking, once it has rested in the fridge – all the flavours have time to come together and develop.
FAQ
What can replace the tomato juice in the recipe? +
Dissolve 2 tbsp of good-quality tomato paste in 400 ml of warm water and mix thoroughly. The flavour will be even richer and more concentrated, but you may need a little more sugar to balance the acidity.
How long does homemade smelt canned food keep? +
In the fridge, in a tightly closed glass or enamel container, the food keeps for up to 5–7 days. For longer storage (up to 6 months) you can seal the hot food in sterilised jars and keep them in a cool, dark place.
Can smelt canned food be made in the oven? +
Yes, this is even more convenient for large batches. Arrange the layers of fish and vegetables in an ovenproof dish with a lid, or cover it tightly with foil, pour over the tomato sauce and stew at 150 °C for 2–2.5 hours until the bones are completely soft.
Why did the canned food turn out bitter? +
Most likely the dark film was not removed from the fish's abdominal cavity, or the vegetables were burnt during frying. Bitterness can also come from old, rancid oil or over-fried onion. Always use fresh ingredients and do not overheat the vegetables.
- Comment
or post as a guest
Be the first to comment.


