
avg —
Kataifi Dough (Kadayıf)
Instructions
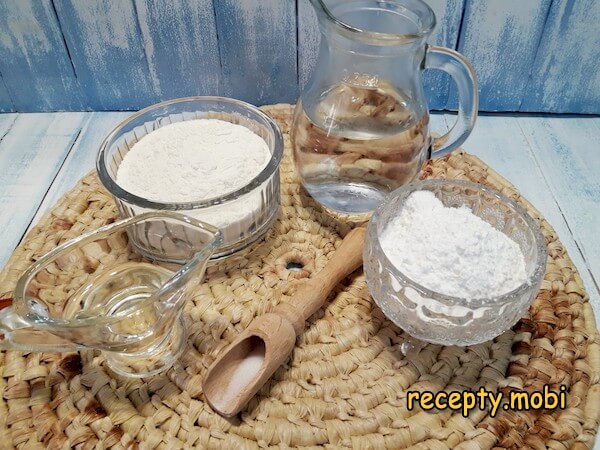
I prepare the ingredients. Cornstarch can be replaced with potato starch, but with cornstarch the dough comes out lighter and airier. The vegetable oil should be refined and odourless — otherwise the smell of the oil would overpower the neutral flavour of the kataifi.
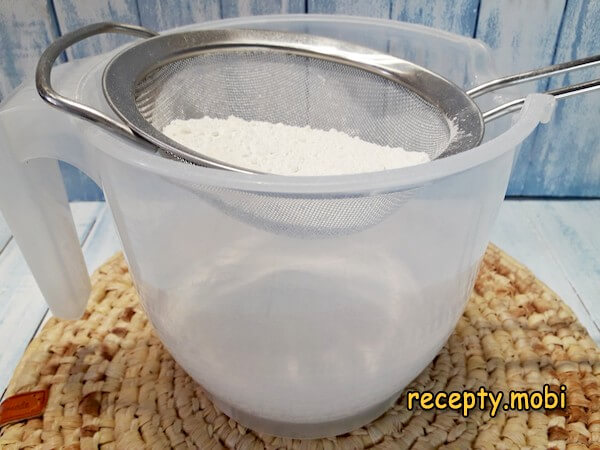
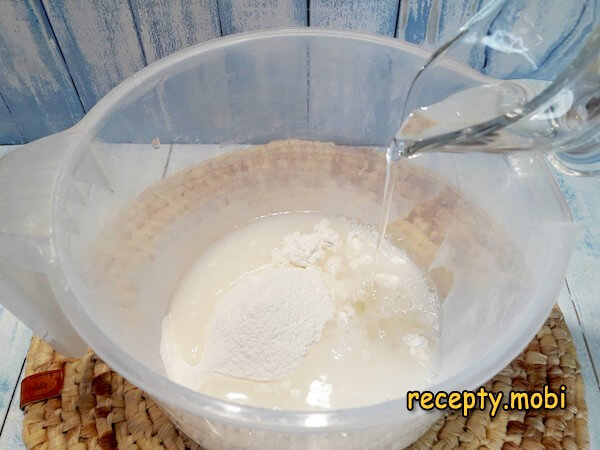
I sift the cornstarch together with the flour into a bowl — sifting twice aerates the dry mixture with oxygen for extra lightness.
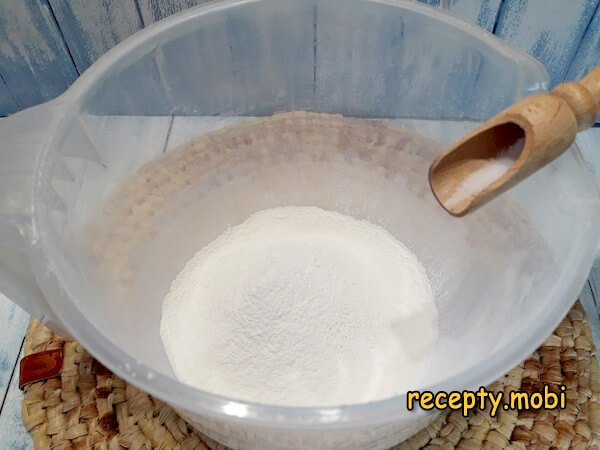
I add salt to the mixture — salt is the "accent" in this neutral dough; without it the kataifi would taste bland.
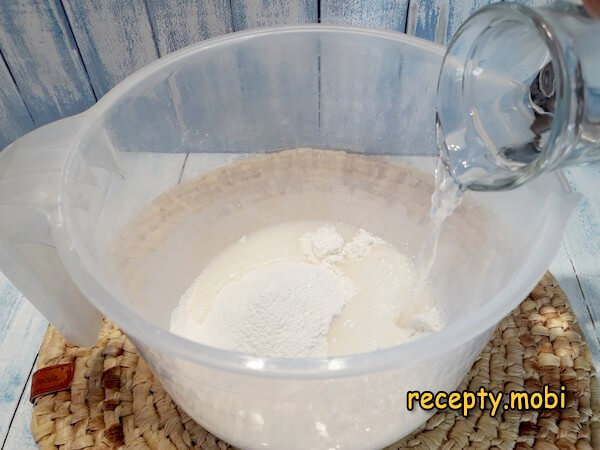
I pour in all of the water at once — warm (38–40 °C) for better combining with the starch.
And I add the vegetable oil — it will make the web elastic rather than brittle.
Now this mixture needs to be blended thoroughly with an immersion blender so that no dry lumps remain. I scrape the mixture down from the walls of the bowl with a silicone spatula and run it back under the blender blades — no unmixed patches are allowed. This is the "secret" to a smooth web.
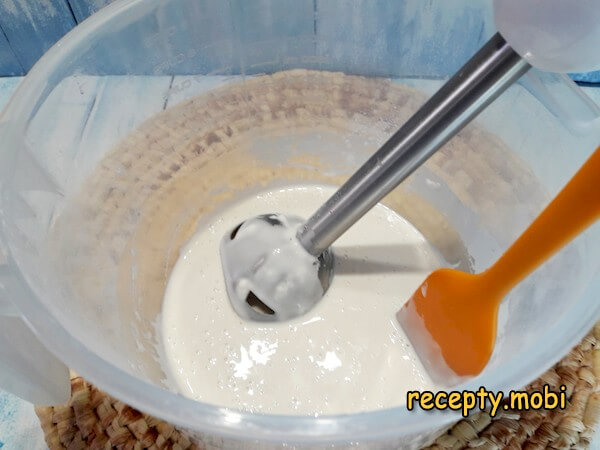
The result should be a smooth, completely uniform mixture with a consistency similar to pancake batter — a "liquid pancake batter" is exactly the right texture.
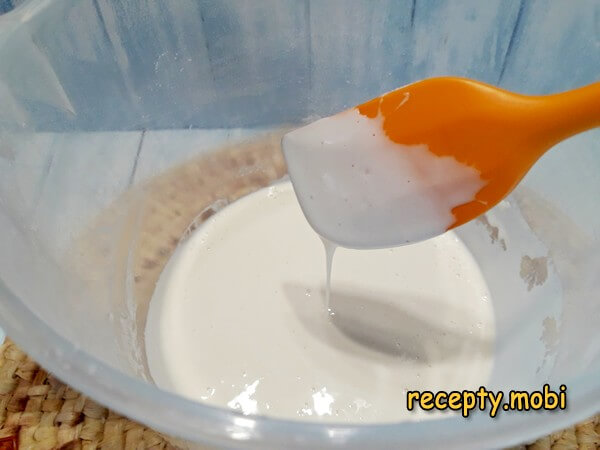
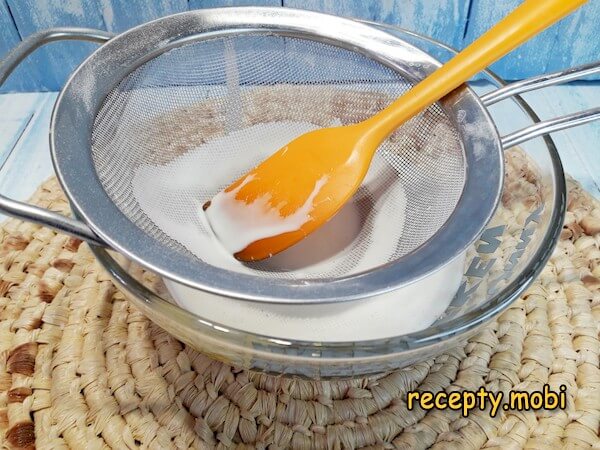
No matter how well the dough is blended, a few individual flour grains may still remain unbroken. To avoid trouble later on, the mixture must be passed through a sieve — then its structure will become truly silky-smooth. This is the "secret" against "bumps" on the web.
Next I pour the mixture into a piping bag, twist the top tightly, and clamp it with a binder clip or an ordinary clothespin. I cover the remaining dough with cling film and leave it, together with the filled piping bag, to rest on the table for about 10 minutes — after which the dough becomes more pliable and develops elasticity.
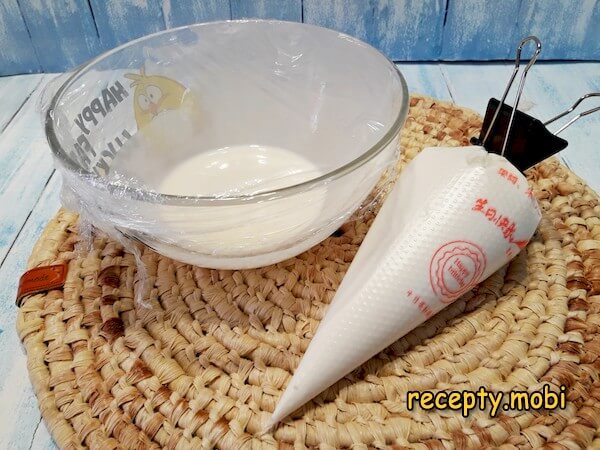
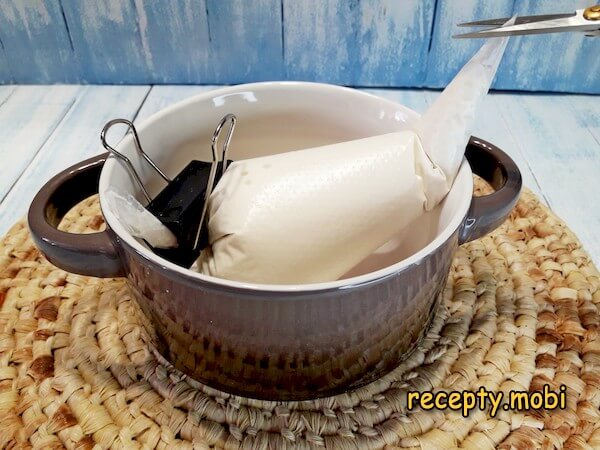
During this time I prepare a deep container in which the piping bag can sit so that the dough doesn't leak out, and I get out a baking sheet or a large tray for storing the finished kataifi. I cut the tip of the piping bag right at the very end (so that the stream flowing out is very thin).
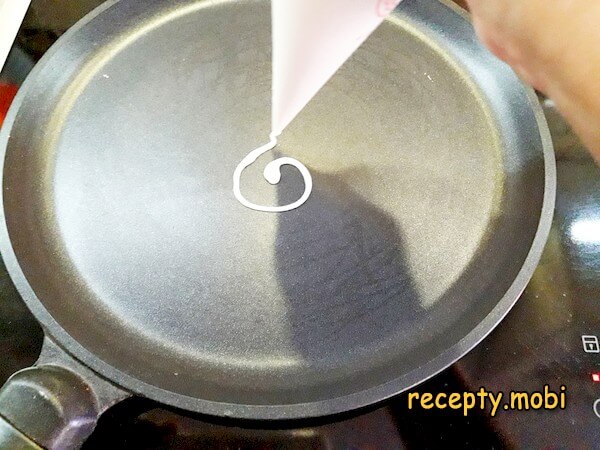
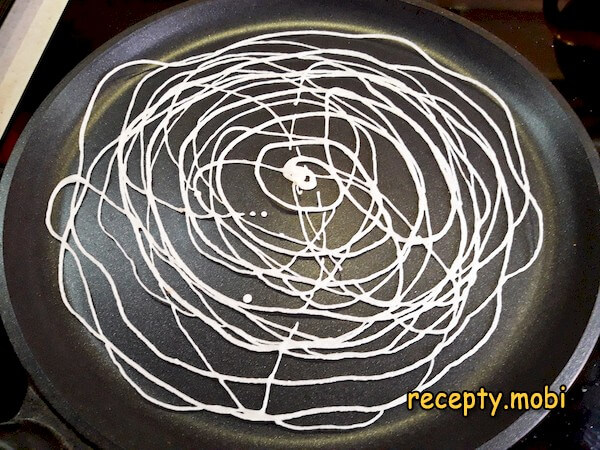
Over medium heat I warm up a frying pan with a good non-stick coating (no greasing needed). I begin piping a spiral pattern from the centre, holding the bag as close to the pan as possible (if the stream pours from a great height, the lines will come out thick). I don't press hard on the bag — the liquid dough practically flows onto the pan by itself.
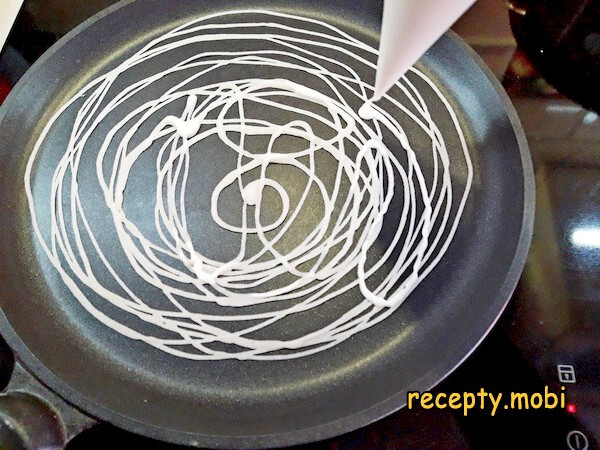
Once the first spiral is drawn, I continue piping the pattern a second time, trying to land in the empty spaces — it is precisely this "multi-layered" spiral that creates the characteristic "web".
After just a few seconds the thin web of dough will start to lift away from the surface of the pan — there is no need to over-dry or brown the dough; it should stay "pale".
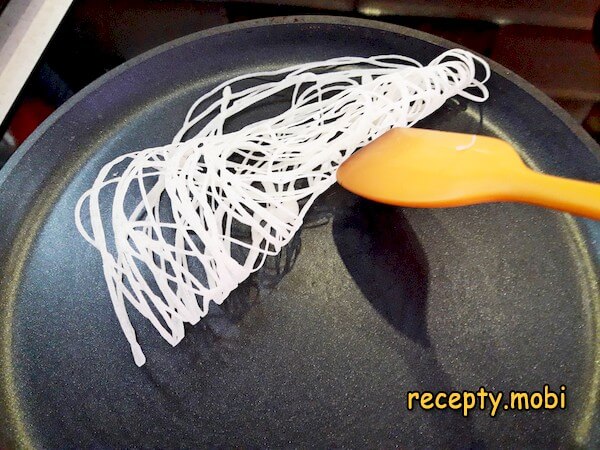
I lift the edges of the web with a silicone spatula — carefully, so as not to damage the thin threads.
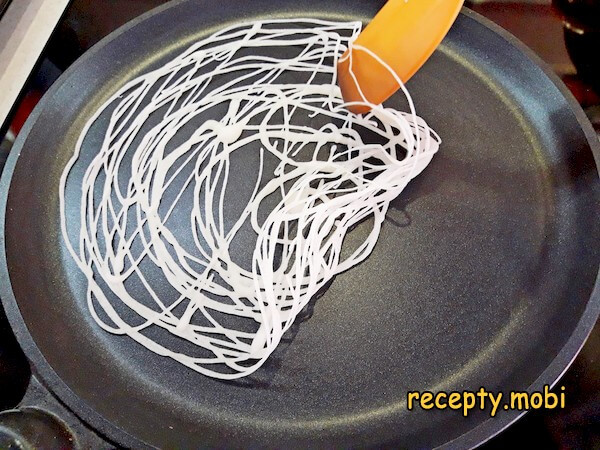
I roll the web up into a little roll and transfer it onto the baking sheet — it is more convenient to store and use as a "roll".
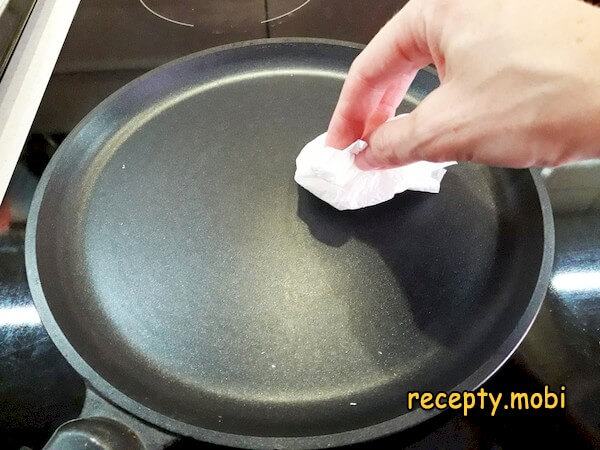
I wipe any leftover crumbs off the pan with a dry napkin — so that the next batch of kataifi doesn't "burn" at the edges.
At first the kataifi dough will be a little dry, but if you cover it with a towel, it will regain its elasticity and softness — this is the "secret" to restoring moisture.

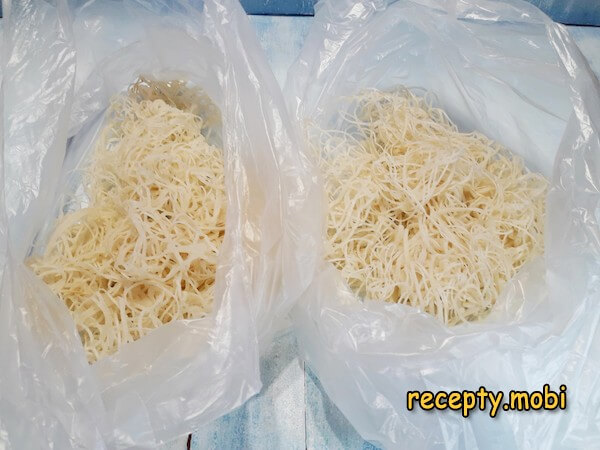
The finished dough can be used right away to make various items, or it can be packed into a bag and stored in the freezer for several months. Before use it will need to be moved to the refrigerator until fully thawed. Very handy to keep "in reserve".Thin, airy, and indispensable in Eastern cooking, kataifi dough (kadayıf) is ready and waiting to be used. It is perfect for Egyptian kunafa, baklava, knafeh, baked seafood, and many other dishes. It is especially popular right now thanks to the trendy "Dubai chocolate" with pistachio paste.


Tips
- 1
WARM WATER AT 38–40 °C is the "secret" to elasticity. Cold water gives a curdling, lumpy mixture; hot water "cooks" the starch, turning the dough into a "jelly". The ideal is warm water (like for a baby), in which the starch disperses evenly and the dough becomes pliable. The check: a drop on the wrist should feel slightly warm, not hot. An alternative is warm milk instead of water (it gives a richer flavour, but a less "neutral" one). For an authentic web, stick strictly to water at exactly 38–40 °C.
- 2
PASSING THROUGH A SIEVE is the "secret" to smoothness. Even after perfect blending, micro-lumps remain that will form "islands" instead of an even web during cooking. Passing the dough through a fine sieve (0.5 mm) is an essential step for "restaurant-quality" kataifi. Without the sieve the dough will be "grainy". Don't skip this step! Five minutes of work saves you from 30 minutes of trying to pull out a decent web. A silicone spatula is the ideal "helper" for pushing the dough through the sieve.
- 3
A THIN BAG TIP is the "secret" to the web. If the tip is too wide, the web will come out "thick as noodles". The ideal is a tip 1–1.5 mm in diameter. Cut it with scissors "straight across", not on the diagonal. An alternative to a piping bag is a plastic bottle with a hole made in the cap (a bit crude, but it works). A professional tool is a "sauce dispenser" with a fine nozzle. In a pinch, a zip-lock bag with a corner cut off will do. The main thing is a thin stream, otherwise the web won't form.
- 4
SPIRAL PIPING is the "secret" to interweaving the threads. Straight lines don't give the characteristic "web" effect. Spirals from the centre to the edges, then reverse spirals into the empty spaces — that is exactly how authentic "kataifi" is formed. The speed of movement should be quick: don't "draw", but "scatter" the stream. The layer should be 1–2 spirals high. Without interwoven threads it is just "noodles", not kataifi. The finished dough is the base for Dubai chocolate with pistachio paste and kataifi — the trending dessert of 2024–2025 — or for classic honey baklava.
FAQ
What can you make from kataifi dough? +
It is a versatile dough for Eastern cooking. Sweet dishes: classic kunafa (with cheese or nuts in syrup), Arabic-style baklava, bird's nests (nests with nuts), and kataifi rolls with pistachios and honey. Modern trends: Dubai chocolate with pistachios (the hit of 2024), kataifi cups for ice cream, and "Telmar" pastries with dates. Savoury uses: baked prawns in kataifi, rolls with feta cheese, and a wrap for chicken curry. Kataifi is also added to desserts as a "crunchy" element for topping or garnish.
What can you use instead of kataifi dough? +
A full replacement is difficult (this is a unique web), but there are close options. Thin filo pastry (Greek, available in shops) gives a similar "layered" effect, but flat. Glass ("funchoza") noodles — dried and broken into short pieces — will approximate the crunchy texture in desserts. Desiccated coconut adds "fibrousness" in Dubai chocolate. Udon noodles work for baking seafood. Shop-bought cornflakes serve for a very "rough" replacement in toppings. The main thing is that you need a "fibrous, crunchy" texture, and the choice depends on the dish.
How long does finished kataifi dough keep? +
In an airtight bag at room temperature — up to 3 days (under a towel to keep it soft). In the refrigerator in an airtight container — up to 1 week. In the freezer — up to 6 months, divided into portioned "rolls" of 100 g each. Defrost in the refrigerator for 4–6 hours or at room temperature for 1 hour. After thawing, be sure to cover it with a towel for 30 minutes to restore its elasticity. Don't over-bake — the dough should stay "pale", not golden.
Can you bake kataifi in the oven instead of on a pan? +
Technically yes, but it is less convenient. The method: parchment on a baking sheet, pipe the spiral from the bag just as you would onto a pan, then put it in the oven at 220 °C for 1–2 minutes. The downside is that the baking sheet heats up more slowly and unevenly, so the web may "run". A pan is more convenient: instant heat, easy removal. Alternatives: a crêpe pan (ideal, if you have one), a smooth-plate waffle iron (with a thin layer), or a vegetable dehydrator at 70 °C for 1 hour (for dry, crunchy threads, but without elasticity). The classic, though, is still a non-stick frying pan.
- Comment
or post as a guest
Be the first to comment.


