Baking: Principles, Rules, and Techniques
Oven roasting and baking is one of the most wholesome, convenient and versatile cooking methods, letting you cook practically any food — meat, fish, vegetables, baked goods and even desserts — with minimum oil, maximum nutrient retention and without the cook needing to hover constantly. However, for oven cooking to give consistently great results you need to know the main principles: the right temperature for each type of food, the difference between convection and top/bottom heat, which cookware to choose (foil, oven bag, ceramic, cast iron or an open sheet pan) and which common mistakes lead to drying out or burning. This guide gathers all the basic rules of oven cooking, recommended temperatures and times for the main foods, and the professional chef secrets that ensure any dish in the oven comes out right the first time.
I consider baking one of the most useful and versatile ways of cooking food – it suits almost any product, from meat and fish to vegetables, fruit, and pastries. From my experience, the main "secret" of successful baking is choosing the right type (grilling, closed baking, gratinating), the right dish (metal, glass, ceramic, silicone), and the right temperature for the specific product. A chicken breast at 220°C under foil and one baked open at 160°C are two completely different dishes. Knowing the basic principles lets you get the most out of your oven.
In this guide you will find my complete approach to baking: the 3 main types, the 4 key rules, the choice of bakeware and wrapping materials (foil, parchment, sleeve), and the particulars of working with meat, fish, vegetables, and fruit. It suits any gas or electric oven. After reading it, you will be able to cook meat with a crisp crust, juicy whole fish, golden vegetables, and dessert fruit without stress. Save it to your bookmarks – it will be a real helper for every new recipe.
Three Types of Baking
1. Grilling (open baking) – the product sits at a distance from the heat source (top heat or the grill setting). The temperature is high, 300–350°C, and the cooking time is short, 10–30 minutes. A characteristic golden crust forms with browned, scorched marks. According to research, this crust is less carcinogenic than a crust formed by frying in oil, because there is no reaction with scorching-hot fat. It suits steaks, oven kebabs, grilled vegetables, and cheese toasts.
2. Closed baking – using food foil, parchment, a sleeve, or cookware with a lid. The temperature is moderate, 160–200°C, and the time is longer, 40–90 minutes. The product cooks in its own juices and steam, so it stays as juicy as possible. The crust is weaker than with grilling – if you want it crisp, remove the lid or foil 10–15 minutes before the end. It suits whole pieces of meat, fish, and braised vegetables.
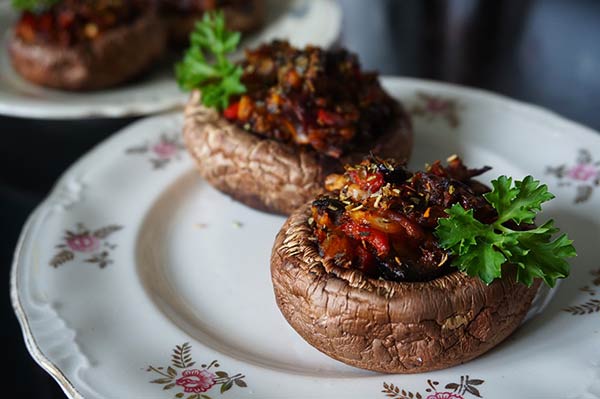
3. Gratinating – brief baking of an almost-finished dish to form a crust on top. The temperature is high, 220–250°C, and the time is 5–15 minutes. Most often the dish is sprinkled with grated cheese or breadcrumbs to form an attractive crust. It suits julienne bakes, lasagne, potato casserole, and vegetable gratins.
The Four Main Rules of Baking
- A preheated oven – products go into an oven that is ALREADY heated to the required temperature. This seals the juices inside, so the dish does not turn out dry. The exception is ceramic pots, which are heated gradually from a cold oven (a sharp temperature change would crack the walls).
- Minimal opening – during cooking, do not open the oven more than 1–2 times. Each opening means a drop in temperature of 20–30°C and an extra 5–10 minutes of cooking time. This is especially critical for baked goods (sponge cakes will sink).
- A container of water against scorching – place a tray with 1–2 cm of water on the bottom shelf. The steam humidifies the oven so the products do not dry out. This is not suitable for drying or curing, or for baking juicy vegetables and fruit.
- Full thawing before baking – frozen products release a lot of water as they thaw, so the dish turns out "boiled" instead of baked. Thaw in the refrigerator for 8–12 hours until fully defrosted.

Choosing Bakeware
Metal cookware (stainless steel, dark non-stick alloy) – high thermal conductivity, ideal for pizza, French fries, cheese bakes, and pastries with a crisp crust. Cast-iron trays are an "eternal" classic; over time they become "seasoned" with oil and improve their non-stick properties. The downsides: they cool quickly (poor for keeping a dish hot without heating) and cannot be used for acidic dishes (they react with them).
Aluminium forms (disposable) – they conduct heat well and are convenient for a picnic or for transporting a finished dish. The downsides: they are disposable (which hits the budget), they have no handles (making them hard to take out of the oven), and the shiny surface gives an uneven crust. They are not suitable for long-term storage of cooked food.
Glass cookware – a versatile choice, with excellent baking and transparent walls that let you monitor the process. It holds heat for a long time after the oven, so the dish is served hot without reheating. The downside: it is afraid of sharp temperature changes (it can crack), so be careful when moving it from the oven onto a cold surface.
Ceramic forms – similar in properties to glass, but with an attractive design. Ideal for festive dishes served straight from the form. Suitable for julienne bakes, gratins, and casseroles. It is also afraid of temperature changes (heat it gradually together with the oven).
Silicone forms – baked goods do not stick and finished items are easy to remove. They are resistant to acidic and alkaline ingredients. The downsides: a maximum of 250°C, and there is a lot of low-quality "Chinese" silicone on the market with toxic additives. Buy only from trusted manufacturers.
Foil, Parchment, Sleeve – What to Use and When
Baking sleeve – heat-resistant polyethylene (it withstands 220–230°C), 30 cm wide and any length. It is sealed with clips on both sides. Always make 2–3 holes on top for steam to escape (otherwise it will inflate like a balloon). 10–15 minutes before the end, cut it open on top for a golden crust. It is ideal for a whole chicken, duck, a large piece of meat, and vegetable stew.
Parchment paper – breathable, but does not let liquid and fats through. Siliconised, treated parchment is the most convenient (products do not stick to it). The maximum temperature is 200°C. It is ideal for baked goods (biscuits, sponge cakes), fish and vegetables in "parcels", and as a liner on baking trays.
Food foil – a thin sheet of aluminium that withstands up to 600°C. It is two-sided: the shiny side reflects heat better (place the product on it), the matte side lets heat through (it faces outward). Do not use it with vinegar and citric acid – they destroy the protective film and release harmful aluminium salts. For an airtight seal, wrap tightly with double folds along the edges. It is ideal for meat in its own juices, whole fish, and baked potatoes.

Baking Meat
Baked meat is a versatile dish for both a celebration and an everyday dinner. Choosing the piece: large, soft pieces with a little fat inside (marbling). Ideal choices are the edge of the loin muscle of a young bull, pork ham, and lamb leg. The pieces should be WITHOUT membranes, sinews, or an abundance of fat. A whole piece of meat is juicier than sliced meat.
Cookware: a cast-iron tray with high sides of 3–5 cm. Match the tray to the size of the piece – a large piece on a small tray will let the juice spill over the edges, while a small one on a large tray will "lose" its juice across the surface.
Preparation: wash the meat, pat it dry with a towel, and rub salt and spices into the fibres. For a lean piece, cover it with thin strips of lard or bacon for juiciness, or bake it in foil, a sleeve, or grape leaves (sealed, in its own juices).
Marinating – optional, for aroma. Soak the meat in the marinade for 8–24 hours in the refrigerator under a weight for better penetration.
Temperature: a high 220°C gives a crisp crust, a low 160°C gives the juiciest meat. The lower the temperature, the longer the cooking. Check doneness with a culinary needle or thermometer: clear juice = ready, cloudy pinkish juice = not yet ready. Internal temperature: beef rare 50°C, medium 60°C, well done 70°C; pork and chicken 75°C; lamb 60–65°C.

Baking Fish
Professionals recommend baking fish WHOLE – do not scale or gut it, for maximum juiciness. All the juices are guaranteed to stay inside, and the scales protect the flesh from drying out. The fish should be WITHOUT punctures or holes through which the juice could escape. Before cooking, wash it thoroughly, salt it (salt penetrates poorly through the scales, so it will not over-salt), and, if you like, sprinkle it with lemon juice and olive oil.
The baking time depends on the size: small fish (250–400 g) – 10–15 minutes at 200°C, medium (500–1000 g) – 20–30 minutes, large (1.5–2 kg) – 40–50 minutes. Turn a thick carcass once halfway through baking for even cooking. Judge readiness by the yellowed salt on the skin and the hardened crust. After the oven, let the fish "rest" for 5 minutes – the juices will redistribute and the flesh will become juicier. Then remove the skin and take out the insides.
Baking Vegetables and Fruit
Vegetables are baked in their skins after being washed and dried. Lay them out on a tray or rack at a distance from one another – they will not stick together and will brown evenly. Salt them 2 minutes before turning off the oven – early salting draws out the juice and the vegetables turn out "boiled". The optimal temperature is 200°C. Below 180°C they take longer and taste worse; above 220°C they will burn. Turn them 1–2 times for an even crust. Do not pour the released juice over them – they will go soft inside. Each vegetable has its own time: potatoes 40–50 min, carrots 30–40 min, courgettes 25–30 min, aubergines 30–35 min, pumpkin 30–40 min, beetroot 60–90 min (whole), cauliflower 25–30 min.
Fruit – a bright dessert in 10–15 minutes. Take pears, apples, quinces, apricots, or peaches – wash them, remove the core, and fill the cavity with jam, honey, nuts, cinnamon, or sugar. Bake on the top shelf at 180°C for 10–15 minutes until soft and a caramel crust forms. Serve with a scoop of vanilla ice cream or 33% cream for an impressive presentation.
❓ Frequently asked questions
Why does baked meat turn out dry?
The main reasons: 1) a cold oven at the start (the juices leak out instead of being sealed in), 2) too high a temperature (above 220°C for tender meat), 3) frequent opening of the door (the temperature drops and the time lengthens), 4) thin pieces of meat without fat (nothing to "hold" the moisture), 5) insufficient baking in its own juices (no foil or sleeve for lean meat), 6) over-drying while waiting (meat "rests" for 10 minutes after the oven – no longer). Use a culinary thermometer – do not go beyond the required internal temperature.
What is the difference between convection and the ordinary top-bottom mode?
The ordinary "top-bottom" mode has heating elements at the top and bottom of the oven, and the heat rises naturally. The cooking time is standard, as in the recipe. Convection (a fan) has an extra fan that drives the hot air throughout the whole space. Advantages: 20–30% faster, even baking on several levels at once, ideal for several trays of biscuits. Downsides: it dries out baked goods (sponge cakes, meringues, and éclairs are better without the fan). For convection, reduce the temperature by 20°C from the recipe or cut the time by 15–20%.
How do you get a crisp crust on chicken?
Several proven techniques: 1) pat the chicken dry with a paper towel before rubbing in spices (dry skin browns better), 2) rub the skin with salt and dry it in the refrigerator for 8–12 hours, uncovered (for deep dryness), 3) bake at 220°C for the first 15 minutes to "seal in" the juice, then lower to 180°C for the main time, 4) brush the skin with melted butter or mayonnaise before baking, 5) for the last 10–15 minutes, raise the temperature to 220°C. The final technique is a "blast" of hot air from convection or the grill for 5 minutes.
Can you bake in ceramic pots on the top shelf?
It is not recommended – ceramic is afraid of direct exposure to the top heating element (a sharp temperature change can crack the walls). The ideal place for pots is the middle or bottom shelf with even surrounding heat. The main rule for ceramic: place it in a COLD oven and heat it gradually together with the oven up to 180°C. Never take a hot pot out onto a cold surface – use a wooden or fabric stand. When the rules are followed, ceramic pots last for decades.


