
avg —
Paris-Brest Pastry
Instructions
I get the ingredients for the choux pastry ready on the work surface. The margarine or butter (100 g) should be cold – I cut it into 1 cm cubes so it dissolves quickly in the water. I always sift the flour (150 g) through a sieve – this enriches it with air for airy finished rings.
Into a thick-bottomed saucepan (1.5 l) I pour the water (250 ml), add the cubed margarine (100 g) and the salt (⅓ tsp). I set it over medium heat and bring to the boil, stirring now and then until the margarine has fully dissolved. The liquid should come to a vigorous boil – this is crucial for properly "cooking" the flour.
I take the saucepan off the heat and immediately pour in all the sifted flour (150 g). I stir vigorously with a wooden spatula or silicone spatula until completely smooth – the flour should be fully "cooked" into the hot liquid with no dry lumps. This is the key moment – quick, thorough mixing.
I return the saucepan to medium heat and cook the dough for 2–3 minutes, stirring constantly and vigorously. The ready choux pastry gathers into a dense, elastic ball, pulls away from the sides and bottom of the pan, and leaves a thin film on the bottom. This is the "secret" to the correct choux pastry texture.
I transfer the hot dough to a large bowl and let it cool to a warm 60–65°C – this is crucial before adding the eggs! If you add eggs to dough that is too hot (above 70°C), they will "cook" and the dough will curdle into lumps. Warm dough (you can test it with a finger – it shouldn't burn) is ideal for adding the eggs.
I beat in the eggs (5 pcs) one at a time, mixing thoroughly after each with a mixer on low speed or a wooden spatula for 1–2 minutes until fully absorbed. After each egg the dough first "separates", then becomes smooth again. The finished dough is smooth, glossy and semi-thick – it falls off the spatula in a "ribbon" after 2–3 seconds rather than pouring in a stream.
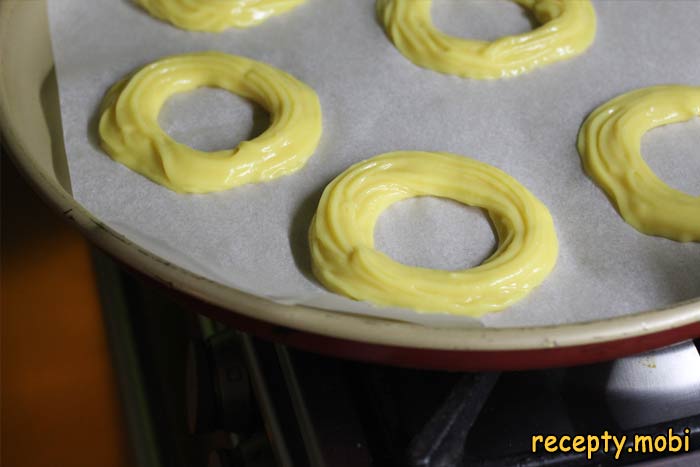
I transfer the dough to a piping bag fitted with a round star nozzle of 12–15 mm – the star nozzle gives the surface of the ring a pretty "ridged" pattern. If you don't have a piping bag, use a sturdy plastic bag with a corner cut off.
Onto a baking tray lined with baking paper I pipe rings 8–10 cm in diameter, spaced 4–5 cm apart – they will double in size during baking. To make the rings even, draw circles on the parchment in pencil beforehand and pipe along the outline. You can adjust the size (mini rings of 5 cm for canapés, large 12 cm ones for a festive table).
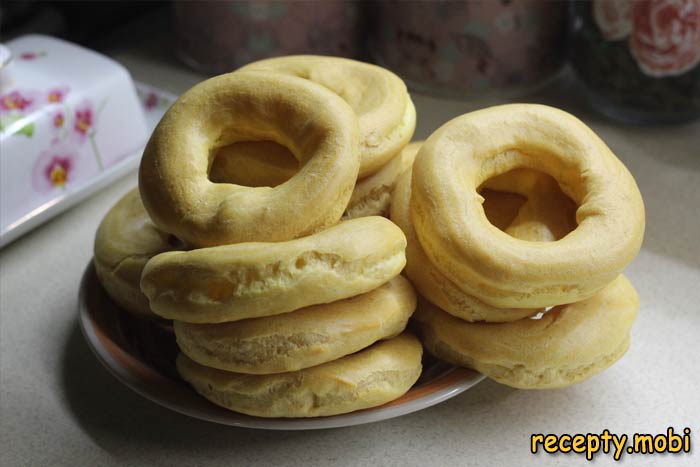
I preheat the oven to 200°C, top-and-bottom heat. I place the tray of rings in the centre of the oven and bake for 30 minutes WITHOUT OPENING the door! This is the "golden rule" of choux pastry. Open it earlier and the temperature will drop, and the rings will sink into flat cakes with no cavity inside. After 30 minutes I open the door slightly "to a pencil's width" (1–2 cm) for another 5 minutes to dry out the crust – this way the rings won't "deflate" as they cool.
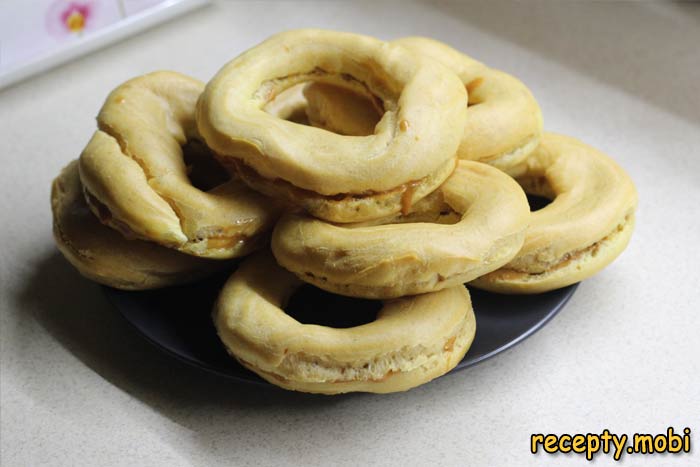
I turn off the oven and leave the rings inside with the door ajar for another 5 minutes – extra drying. I take the finished rings out onto a wire rack and cool them completely to room temperature (about 30 minutes). A ready ring is dry on the outside, with a golden crust, light to the touch, and with an empty cavity inside – ideal for filling with cream.
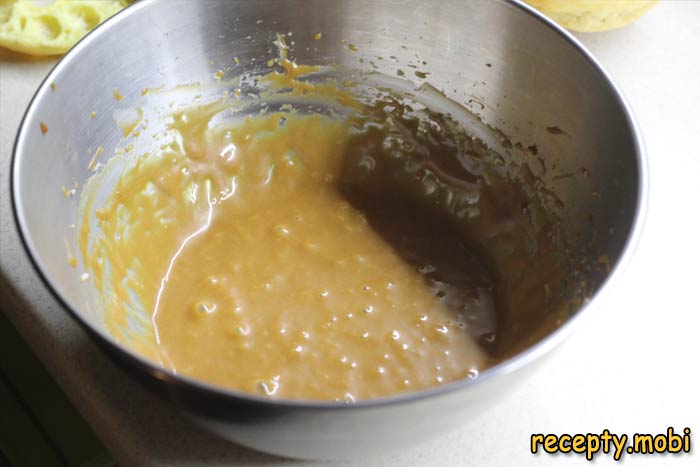
In parallel I make the caramel cream. I take the butter (150 g) out of the fridge 30 minutes ahead – it should be soft but not melted. In a deep bowl I beat the soft butter with a mixer for 3–5 minutes until fluffy and pale. Gradually (1–2 tbsp at a time) I add the boiled condensed milk (200 g) without stopping the beating – this keeps the cream smooth.
I add a drop of vanilla extract and 1 tbsp of cognac or rum (optional, for a "grown-up" dessert or to enhance the caramel aroma). For a children's dessert, skip the alcohol. I beat the cream for another 1–2 minutes until fully fluffy and smooth. I put it in the fridge for 15 minutes to stabilise – the cream becomes firmer and easier to pipe.
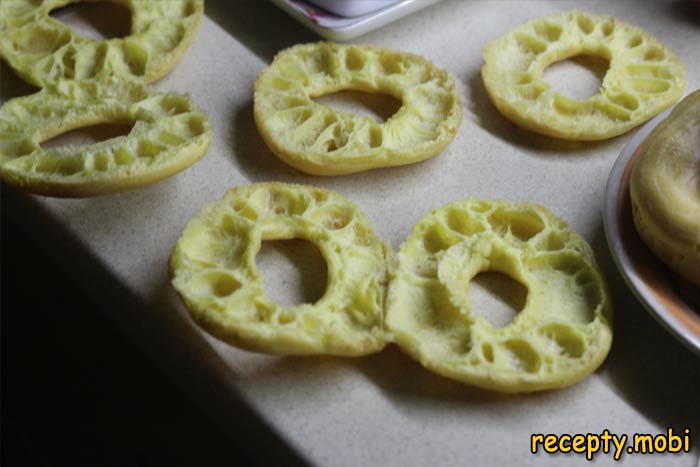
With a sharp serrated knife I cut each fully cooled ring horizontally in half – a bottom and a top half with the cavity inside. Inside, the choux rings have pretty "porous" cavities with large hollows for the cream – the result of correct baking.
I transfer the cream to a piping bag fitted with a round or star nozzle of 8–10 mm. Onto the bottom half of each ring I pipe cream around the outline and into the centre – 2–3 tbsp per pastry. I cover with the top half of the ring, pressing down gently. This way I fill all 20 pastries.
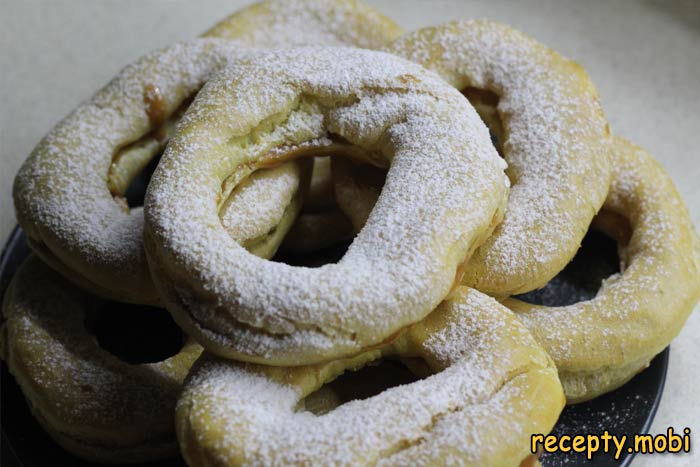
I dust the finished pastries with powdered sugar (30 g) through a sieve for an impressive presentation. I put them in the fridge for 30 minutes so the cream soaks into the dough – the pastries become more tender. The Paris-Brest pastry with caramel cream is ready! I serve them chilled with tea or coffee.Bon appétit!


Tips
- 1
Do NOT open the oven door for the first 30 minutes – the "golden rule" of choux pastry. Otherwise the rings will sink flat with no cavity.
- 2
Be sure to cool the dough to 60–65°C before adding the eggs – dough that is too hot will "cook" the egg white and curdle it into lumps.
- 3
A star nozzle on the piping bag gives a pretty "ridged" pattern on the surface. I bake choux éclairs on the same principle.
- 4
Mark out circles in pencil on the parchment before piping – the rings will come out the same size for a neat presentation.
FAQ
What can replace boiled condensed milk in the caramel cream? +
A few options work: home-made boiled condensed milk (a tin of ordinary condensed milk + 2–3 hours of boiling in water), caramel sauce (200 g, home-made or shop-bought), Nutella (200 g, a chocolate-hazelnut version), a soft chocolate cream (200 ml of 33% cream + 100 g of chocolate), reduced maple syrup (for a "Canadian" version), a meringue-based custard with caramel syrup, or a sour-cream filling (instead of caramel – a "Russian" interpretation). Each substitute gives its own character. Boiled condensed milk is the "classic" of Soviet pastries, giving that characteristic "grandmother's" taste.
Can I make mini versions for canapés? +
Yes, mini Paris-Brest rings of 4–5 cm in diameter make an ideal dessert canapé for a buffet or cocktail party. Reduce the baking time to 20–25 minutes (less dough cooks faster). Use a thin nozzle for piping the cream (5–6 mm) and fill them more delicately. You will get 35–40 mini pastries from one portion of dough. Serve them on a special porcelain canapé stand or on a wide platter. Ideal for a wedding, a birthday or a corporate banquet.
How long do the finished pastries keep? +
Pastries with cream keep in the fridge for up to 24 hours in an airtight container – any longer and they lose their crisp crust and go "soggy" from the cream. Without cream (empty rings) they keep at room temperature for up to 2 days in airtight packaging, or freeze for 1 month in a bag. Do not freeze them once filled with cream – the cream will "separate" on thawing. It is ideal to serve them 1–2 hours after filling with cream – the dough will soak a little but keep its crisp crust. Make them by the portion for a meal or an event.
What to serve the pastries with? +
They are ideal with French coffee (espresso, cappuccino, latte) – the "Parisian" classic way to serve them. With tea – black with bergamot (Earl Grey), green with jasmine, white tea with rose petals. With hot chocolate – a "winter" option for cold evenings. For a children's party – with cocoa and marshmallows and a milkshake. For a dessert table – with brut champagne, prosecco or Moscato. For a French breakfast – with croissants and hot chocolate. At a cocktail party – in canapé format with dessert wines and liqueurs such as Baileys or Amaretto.
- Comment
or post as a guest
Be the first to comment.
")


