
avg —
Classic New York Cheesecake
Instructions
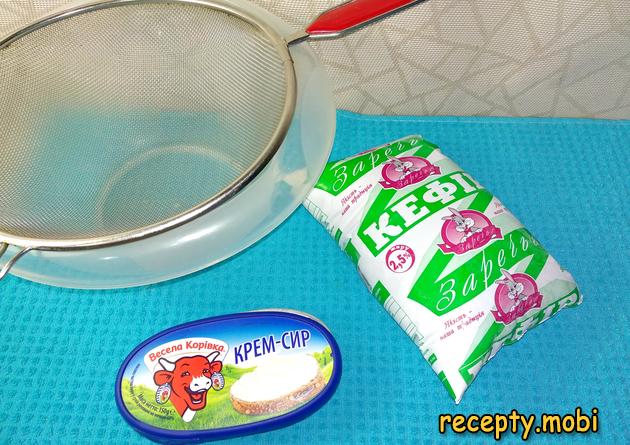
I prepare the cream cheese for the cheesecake. You can buy ready-made Philadelphia cream cheese in the shop (400 g) – the classic option. Or you can make your own at home from ordinary kefir – a budget-friendly alternative.
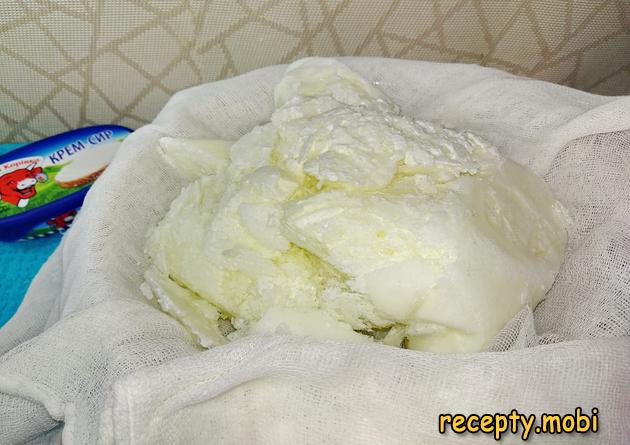
For homemade cream cheese: put 2 packs of kefir 2.5–3.2% (1 l each) in the freezer overnight. In the morning, tip the frozen kefir onto a sieve lined with 4 layers of cheesecloth. Leave it for 6–8 hours at room temperature until fully thawed. The whey drains off and a smooth cream cheese stays behind in the cloth.
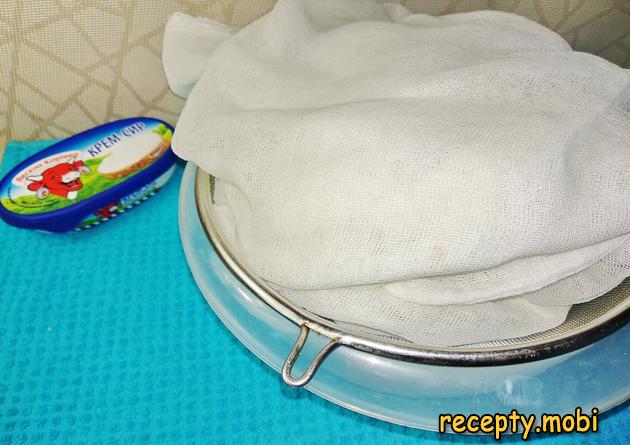
On top of the cooled cheese in the cloth I place a weight (a jar with 200 ml of water) to firm up the structure. After 2–3 hours the homemade cream cheese is ready – about 400–500 g from 2 l of kefir.
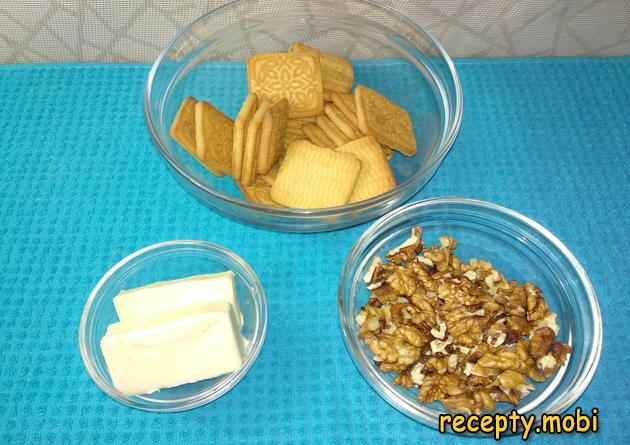
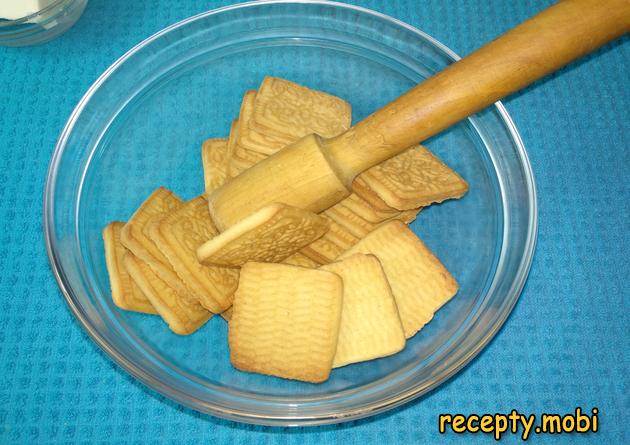
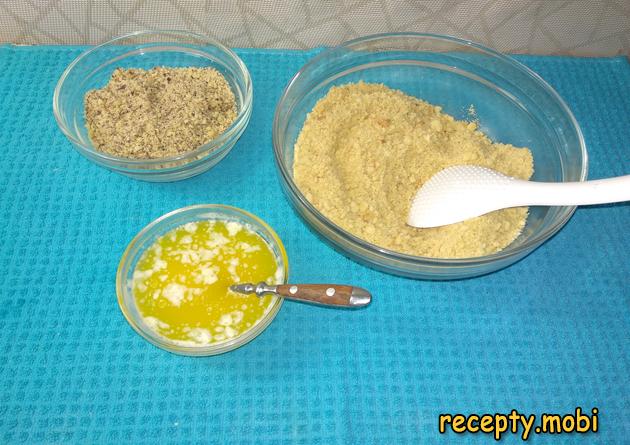
I prepare the ingredients for the base according to the list. Shortbread cookies (280 g) – plain tea biscuits or biscuits made specially for cheesecakes. Walnuts (100 g) – fresh and shelled. Butter (120 g).
I crush the cookies into crumbs – in any way that suits you: with a rolling pin in a sturdy bag (the classic method), in a food processor (fast) or with a potato masher (laborious). The ideal crumb is fine, like sand, with no large pieces.
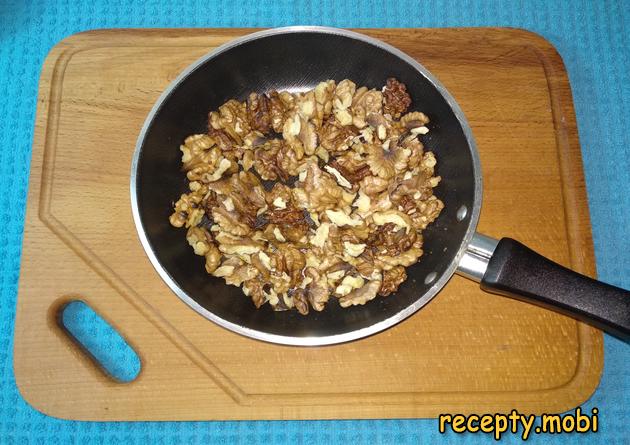
I toast the walnuts (100 g) in a dry skillet over medium heat for 3–5 minutes until they smell pleasantly nutty – the nuts should turn crisp and intensely fragrant. Do not toast them until brown. I let them cool slightly and chop them finely with a sharp knife into pieces of 3–5 mm.
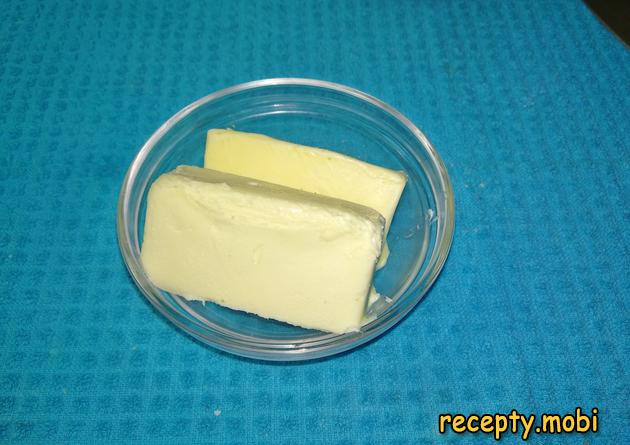
I melt the butter (120 g) in the microwave (1 minute at 600 W) or on the stove over low heat. The butter should be completely melted and liquid.
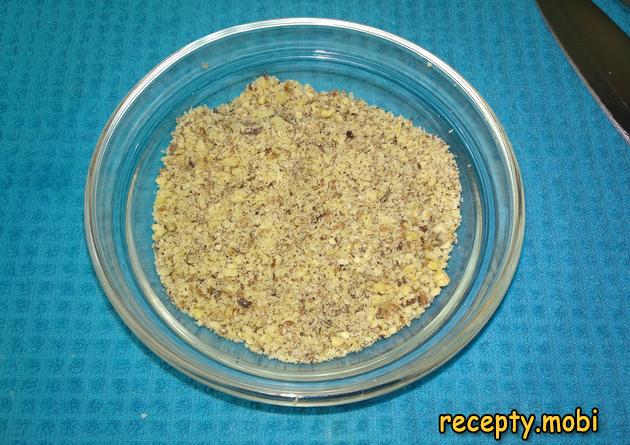
In a large mixing bowl I combine the cookie crumbs and the chopped nuts. I mix them thoroughly with a silicone spatula. To the dry ingredients I add the melted butter – it binds the mass together. I mix thoroughly until uniform – every crumb should be damp with butter.
I prepare a SPRINGFORM pan 22–24 cm in diameter – it is crucial that the side opens. In a solid pan the cheesecake is hard to remove without damage. I line the bottom of the pan with baking paper to stop it sticking.
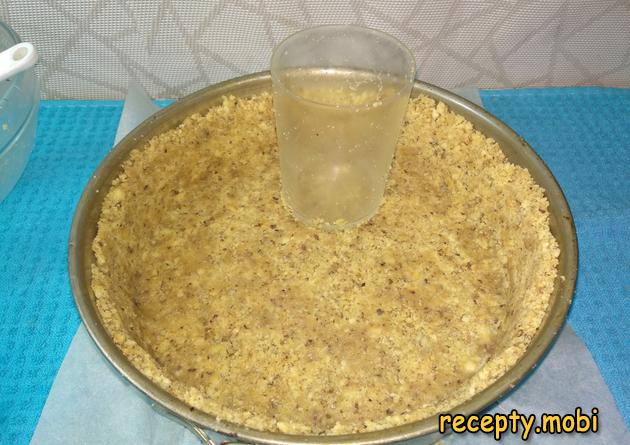
I pour ⅔ of the cookie, nut and butter crumb into the pan. I spread it evenly across the bottom with my hands and compact it with the flat base of a STRAIGHT GLASS – this gives a dense base like in restaurants. The base should be 1–1.5 cm thick.
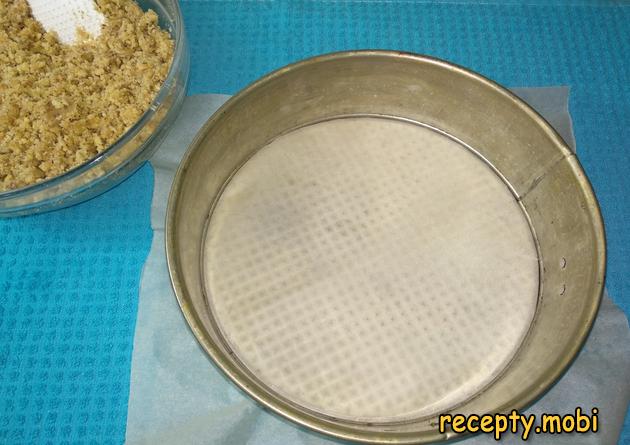
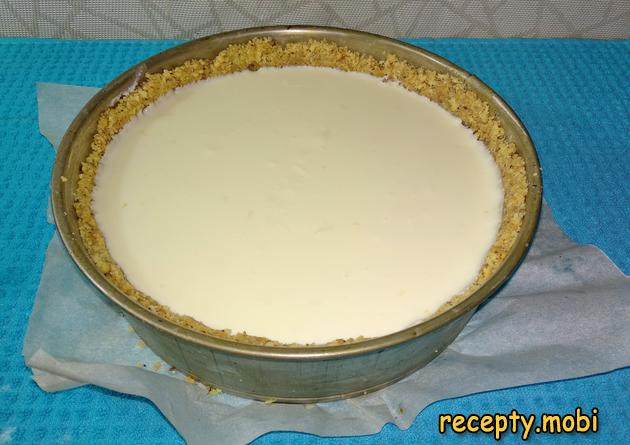
From the remaining ⅓ of the crumb I build up the sides of the pan – 4–5 cm high. I compact them with the glass or my fingers for an even finish. The ready base is a little trough of crumb. I put the pan with the base into the FREEZER for 30 minutes – the butter sets, the base becomes firm and will not crumble when the filling is poured in.
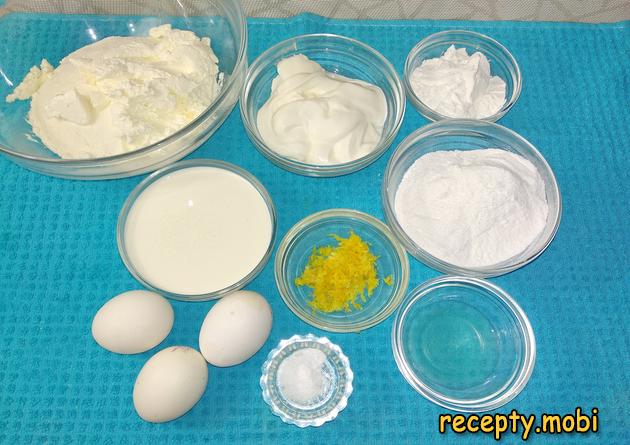
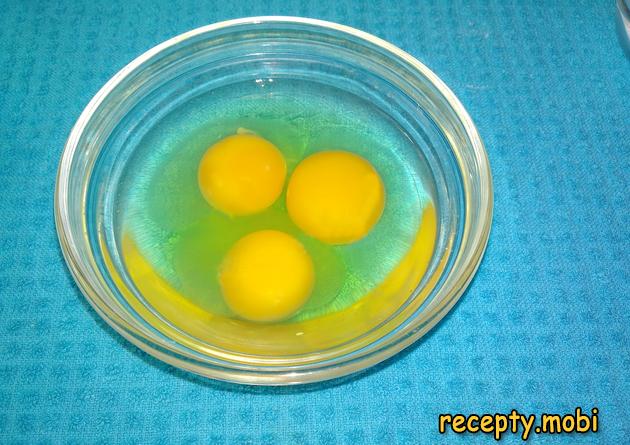
Meanwhile I make the cream cheese filling. I prepare the ingredients according to the list. IMPORTANT: before adding the eggs I crack them into a separate small bowl to check their quality and to avoid getting any shell into the mass.
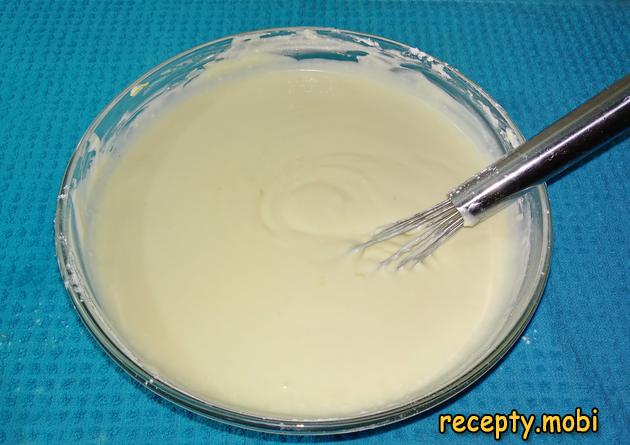
CRITICAL STEP: I mix the filling with a WHISK; it is better NOT to use a mixer or blender here – so as NOT to BEAT AIR BUBBLES into the mass. The texture of the cheesecake should be smooth, dense and FREE OF AIR BUBBLES – otherwise the bubbles will burst on the surface during baking and leave craters.
To the large bowl with the cream cheese (400 g, homemade or Philadelphia) I add the powdered sugar (150 g) and mix with a whisk until uniform. Powdered sugar dissolves instantly (unlike granulated sugar with its crystals). As soon as the cheese has combined with the sugar I add the sour cream 25% (200 g). I mix thoroughly.
Next I add the heavy cream 35% (150 g) to the filling. I mix until uniform. I add the eggs (3 pcs) ONE AT A TIME, whisking thoroughly after each. Adding the eggs gradually prevents the mixture from separating.
So that the filling does NOT CRACK during baking, I add the cornstarch (2 tbsp) to the mass. This is the secret of the smooth surface of a classic cheesecake. I add the juice and zest of the lemon (from 1 pc) – the secret to neutralising any eggy taste. If desired, add the vanillin (1 sachet). The filling is ready.
I take the pan with the base out of the freezer – it has set well. I fill it straight away with the cream cheese filling ON TOP of the base. Tap the pan against the table 2–3 times to get rid of any air bubbles in the mass.
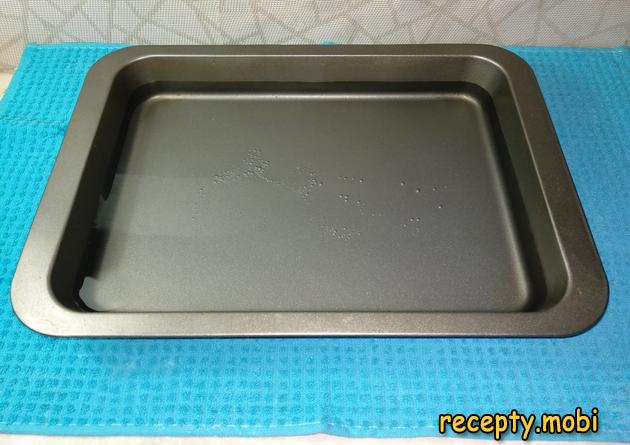
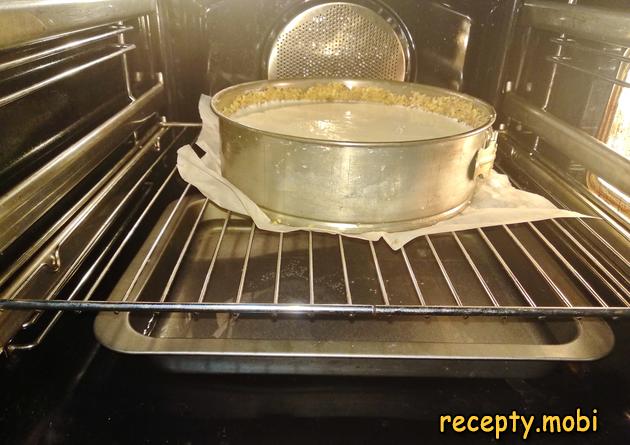
CRITICAL STEP for a smooth surface: on the lower rack of the oven I PLACE A TRAY WITH WATER (1 l) – the water bath creates steam and the filling cooks evenly without cracks. Without water the cheesecake is guaranteed to crack on top.
I preheat the oven to 180°C, top-and-bottom heat (with the tray of water at the bottom!). I place the pan with the cheesecake in the centre of the oven. I bake for 30 minutes at 180°C. Then I REDUCE the temperature to 150°C and bake for another 30 minutes (total time – 1 hour).
After 1 hour of baking I TURN OFF the heat in the oven, but I do NOT take the dessert out! The cheesecake must STAY IN THE OVEN UNTIL IT IS COMPLETELY COOL – 3–4 hours. This is the secret to preventing the centre of the cheesecake from sinking. Moving it abruptly from the hot oven to a cold surface will cause the centre to collapse.
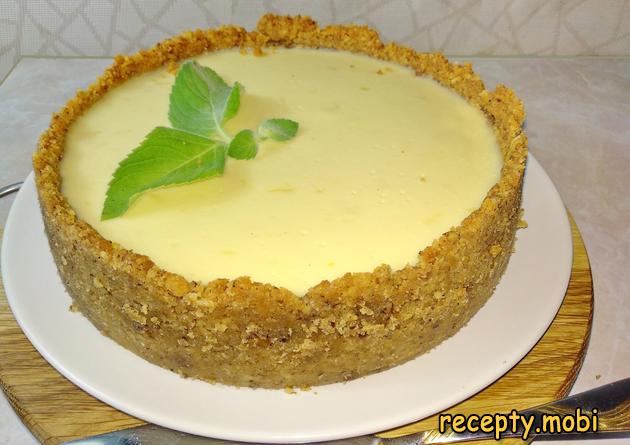
I take the fully cooled cheesecake out of the oven and put it in the refrigerator for 6–8 hours (preferably overnight). During this time the cheese mass settles, firms up and takes on its characteristic restaurant texture – tender, dense and silky.

Before removing the cheesecake from the pan – RUN A KNIFE around the sides to make sure the base is not damaged when it opens. I carefully open the springform pan – the cheesecake comes out freely. I transfer it to a serving plate. Decorate as desired: mint leaves, fresh berries (strawberries, raspberries, blueberries), chocolate shavings, grated cookie. The classic New York cheesecake is ready! I cut it with a hot knife (rinse it in boiling water) for neat, even slices. I serve it with coffee or tea.


Tips
- 1
Always bake in a water bath, with a tray of water on the lower rack – the secret to a smooth surface without cracks.
- 2
Mix the filling with a WHISK, not a mixer – so as not to beat air bubbles into the mass.
- 3
Leave the cheesecake in the turned-off oven until it is completely cool – the secret to preventing the centre from sinking. I bake royal vatrushka on a similar principle.
- 4
Cut it with a HOT knife (rinse it in boiling water) – this gives neat restaurant-style slices with no squashed edges.
Video
FAQ
What can replace Philadelphia cream cheese? +
Several options work: Italian mascarpone (a more delicate, creamy texture), ricotta whipped with powdered sugar (a lighter option), cream cheese from any local producer, a 50/50 blend of 9% cottage cheese and full-fat sour cream (a budget substitute), or homemade cream cheese from frozen fermented baked milk (as in our cream cheese recipe). For vegans there is soy or coconut cream cheese. Philadelphia is the classic choice for American cheesecake, with its characteristic tangy, creamy note. Each substitute gives its own character. The cheapest substitute is homemade cheese from kefir.
Can I bake the cheesecake without a water bath? +
You can, but the risk of cracks on the surface will be high. Alternatives for preventing cracks: 1) Bake at a low temperature of 150°C for 70–80 minutes (without a water bath) – slow heating also gives a smooth surface. 2) Cover the pan with foil for the first 30 minutes – this holds in the moisture. 3) Place a bowl of water NEXT TO the pan (not on the lower rack) – this also adds humidity to the oven. 4) After baking, leave it in the turned-off oven for 4 hours without opening it – this minimises the risk of cracks. The best result comes with a real water bath, but the alternatives also work 80–90% of the time.
How long does New York cheesecake keep? +
The finished cheesecake keeps in the refrigerator for up to 5 days in a tightly closed container or under cling film. On the 2nd or 3rd day the flavour is even richer – the filling firms up to the maximum and takes on its characteristic restaurant texture. Take it out of the fridge 30 minutes before serving – cheesecake at room temperature is more tender than ice-cold. You can freeze it whole or in portions for 1 month in airtight wrapping – before serving, thaw it completely in the refrigerator for 12 hours. It is ideal to make ahead at the weekend for a whole week of festive tea drinking or for the guest table.
What goes well with New York cheesecake? +
It is ideal with a decoration of fresh berries and mint for a classic restaurant presentation. Toppings: strawberry or raspberry sauce (the classic), caramel sauce (salted caramel is fashionable in the 2020s), chocolate ganache, lemon curd, orange jam. With drinks: espresso, latte, cappuccino (the classic of American cafes), cocoa with milk, black tea with lemon or green tea with jasmine. For a grown-up dessert: dessert liqueurs (Baileys, Amaretto, Limoncello), semi-sweet white wine (Moscato), sweet sparkling wine (Prosecco, champagne). For a birthday – a regal dessert with a candle. For New Year and Christmas – with hot mulled wine.
- Comment
or post as a guest
Be the first to comment.


