
avg —
Orange Biscuit in the Oven
Instructions
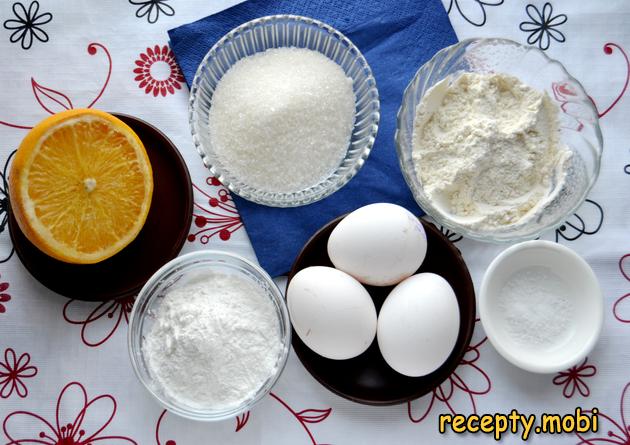
Lay out the products on your work surface. All the ingredients should be at ROOM TEMPERATURE, so I take the eggs out of the fridge 1–2 hours in advance. Warm yolks and whites whip into a fluffier mass than cold ones – this is the secret of an airy texture.
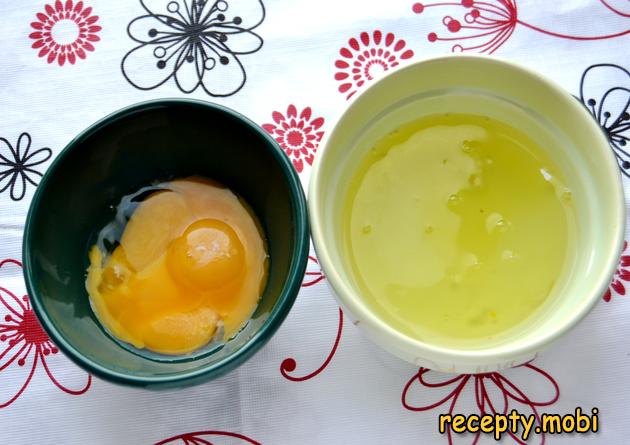
Carefully separate the yolks from the whites. Put the yolks into one deep mixing bowl and the whites into a separate clean bowl. Not a single drop of yolk should get into the whites – yolk is fat, and it will ruin the whipped foam.
Prepare the orange for the zest and juice. Wash the fruit thoroughly with hot water and a brush to remove any waxy coating from shop-bought citrus. On a fine grater, grate ONLY the brightly coloured outer layer – about 1 tbsp of zest. Do not grate the white part (the pith), as it is bitter and will spoil the biscuit. Then squeeze about 2 tbsp of fresh juice from the flesh. One large orange usually gives enough juice and zest for the recipe.

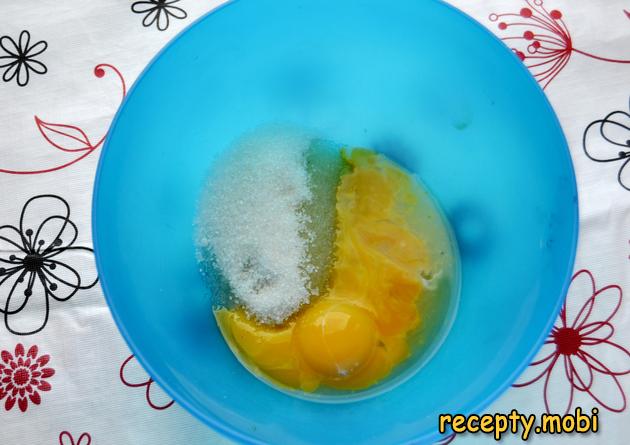
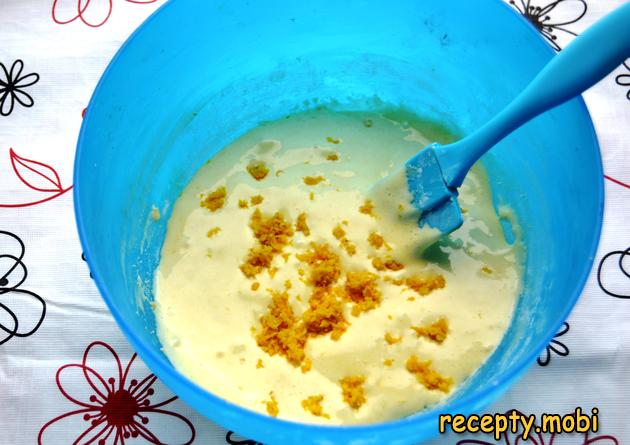
Add all the sugar (70 g) and the 2 tbsp of fresh orange juice to the 3 yolks. Stir thoroughly with a fork or whisk for about 1 minute until the sugar starts to dissolve.
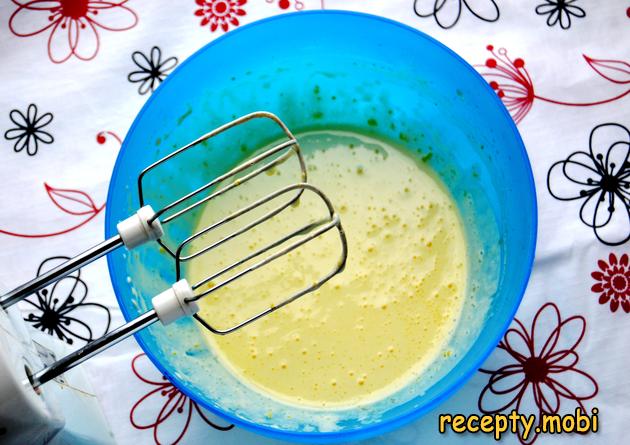
Beat the yolks with the sugar and juice on medium-high speed for 4 minutes – until the mixture turns pale (light and creamy) and thickens, increasing in volume by 2–3 times.
Add the grated orange zest (1 tbsp) to the fluffy yolks and fold gently with a silicone spatula, using bottom-to-top movements rather than the mixer, to keep the mixture airy. The zest gives the biscuit its characteristic orange flecks and intense aroma.
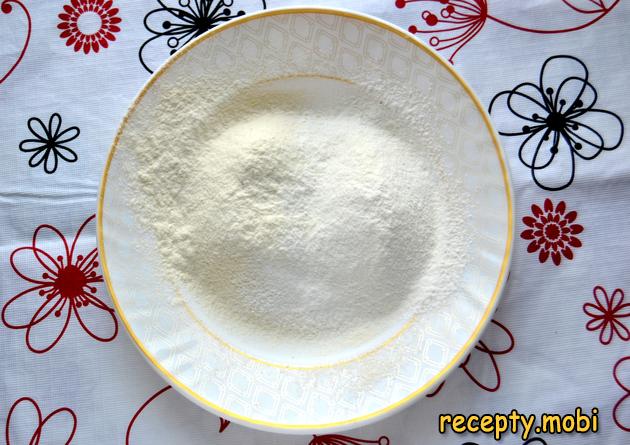
Prepare the flour and starch mixture. In a separate bowl, combine the flour (45 g) and the potato starch (30 g). Mix thoroughly with a whisk and sift through a fine sieve – this enriches it with air for lightness and removes any fine bits. The starch makes the biscuit more tender and moist.
Add the sifted flour-and-starch mixture to the whipped yolks IN PARTS (in 3 stages). After each portion, fold gently with a silicone spatula, using bottom-to-top movements, until smooth. Do not mix for too long, or you will knock the air out of the yolks and the biscuit will turn out dense.
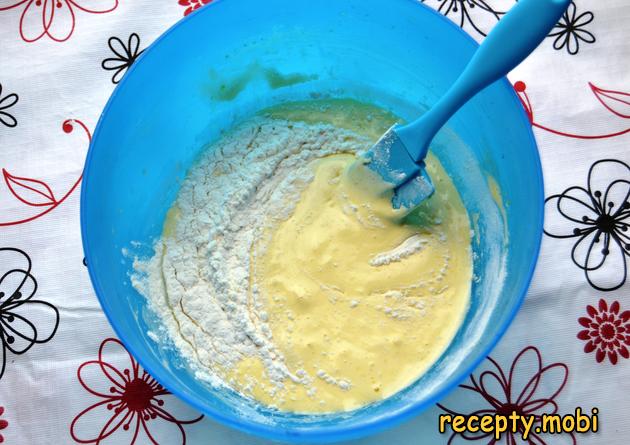
Now whip the whites. Add a pinch of salt to the clean bowl of whites – it stabilises them and helps them whip into a fluffy foam faster. With clean beaters, whip the whites on maximum speed for 4–5 minutes until STIFF PEAKS form. To check: turn the bowl upside down – properly whipped whites hold firmly in the bowl and do not fall out. Add the whipped whites STRAIGHT AWAY to the yolk-and-flour batter (do not let them stand, or they will deflate). Fold in gently with a wide silicone spatula, using bottom-to-top movements, to keep the whites airy. Do not stir for long or roughly, or the batter will collapse and the biscuit will be flat.

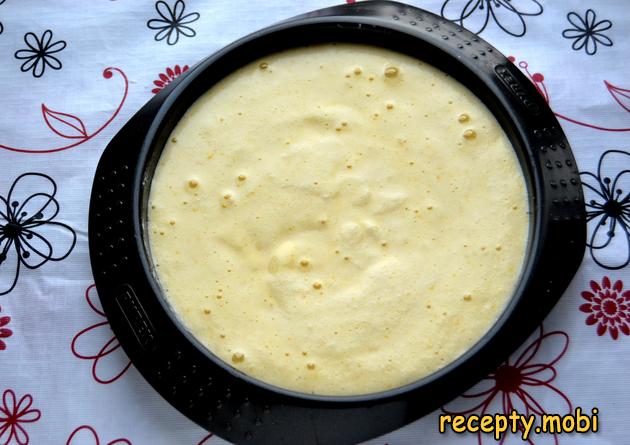
Prepare the baking mould (18–20 cm in diameter; a springform is ideal for sponges). Line the bottom with parchment paper. Do NOT line or grease the SIDES of the mould – the biscuit needs to climb up the sides as it bakes, otherwise it will sink in the centre. Spoon the batter into the mould and level it with the spatula. Tap the mould against the table once or twice to release any large air bubbles. Preheat the oven to 180°C (top and bottom heat). Put the mould in the centre of the oven and bake for 20 minutes at 180°C, then REDUCE the heat to 170°C and bake for another 10 minutes (30 minutes in total). Adjust the time to your own oven. Do not open the door for the first 25 minutes, or the biscuit will sink. Check with a wooden skewer – it should come out dry from the centre.
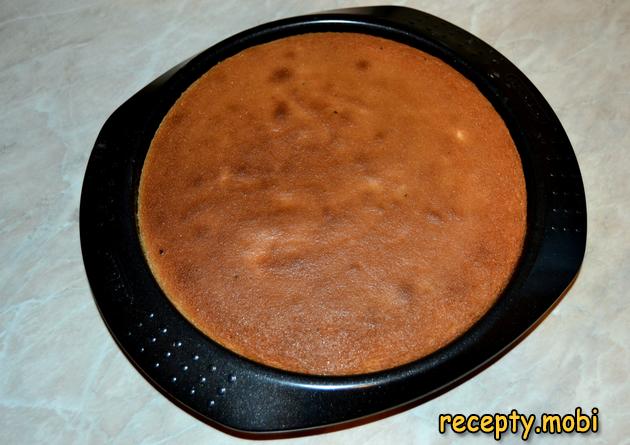
The orange biscuit is golden on top, springy to the touch and pulling away from the sides of the mould. Take it out of the oven and let it cool in the mould for 15 minutes – a hot biscuit is easily damaged. Then turn it out onto a wire rack to cool completely (about 30–40 minutes). The biscuit is VERY delicate, so I recommend cutting it only after 5 HOURS of full cooling and setting. Before serving, dust the cooled biscuit with icing sugar through a sieve (30 g).The orange biscuit in the oven is ready. You can use it as the base for a layered cake, or simply serve it in slices with tea. Enjoy!


Tips
- 1
Whip the yolks and the whites SEPARATELY – this is the secret of the biscuit's airy structure.
- 2
Do NOT grease the sides of the mould – the biscuit needs to climb up the sides as it bakes, otherwise it will sink in the centre.
- 3
Do not open the oven door for the first 25 minutes, or the biscuit will sink and turn out flat. I bake a chocolate biscuit on the same principle.
- 4
Cut the biscuit only after 5 HOURS of complete cooling – a hot biscuit will be damaged when sliced.
FAQ
What can I use instead of potato starch? +
Good options are: corn starch (30 g, a more tender texture and a classic for European sponges), rice starch (30 g, gluten-free), wheat starch (30 g, a standard for cakes), or simply more flour (30 g, no starch at all, for a denser biscuit). Potato starch is the Russian classic and gives a moist, tender sponge, while corn starch is the European classic used for "Milk Girl" and "Bird's Milk" cakes. Each substitute gives its own character. For a gluten-free biscuit, replace the flour with 45 g of rice flour plus 30 g of potato starch.
Can I replace the orange with another citrus? +
Yes, the method is universal. You can use lemon (a sharper citrus aroma; add 1–2 tsp of extra sugar for balance), lime (a fresher, green aroma), mandarin (a softer, sweeter aroma and a classic for festive sponges), grapefruit (with a slight bitterness), pomelo (mild citrus) or bergamot (for tea-style sponges with an English character). You can also make a citrus mix from two fruits, 50/50. Each citrus gives its own character. Orange is the universal classic thanks to its sweet, aromatic zest and the bright, sunny colour it gives the biscuit.
How long does the finished biscuit keep? +
The finished biscuit keeps at room temperature in an airtight container for up to 3 days. In the fridge it keeps for up to 5 days under cling film – before serving, warm it for 1 minute in the microwave to bring back its tenderness. You can freeze it whole or in portions for 1 month in airtight wrapping – before serving, defrost it completely at room temperature for 2 hours. It is ideal for cakes: bake the biscuit the day before assembling the cake, as a rested biscuit soaks up syrup and cream better, whereas a fresh, hot biscuit falls apart when soaked.
What can I serve the orange biscuit with? +
It is ideal on its own as a dessert with tea or coffee, dusted with icing sugar. With tea – black tea with lemon, green tea with jasmine, or Earl Grey with bergamot (a classic for European desserts). With coffee – espresso, latte, cappuccino, or cocoa with milk. For a cake, cut the biscuit horizontally into 2–3 layers and fill with buttercream or curd-cheese cream, orange curd, chocolate ganache, or mascarpone with orange zest. Decorate with orange slices and a sprig of mint. For a children's birthday – serve with a milkshake or cocoa; for a grown-up dessert – with champagne, white semi-sweet wine, or Cointreau (an orange-based liqueur).
- Comment
or post as a guest
Be the first to comment.


