
avg —
Coffee Bean Cookies
Instructions
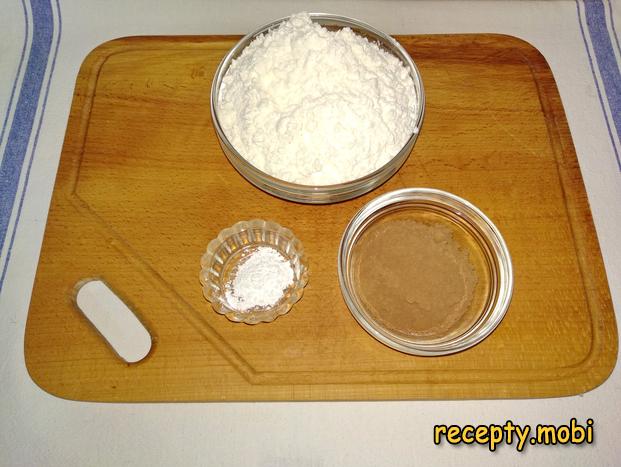
I lay out the products on the work surface. All the ingredients should be at the SAME TEMPERATURE – room temperature. One to two hours before I start, I take the butter (60 g), sour cream (60 g) and egg yolk out of the fridge so they warm up. Cold butter will not blend into the dough, and cold sour cream will leave lumps.

I immediately prepare the dry ingredients in a separate bowl. I thoroughly mix the flour (200 g), cocoa powder (15 g), fine-ground instant coffee (2 tsp) and baking powder (½ tsp). I use a good-quality unsweetened cocoa, which gives a deep chocolate colour and a rich flavour.
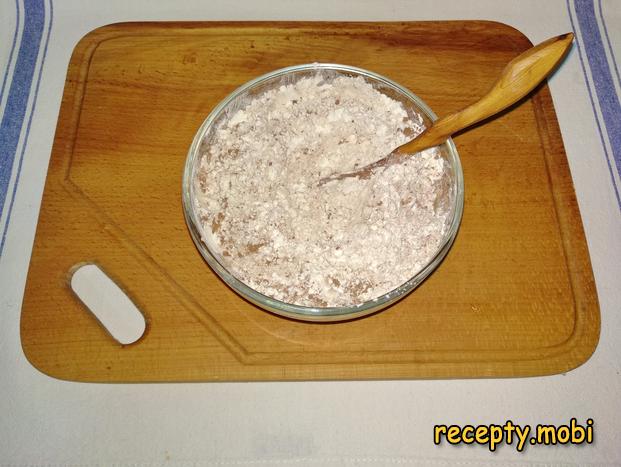
ESSENTIAL STEP: I sift the dry mixture through a fine sieve – this is critical for the right cookie texture. Cocoa often has small lumps that need to be broken up, and the flour gets aerated for a lighter result. I set the sifted mixture aside.
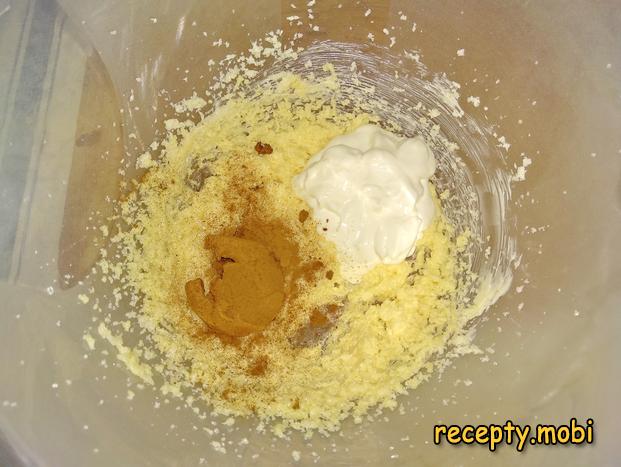
Into a large, deep bowl for kneading the dough I put the softened butter (60 g), all the sugar (80 g) and the pinch of salt. Salt brings out the flavour of the coffee and cocoa – an essential ingredient in coffee baking. This is the base of the dough.
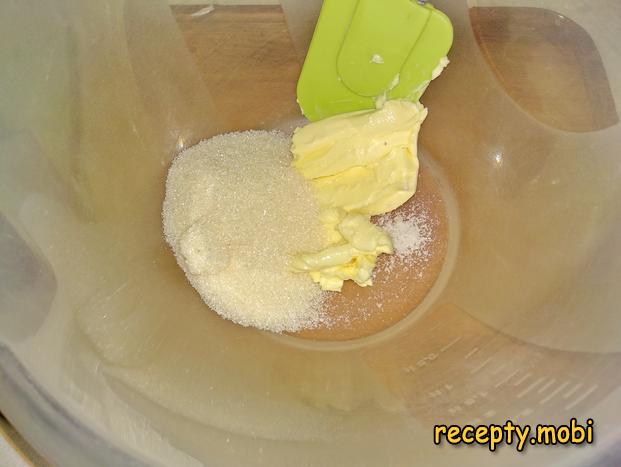
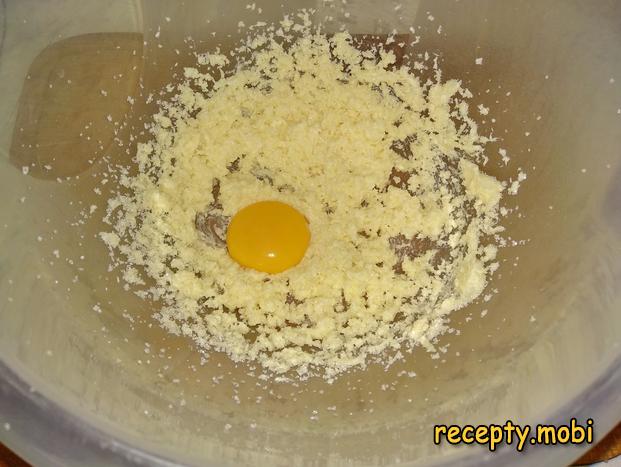
With a mixer or a blender whisk I beat the butter with the sugar on medium speed for 1–2 minutes until fluffy and creamy. The sugar partly dissolves into the butter and the colour lightens. I add the egg yolk and keep beating for another 2 minutes until completely smooth.
I add the sour cream 20% (60 g) and the instant coffee (2 tsp, definitely FINE ground – coarse coffee will not dissolve in the dough and leaves hard "grains"). I beat again with the mixer for 1–2 minutes until I have a smooth brown mass with an intense coffee aroma.
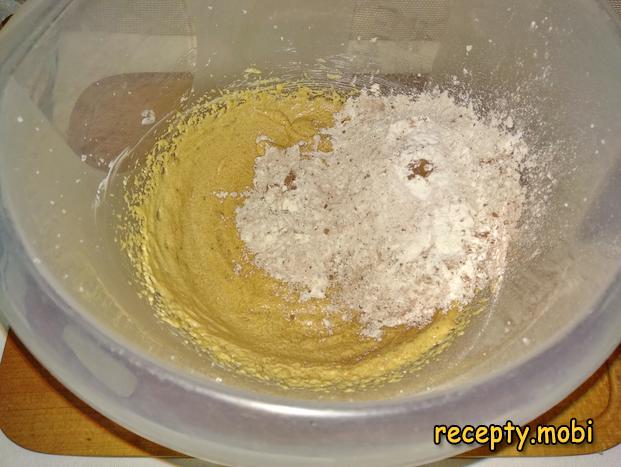
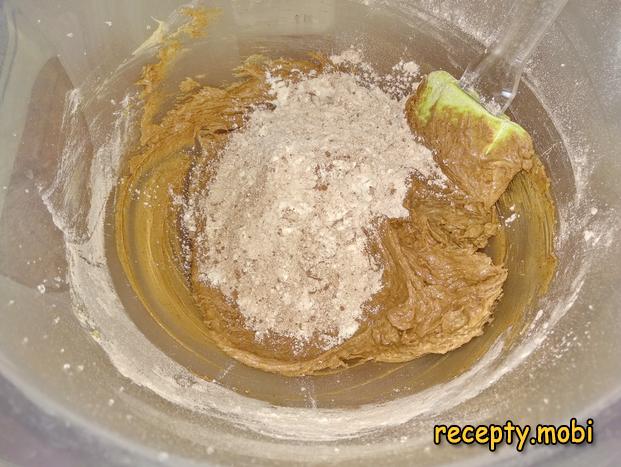
In 2–3 stages I add the sifted dry ingredients (flour + cocoa + coffee + baking powder). After each portion I mix thoroughly with a silicone spatula until fully incorporated. Adding the flour gradually gives a more even dough without dry patches.
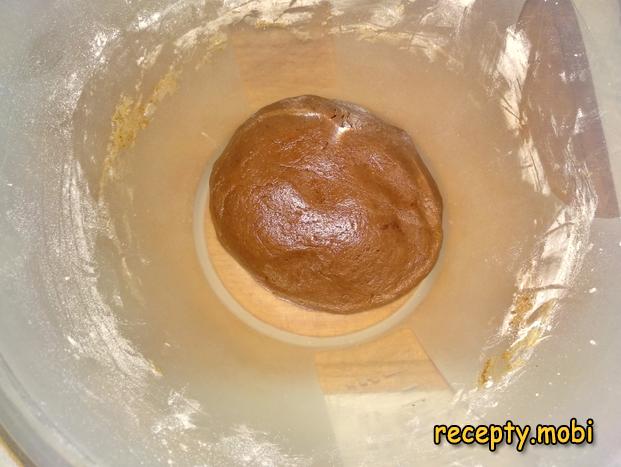
When the dough becomes too firm to stir with the spatula, I carry on kneading by hand. IMPORTANT: do NOT knead the dough for too long – this enriched "shortcrust" dough turns dense and tough with long kneading. One to two minutes of hand work is enough to bring it together.
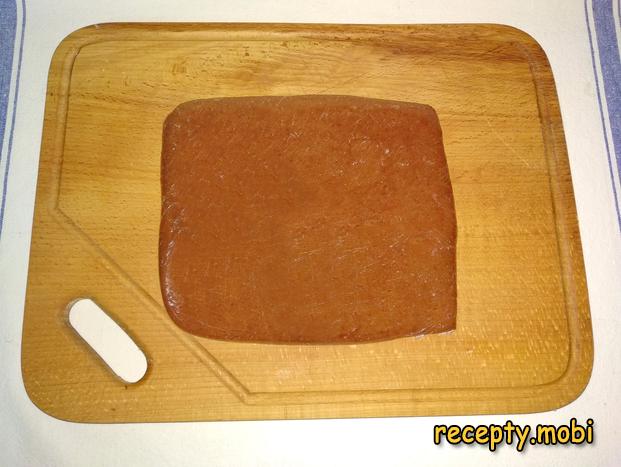
I transfer the finished dough onto cling film and shape it into a square "brick" about 15×15×2 cm thick – this makes it easier to chill and cut. I wrap it in the film and put it in the freezer for 30 minutes; chilled dough is easier to cut into equal portions.
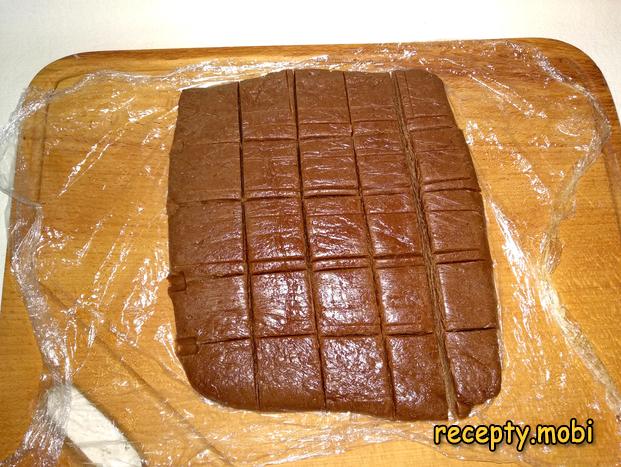
After 30 minutes I take the dough out of the freezer. On a board I divide the "brick" into 26 equal parts of 15 g each (use kitchen scales). The smaller the piece, the smaller the "beans". If you want larger "beans", make them 20–25 g and you will get 16–20 pieces instead of 26.
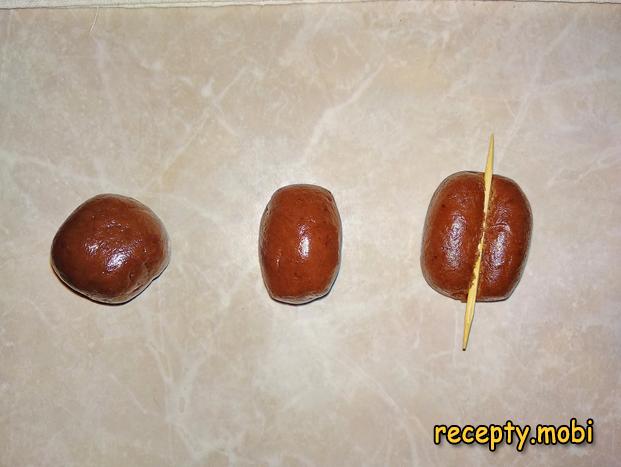
I shape each "coffee bean" in 3 stages. Stage 1: from each piece I roll a round ball by hand. Stage 2: from the ball I roll an elongated "acorn" shape – an oval 2–3 cm long and 1.5 cm wide. Stage 3: with a clean toothpick I press a lengthwise groove down the middle of each "acorn", pressing it lightly against the work surface – this gives the characteristic "coffee" look.
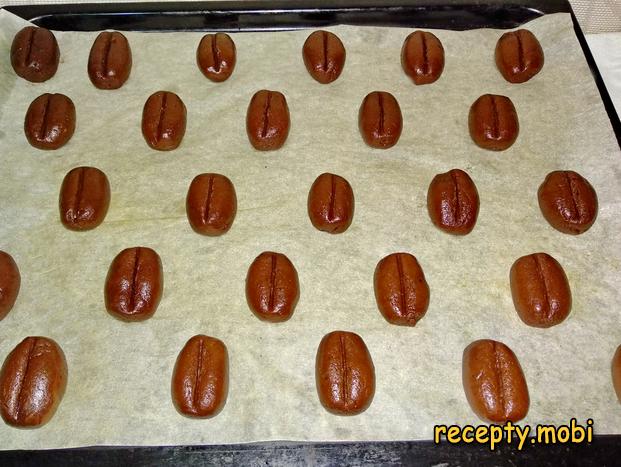
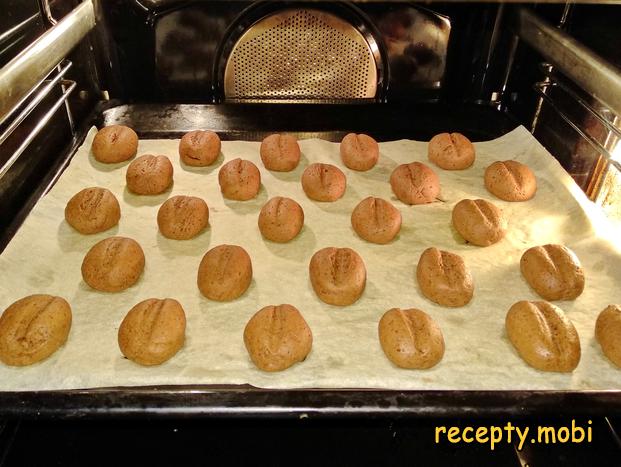
I line a baking sheet with parchment paper. I lay out the finished "beans" 2–3 cm apart – they spread slightly during baking. I preheat the oven to 180°C, top-and-bottom mode.
I bake the cookies for 20–25 minutes until done. NOTE: watch that the cookies do not dry out – "Coffee Beans" should be SOFT inside, not dry like rusks. I check for doneness by touch – the top springs back slightly. The colour is a natural dark chocolate.
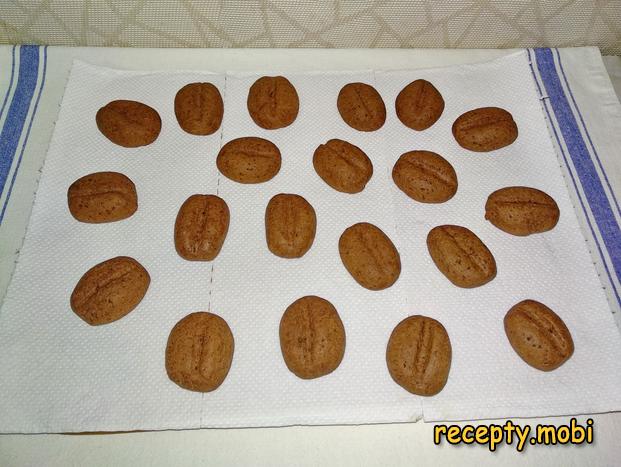
I take the finished cookies out and leave them on the baking sheet to cool for 5–7 minutes – hot cookies are fragile and can fall apart when moved. Then I transfer them to a rack to cool completely.
If you like, dust the cooled cookies with icing sugar through a sieve (30 g) for a festive presentation. Without the dusting the cookies look even more like natural coffee beans – that option is better for decorating a coffee cake or as a gift for a coffee lover. The "Coffee Bean" cookies are ready! I serve them with a cup of espresso, latte or cappuccino.


Tips
- 1
Use ONLY fine-ground instant coffee – coarse coffee will not dissolve in the dough and leaves hard "grains" in the finished cookies.
- 2
The toothpick groove is a must – without it the cookie does not look like a coffee bean and loses its visual appeal.
- 3
Do NOT overbake the cookies – they should be soft inside, not dry. I bake chocolate cookies on a similar principle.
- 4
Use all the ingredients at room temperature – cold butter and sour cream will not give a smooth dough.
FAQ
What can replace instant coffee in the recipe? +
The following work: natural ground coffee (1 tbsp, a "coarser" texture); concentrated espresso (2 tsp of liquid instead of instant); instant chicory (for a caffeine-free version, a more "herbal" taste); increasing the cocoa to 30 g (for chocolate cookies without coffee); a 50/50 mix of coffee and cocoa (a moderate coffee taste); or coffee extract (½ tsp). Instant coffee is the "classic" choice because it dissolves perfectly into the dough without grains. For gourmets, use fine-ground natural coffee (espresso grind) for an intense aroma.
Can I replace sour cream with yogurt or cream? +
Yes, the options are: plain 5% yogurt (a "fresher" taste); 33% cream (a richer, more tender cookie); full-fat 3.2% kefir (a more "Russian" version); mascarpone (for a tender, creamy texture); or thick 10% Greek yogurt (for a firmer dough). Sour cream 20% is the "classic" of Russian shortcrust dough, with a light tang that gives the characteristic "crumbliness". For vegans, use plant-based soy sour cream or coconut cream. Each substitute gives its own character.
How long do the finished cookies keep? +
The finished cookies keep in an airtight container at room temperature for up to 5–7 days (thanks to the butter they do not dry out). On the second day the flavour is even richer, as the coffee and cocoa aromas come together. In the fridge they keep for up to 14 days (but lose their "freshness" at low temperature). They can be frozen for 1 month in airtight bags – before serving, thaw completely at room temperature for 1 hour. Ideal as a gift – serve them in a pretty box with a ribbon 1–2 days after baking.
How do I use the cookies to decorate cakes? +
"Coffee Beans" are a versatile decoration for coffee and chocolate desserts: decorating a tiramisu cake (arrange them around the edge or in the centre), decorating a coffee cheesecake, decorating a mocha cake, a "hedgehog"-style coffee cake (cover it entirely with the cookies like spines), topping cupcakes with coffee cream, or "beans" in a glass jar as part of a coffee gift. You can partly dip the "beans" in dark chocolate for a striking presentation. For original packaging, place 10–15 pieces in a small jute bag labelled "Coffee Beans" – the perfect gift for coffee-loving colleagues.
- Comment
or post as a guest
Be the first to comment.


