
avg —
No-Bake Cookie Cake with Condensed Milk and Nuts
Instructions
The base of this dessert is crushed shortbread cookies with walnuts. I break the "Yubileynoe" cookies (1 kg) into large pieces and load them in batches into the bowl of a blender or food processor. I add the shelled walnuts (100 g) – they give the cake crunch and a rich nutty flavour. I check the nuts for freshness beforehand – bitter or rancid ones would spoil the whole dessert.
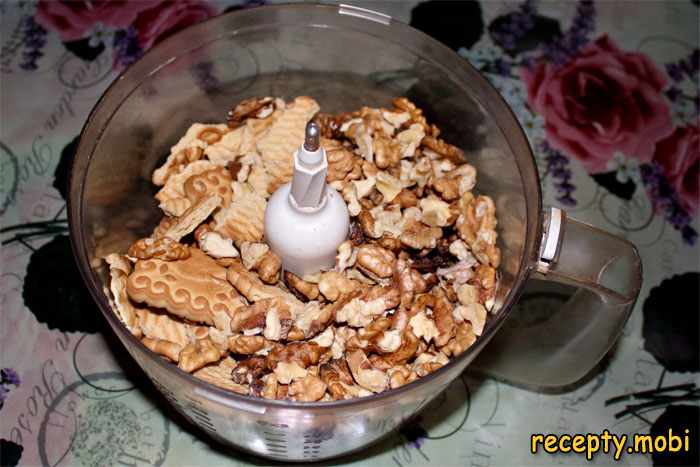
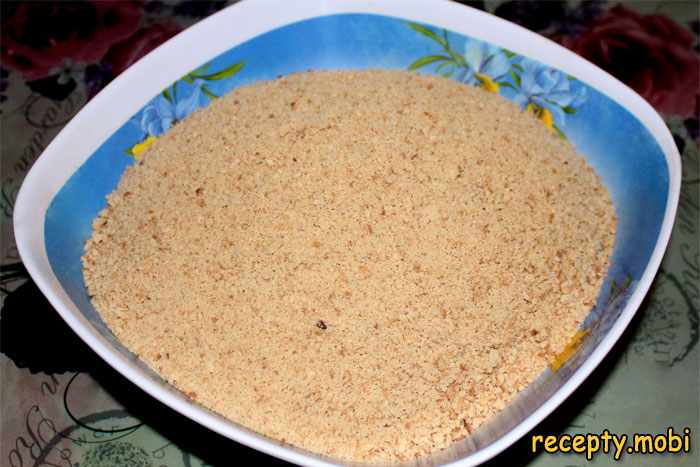
I switch the blender on to maximum speed and grind the cookies with the nuts to fine crumbs with no large pieces. Grinding takes 1–2 minutes depending on the power of the blender. I pour the resulting smooth mixture into a deep bowl with a capacity of at least 3 litres – it will be convenient for mixing the cake base in.
I add condensed milk (400 g) and cream (300 ml) to the dry crumbs. The condensed milk binds the crumbs and adds sweetness, while the cream makes the texture more tender and keeps the cake from being cloyingly sweet. If you want a less sweet cake, replace part of the condensed milk with rich sour cream (20–25%).
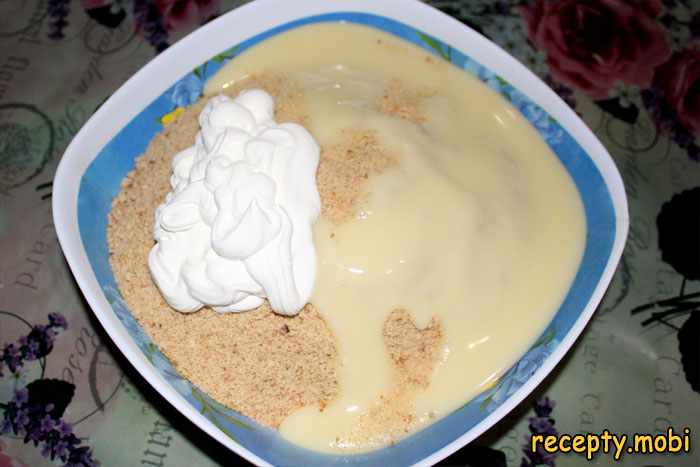
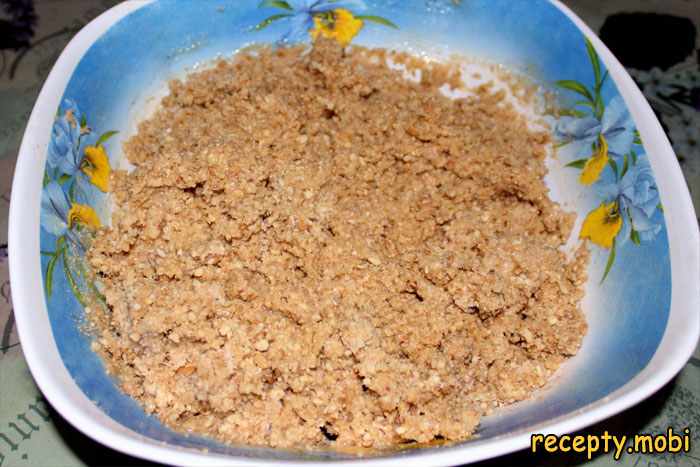
I pour in the milk in parts, stirring constantly to control the consistency. I start with half a cup (125 ml) and add more as needed – if you add a lot of liquid at once, the cake will turn out too soft and won't hold its shape. The mixture should be viscous, like a thick dough, easy to shape by hand but not runny.
I use a springform tin 21–24 cm in diameter – this size is ideal for the given quantity of ingredients. I line the bottom of the tin with baking parchment so the cake comes out easily. I spoon the viscous mixture into the tin and pack it down firmly with a spoon or spatula, dipping them in cold water – that way the mixture won't stick. I smooth the surface as evenly as possible.
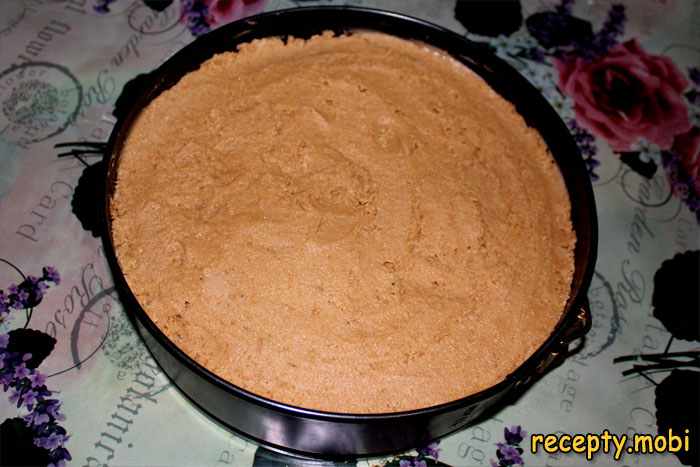
I put the tin with the packed base into the refrigerator for 15–20 minutes – during this time the mixture will set a little and become firmer. Meanwhile I prepare the chocolate glaze. I break the white chocolate (100 g) into small pieces and put it into a small bowl together with the butter (50 g).
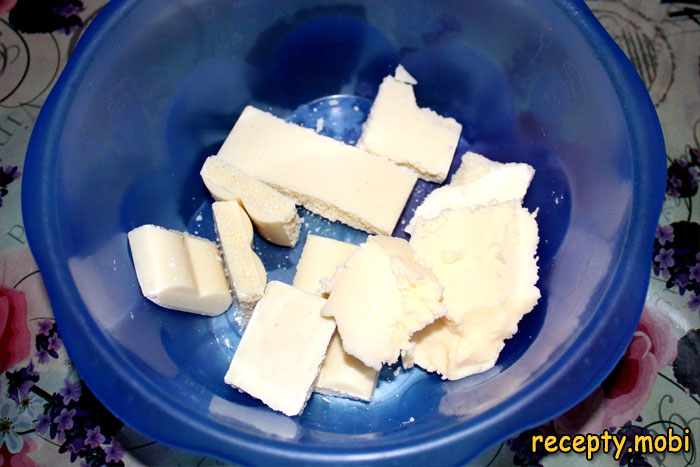
I melt the chocolate with the butter in the microwave in 15–20 second bursts at medium power, stirring after each burst. It is important not to overheat it – white chocolate seizes quickly at high temperature. I heat it only until melted, when the mixture becomes smooth and glossy. You can also melt it in a water bath.

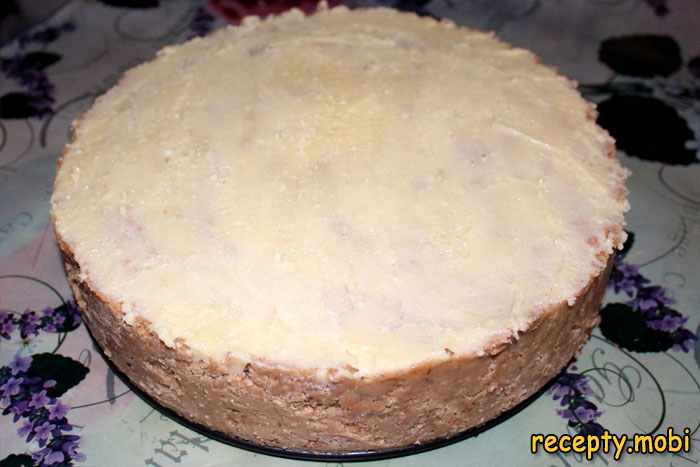
I take the tin with the base out of the refrigerator. I carefully release the sides of the springform tin and transfer the cake onto a serving plate using a wide spatula. I remove the parchment only after moving it onto the plate.

I pour the melted chocolate mixture onto the centre of the cake and quickly spread it with a knife or spatula over the whole surface in an even layer 2–3 mm thick. I work fast – the chocolate sets at room temperature within 3–5 minutes. You can also coat the sides of the cake with glaze for a more finished look.
For a festive decoration I cut a heart-shaped stencil with the word "LOVE" out of stiff paper – the stencil should be slightly smaller than the diameter of the cake. I carefully place the paper stencil in the centre of the cake on top of the still-soft glaze.
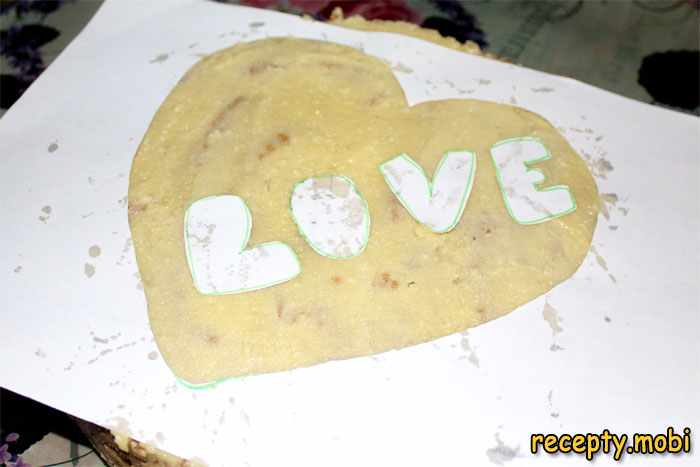
I generously sprinkle the cake with red coconut flakes along the outline of the stencil – the flakes settle on the glaze and stick to it. I fill in all the space inside the heart, except for the letters of the inscription. I press the flakes down with my palm so they adhere better.
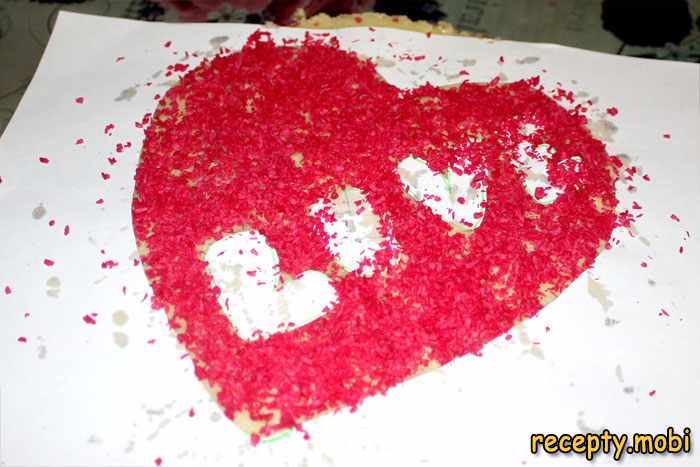
With a dry brush I gently sweep the excess flakes off the surface of the cake and remove the paper cut-outs. The result is a beautiful, even heart with crisp outlines. The letters stay white – the contrast with the red flakes looks very striking.

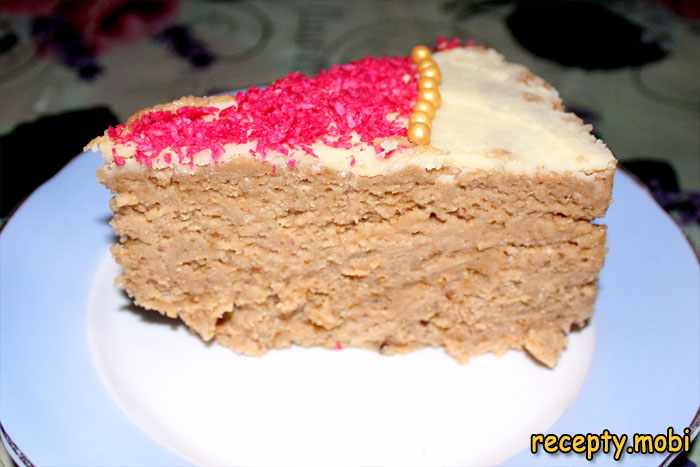
For the finishing touch I outline the heart with decorative golden pearls – you can find them in the baking sections for confectioners or order them online. I stick the pearls to the glaze one by one with tweezers, or simply scatter them along the edge. If you like, decorate the sides of the cake too – dust them with the remaining crumbs or flakes.

The no-bake cookie cake with condensed milk and nuts is ready! Before serving I chill it in the refrigerator for at least 2–3 hours – during this time the cake will set completely and will be easy to cut into neat portions. I cut it with a sharp knife, dipping it in hot water before each cut. I serve it with tea or coffee.


Tips
- 1
Instead of white chocolate you can use dark or milk chocolate – the flavour will be less sweet and richer. Dark chocolate goes especially well with walnuts.
- 2
If the cake turns out too sweet, serve it with strong unsweetened coffee or unsweetened tea – the drink will balance the sweetness of the dessert.
- 3
The cream can be replaced with rich sour cream (25–30%) – the structure of the cake will be a little denser, and the flavour will gain a pleasant tang that reduces the cloying sweetness.
- 4
Chill the cake in the refrigerator for at least 2–3 hours before slicing – this gives you even, attractive portions. To speed things up, you can put the cake in the freezer for 40–60 minutes.
FAQ
What can I use instead of "Yubileynoe" cookies? +
Any plain shortbread cookies without filling or glaze will do – "Maria", "Baked Milk", "Strawberry" or oatmeal cookies. You can mix several kinds for a more interesting flavour. Avoid cookies with cream or chocolate glaze.
Can I freeze the finished cake? +
Yes, the cake keeps very well in the freezer for up to 1 month in airtight packaging. Thaw it slowly in the refrigerator for 4–6 hours – that way the texture stays tender. Do not thaw it at room temperature – the cake will become too soft.
Why did my cake turn out too soft and won't hold its shape? +
Most likely too much milk or liquid cream was added. Next time reduce the amount of liquid by 50–100 ml or use thicker cream (33%). Longer chilling in the refrigerator will also help – at least 4–5 hours.
Which nuts can I use instead of walnuts? +
Hazelnuts, almonds, cashews or a mix of nuts work well. Peanuts will give the characteristic "Snickers" flavour. You can toast the nuts in a dry pan for 3–5 minutes beforehand for a brighter aroma.
- Comment
or post as a guest
Be the first to comment.


")
