
avg —
Honey Cake without Eggs
Instructions
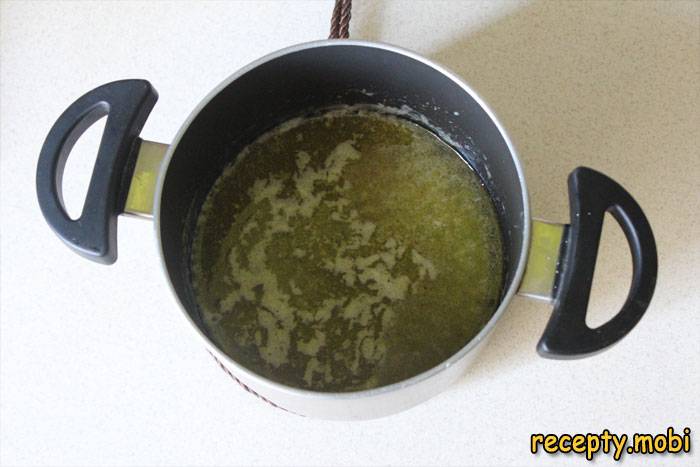
Bring all the ingredients to room temperature in advance – this is critical for success. In a heavy-bottomed saucepan, combine 100 g of butter, 2 tablespoons of liquid honey and 50 g of sugar. Melt them over low heat, stirring constantly, for 3–4 minutes, until the sugar has fully dissolved and you have a smooth golden mixture.
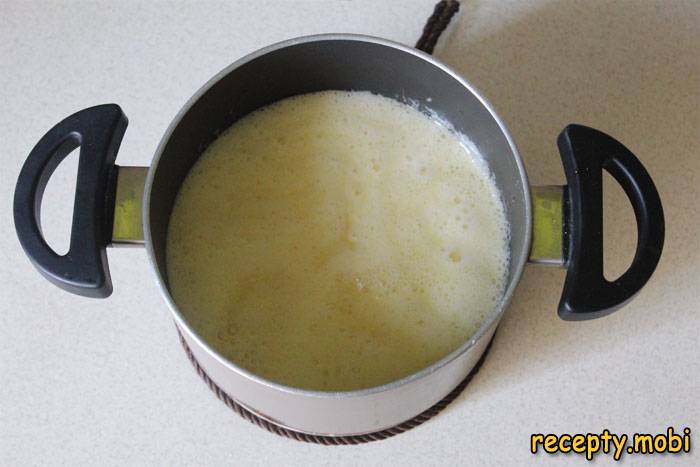
Add 100 g of sour cream and 1 teaspoon of baking soda to the honey mixture, then sprinkle in a pinch of salt. As soon as the mixture begins to bubble actively (this is the reaction of the soda with the acidic sour cream and honey, which will make the dough light), immediately take the pan off the heat – further heating will kill the reaction. Stir everything thoroughly with a wooden spoon, then add 320 g of sifted flour. Knead a soft, elastic dough by hand for 3–4 minutes – it should be pliable and not stick to your hands.
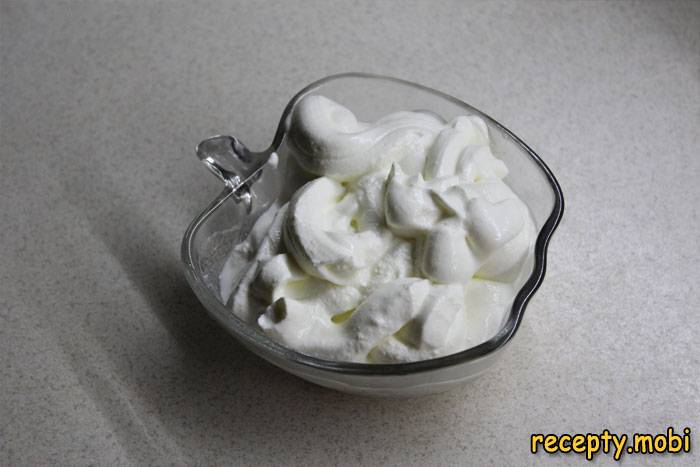
Meanwhile, prepare the sour cream filling. Using a mixer on high speed, whip 350 g of sour cream with 20–25% fat content (it must be full-fat for an airy cream) together with 60 g of sugar and a pinch of salt for 5–7 minutes, until thick, firm peaks form. The cream should hold on the whisk and not run off the spoon. For an even airier texture, you can chill the sour cream in the fridge for 1 hour beforehand.
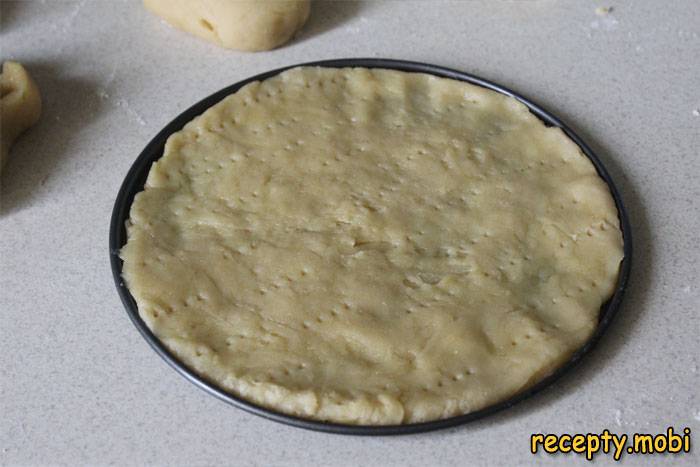
Divide the honey dough into 4 equal parts by weight (about 145 g each) – scales will help you make the layers identical. Roll out each part on a lightly floured surface into a thin round layer 3–4 mm thick, sized to fit your baking tray. Prick the layers evenly all over with a fork – this will stop them puffing up during baking. Bake the layers on a baking tray lined with parchment in an oven preheated to 180 °C for 6–8 minutes, until nicely golden – do not overbake, as thin layers dry out quickly. Bake each layer separately for even results.
Once all 4 layers have cooled completely to room temperature (30 minutes on a wire rack), start assembling the cake. Spread each layer generously with the sour cream filling (80–100 g of cream per layer) – do not be sparing, as this is exactly what gives the finished Medovik its characteristic juiciness. Leave the assembled cake at room temperature for 1 hour for the first stage of soaking, then transfer it to the fridge for 12 hours (overnight is best) – this is the critical time for the flavour to develop fully and the layers to become tender.
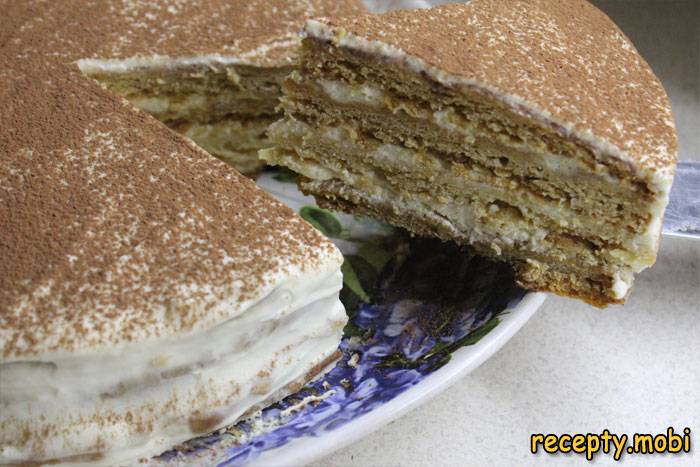
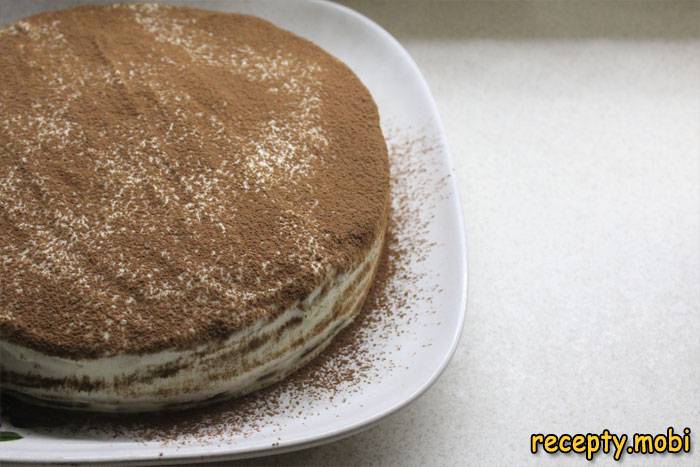
The fragrant and incredibly delicious homemade eggless Medovik is ready! Before serving, decorate the top of the cake with cocoa powder pushed through a sieve, finely grated chocolate or chopped almonds for a classic festive look. You can also decorate it with crumbs made from the trimmed-off edges of the layers, ground in a blender – this is the traditional Russian method. Cut it with a sharp knife into 8 pieces and serve with tea or coffee.


Tips
- 1
Do not overheat the honey mixture while melting it – honey loses its beneficial properties and some of its aroma at temperatures above 60 °C. Melt it gently over low heat, stirring constantly.
- 2
The layers must cool completely on a wire rack for 30 minutes before you assemble the cake – warm layers will melt the sour cream filling and it will run off. Cold layers hold the cream perfectly.
- 3
The longer the cake soaks in the fridge, the more tender the layers become and the more harmonious the flavour. Allow a minimum of 12 hours; 24 hours is ideal. A cake assembled the day before is always better.
- 4
Do not throw away the trimmings from the cake layers – grind them in a blender to fine crumbs and use them to coat the sides of the cake. This is the classic Russian way of decorating a Medovik.
FAQ
Why doesn't the dough rise in an eggless Medovik? +
Make sure the baking soda is fresh and not old – it loses its properties over long storage and will not give the proper reaction. The reaction of the soda with the acidic sour cream and liquid honey should be active – the mixture should bubble noticeably when combined. If there is no bubbling, the soda is dead, so replace it with fresh. The honey should also be natural rather than an artificial syrup – artificial honey does not contain the acids needed for the reaction. Check the use-by date on the soda packet – once opened for more than 6 months, it is best replaced. Without eggs and without the proper soda reaction, the layers will be dense and rubbery.
Can I use a different cream for the Medovik instead of sour cream? +
Yes, this is a classic Russian cake with many variations. You can use: custard cream (500 ml based on milk, eggs and flour – a denser option), mascarpone cream (300 g mascarpone + 100 g icing sugar + 200 ml 33% cream), boiled condensed milk cream with butter (300 g condensed milk + 200 g soft butter – a caramel flavour), or a sour-cream-and-curd-cheese cream (200 g sour cream + 200 g curd cheese + 100 g sugar). Each option gives the Medovik its own character. For a more diet-friendly version, use Greek yoghurt instead of sour cream.
How long does a finished eggless Medovik keep? +
In the fridge, in a sealed container or covered, the cake keeps for up to 5 days without losing flavour. Over time the Medovik only becomes tastier – the layers soak up the cream better and the flavour grows more harmonious. The peak of flavour is on days 2–3. Do not leave it at room temperature for longer than 3 hours – sour cream filling spoils quickly in the warmth. I do not recommend freezing a Medovik – the sour cream filling will separate on thawing and change the texture. The layers on their own can be frozen for up to 1 month – handy for preparing the dough ahead of a celebration.
How can I decorate a Medovik cake for a festive presentation? +
Classic decoration options: crumbs from the trimmed layers, generously scattered over the top and sides (the traditional Russian option); grated dark or milk chocolate (100 g in fine shavings); cocoa powder through a sieve in lacy patterns; chopped almonds or walnuts; fresh berries (raspberries, strawberries, blueberries); ready-made chocolate decorations piped from a bag; or desiccated coconut. For a festive version, add white or chocolate glaze on top. A homemade cake with a berry decoration looks especially striking in summer. Each finish transforms the cake to suit a particular occasion.
- Comment
or post as a guest
Be the first to comment.


