
avg —
Garlic Bread in the Oven "Snail"
Instructions
I lay out the ingredients for the yeast dough on the work surface. I take the butter (130 g) for the filling out of the refrigerator 2–3 hours in advance – it should be soft but not melted. Soft butter mixes easily with the herbs and spreads well over the dough. I warm the milk (100 ml) and water (100 ml) to 32–37°C, "body" temperature for activating the yeast. I sift the flour (400 g) through a sieve.
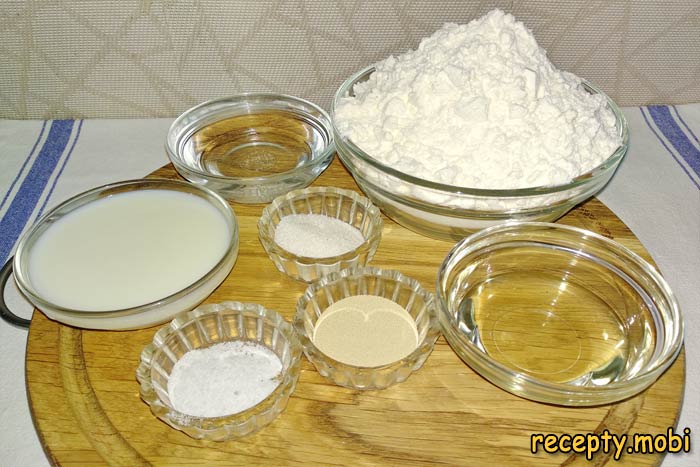
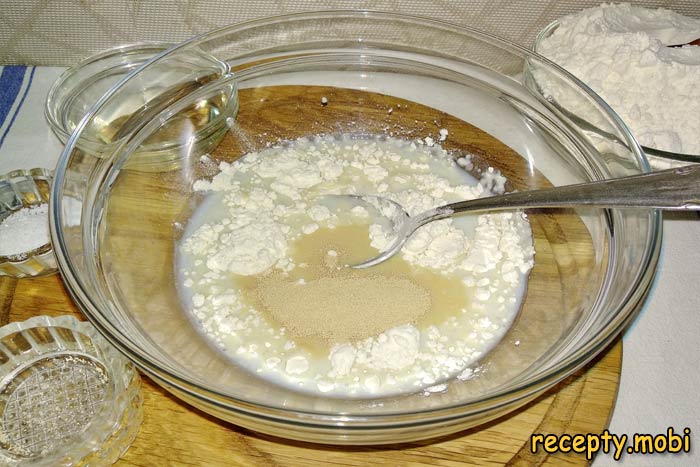
I make the starter to activate the yeast before kneading. I pour the warm milk and water into a bowl. I add the sugar (1 tsp), 2–3 tbsp of flour (from the total amount) and the dry yeast (1 tsp). I mix thoroughly with a whisk until smooth, cover with a towel and place in a warm spot for 15–20 minutes.
Place the bowl in a warm place for fifteen to twenty minutes to activate the yeast.
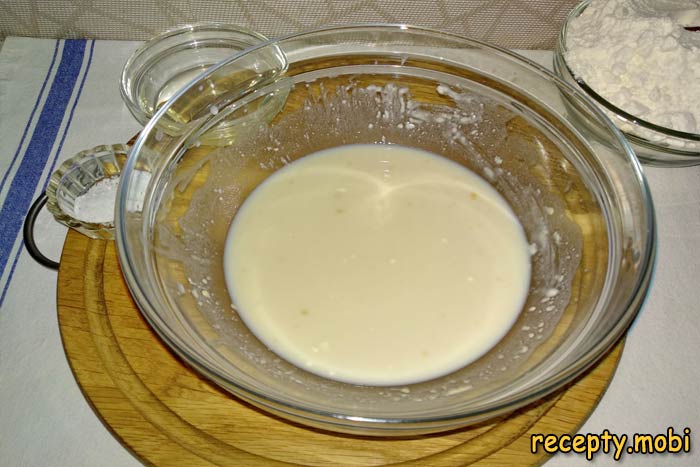
After this time, the starter rises and is covered with a fluffy foamy "cap" 2–3 cm high. This is a sign of active yeast and you can carry on. If there is no cap, the yeast is "dead" (expired or poorly stored), so use fresh yeast.
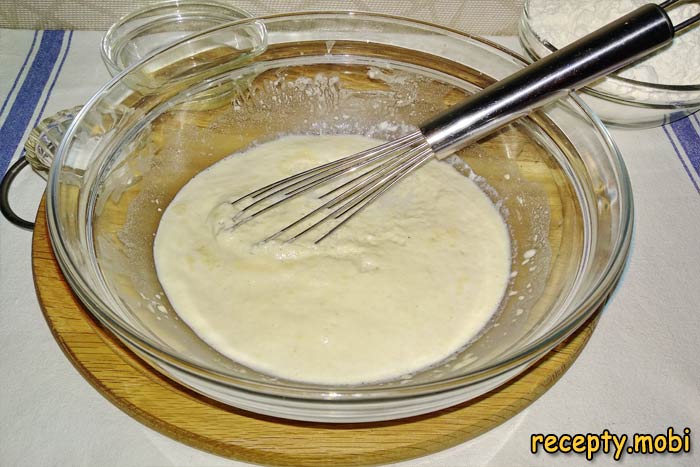
To the bowl with the active starter I add the vegetable oil (3 tbsp), the salt (1 tsp) and a third of the sifted flour (about 130 g). I start kneading the dough with a balloon whisk.
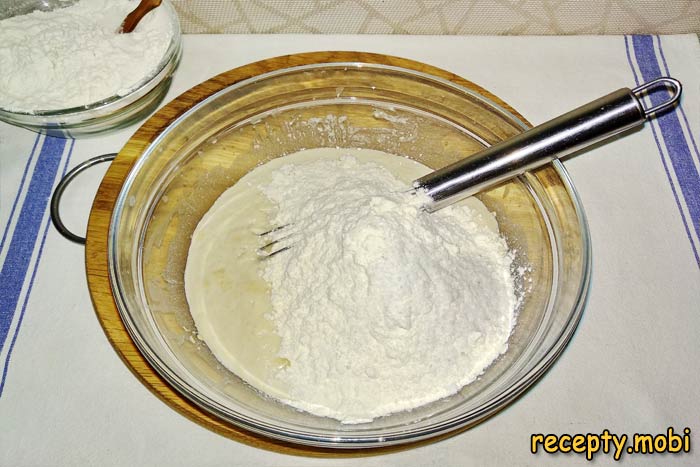
Gradually (about 100 g at a time) I add the rest of the flour and keep kneading until the dough thickens.

When the dough can no longer be worked with a whisk, I move it onto a floured work surface.
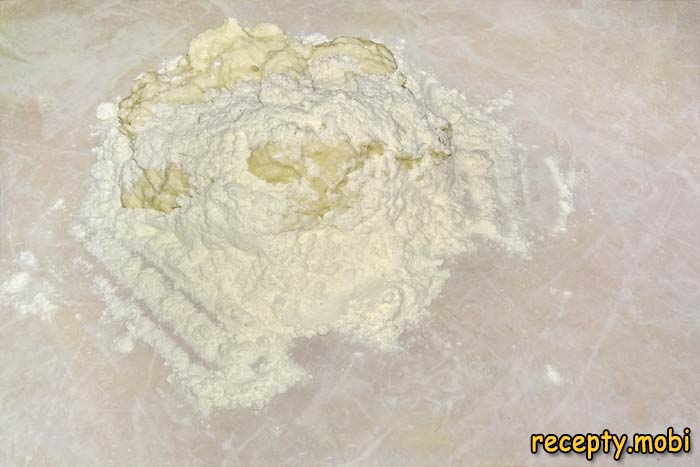
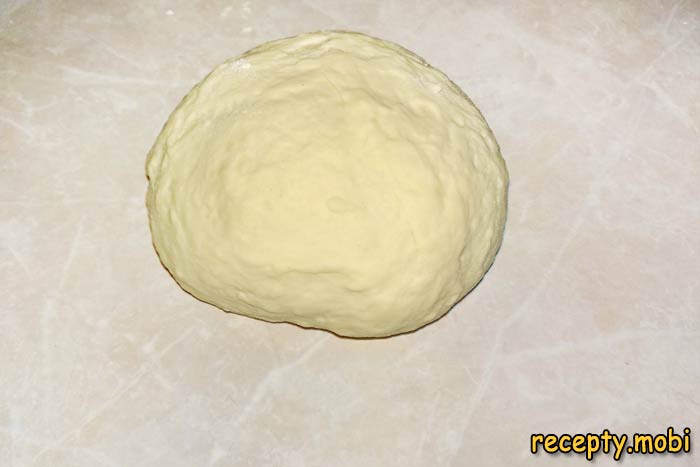
I knead the dough by hand for 7–10 minutes until it is soft, elastic and slightly sticky. The finished dough comes together into a smooth ball that does not stick much to your hands. The amount of flour may vary (380–420 g) depending on its quality, so go by the consistency.
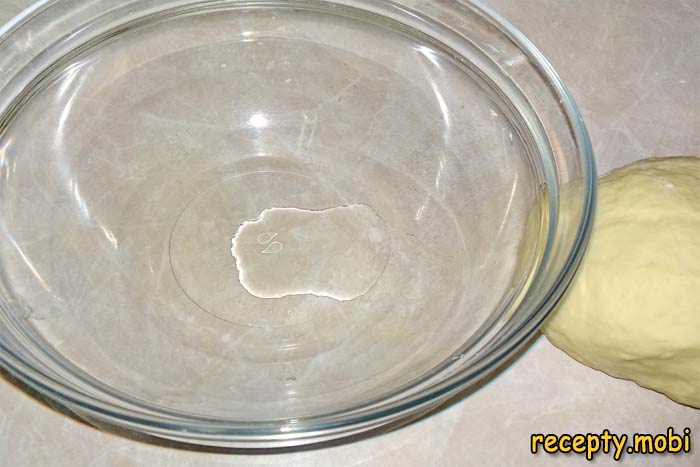
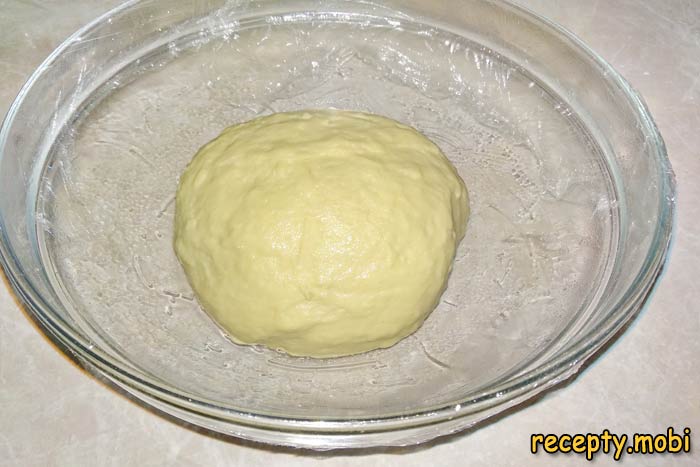
I lightly grease a clean bowl with vegetable oil, transfer the dough and also grease it with oil on top, which protects it from drying out. I transfer the dough to the bowl.
I cover the bowl with plastic wrap and place the dough in a warm place (30°C) to rise for 1 hour. The ideal spot is the oven with only the light switched on, which gives about 30°C.
Meanwhile I prepare the garlic-butter filling. I wash a large bunch of dill, parsley and cilantro (about 30 g) thoroughly and pat it dry with paper towel. I chop it finely with a knife – the finer it is, the more evenly it spreads over the dough. I pass the fresh garlic (3 cloves) through a press or grate it on a fine grater.
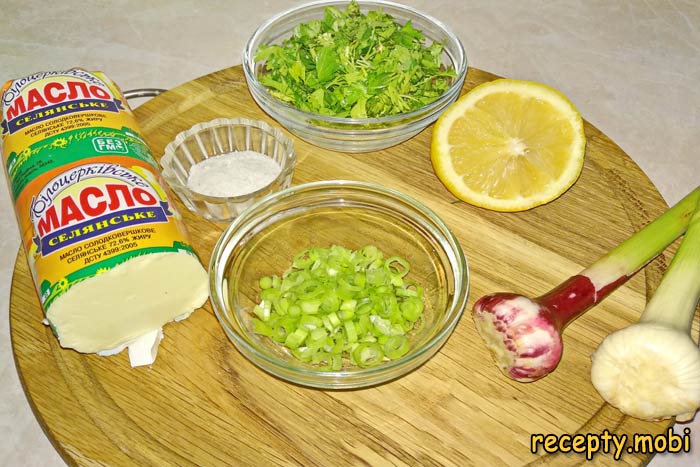
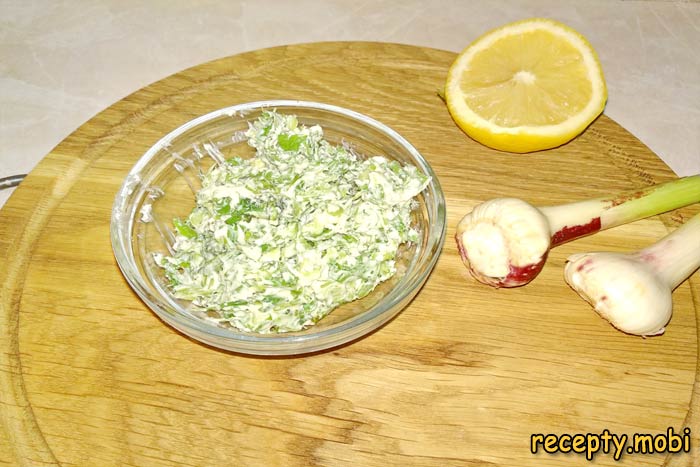
To the bowl with the soft butter (130 g) I add the chopped herbs, the crushed garlic, the lemon juice (2 tsp) and a pinch of salt. I mix thoroughly with a silicone spatula or a fork until smooth. This "green" butter spread is the main aroma of the garlic bread, and the lemon juice brings out the flavour of the garlic more brightly.
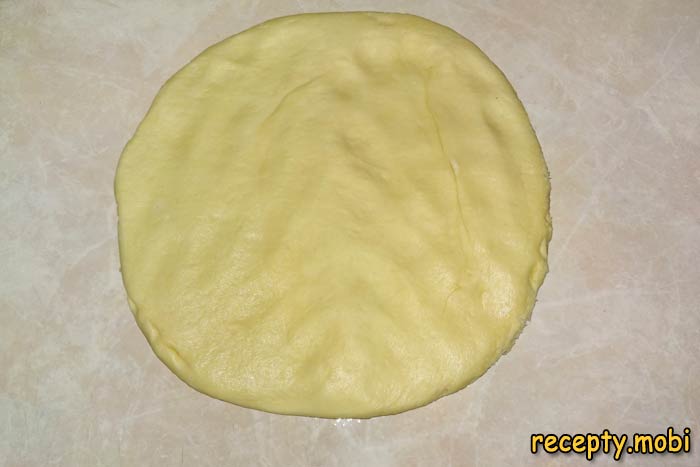
After 1 hour the dough has increased 2–3 times in size and become soft and airy. I take the bowl out of the warm place.
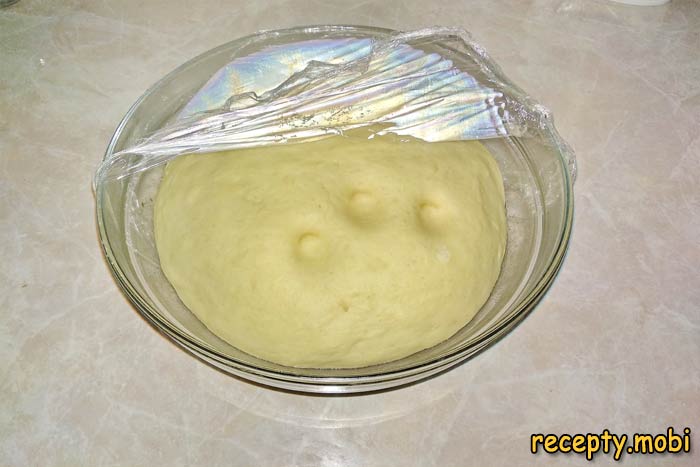
I grease the work surface with vegetable oil (NOT flour – flour would "clog" the dough and make it dense). I put the dough on the oil, knead it down by hand to release the carbon dioxide, and stretch it into an even rectangular layer.
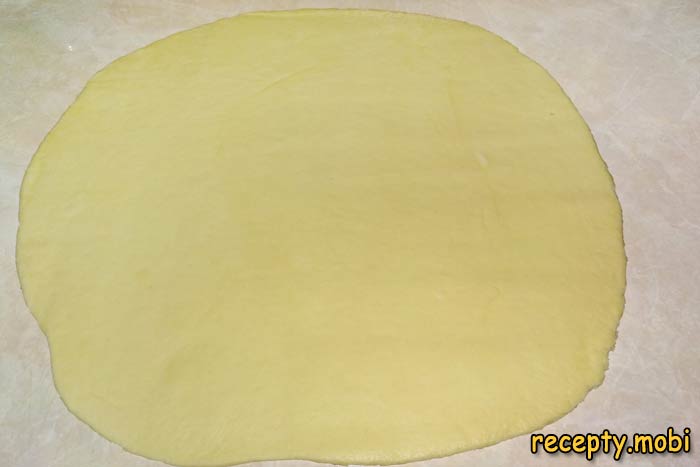
Then I roll the dough out with a rolling pin into a 30×40 cm rectangle, 5–7 mm thick. The dough should be thin enough for the finished Snail to be attractively layered.
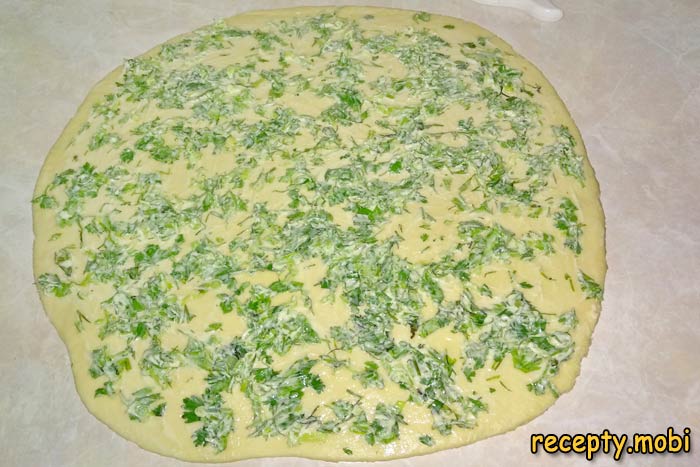
Using a silicone spatula or just my hand, I spread the garlic-butter filling evenly over the entire surface of the dough, leaving a 1 cm clear edge on all sides. The layer should be 2–3 mm thick – a generous layer gives maximum aroma.
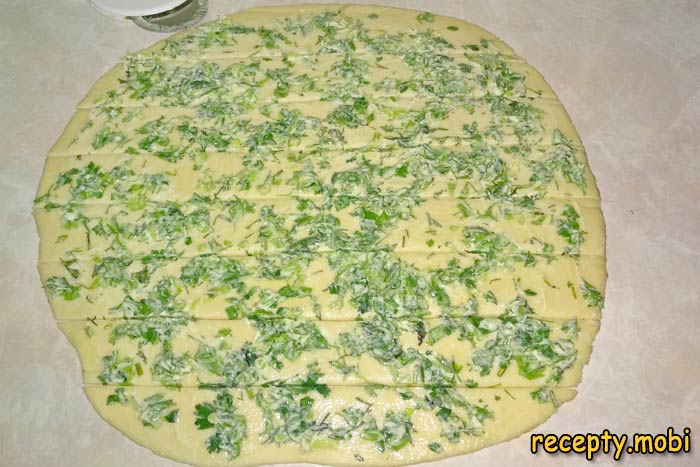
With a sharp pizza cutter or an ordinary knife I cut the rectangle of dough into long strips 5–7 mm wide, across the short side (you get 8–10 strips). Each strip is a "ribbon" for the future Snail.
I line a baking sheet with parchment paper and lightly grease it with vegetable oil. You can also bake the bread in a detachable biscuit tin.

From the first strip (at the edge) I shape the centre of the Snail: I roll it into a tight little roll, the base of the spiral. This is the "rose" from which the Snail will grow.
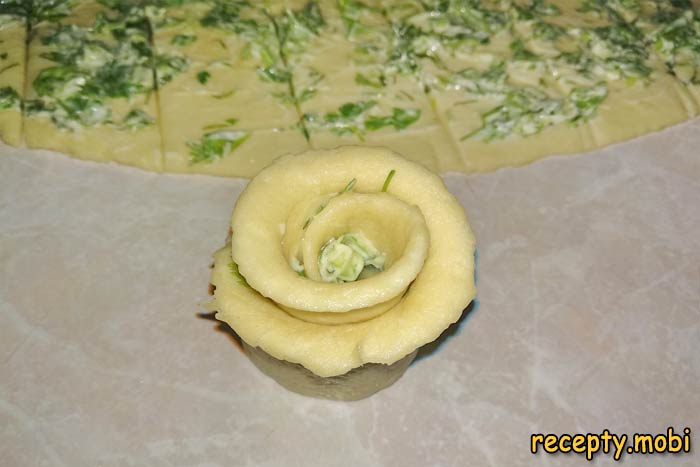
I carefully transfer the "rose" to the centre of the parchment. From it I will form the bread.
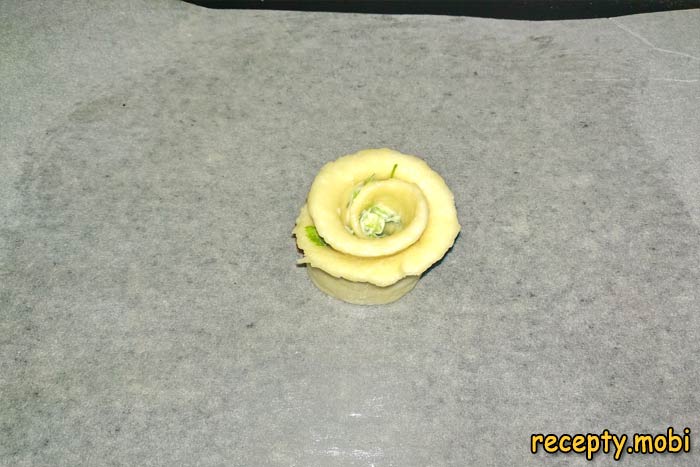
I take the second strip of dough and place it on the baking sheet. I wrap it around the "rose" in a spiral, LEAVING a gap of 0.5–1 cm between the coils, because the dough increases during baking and fills the space.
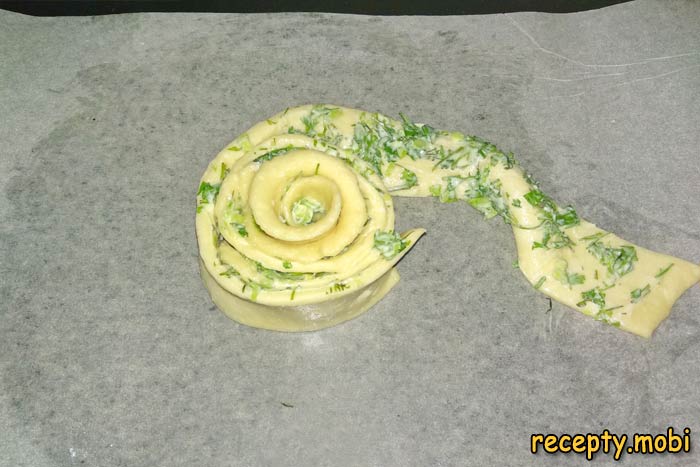
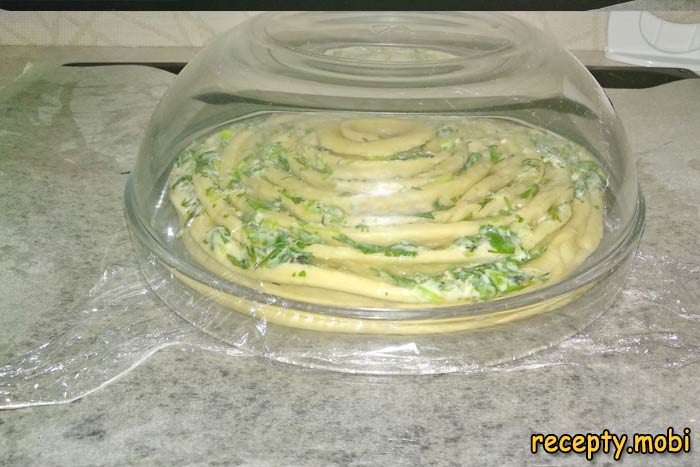
I do the same with each subsequent strip, "winding" all the strips around the centre to form the characteristic spiral Snail, 25–28 cm in diameter. Do not press the strips tightly against each other, since the dough will still rise.
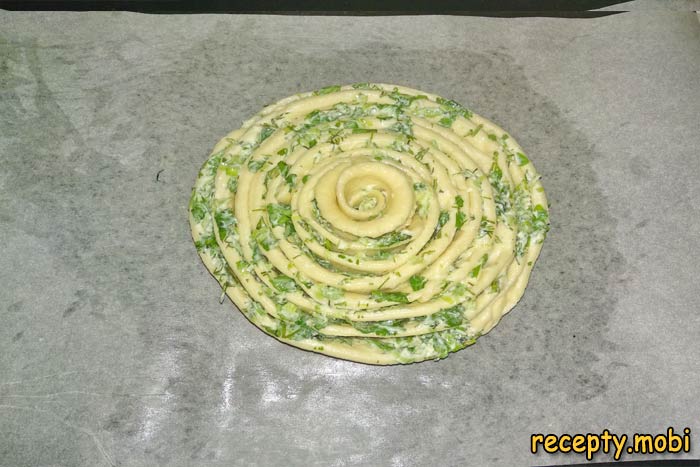
I cover the finished Snail with an upturned bowl and leave it to rest for 10–15 minutes so the dough proves a little before baking. Meanwhile I preheat the oven to 180°C, top-and-bottom heat.
I bake the Snail for 40–45 minutes until golden brown. I check it for doneness with a wooden skewer, which should come out dry. If the crust browns too quickly (after 25–30 minutes), cover it with foil and finish baking.
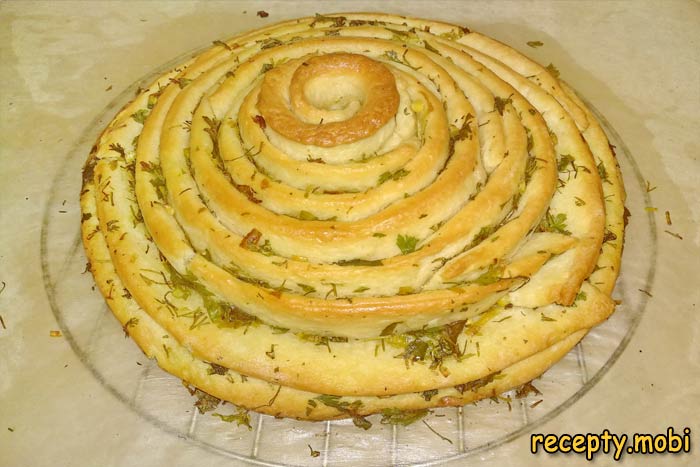
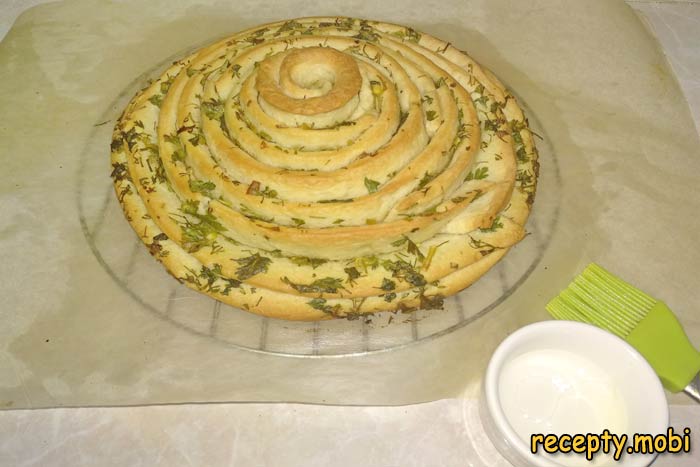
I take the finished Snail out of the oven and IMMEDIATELY brush it with a mixture of 1 tsp vegetable oil and 1 tsp water (1:1) – this gives a beautiful shine and stops the bread from going stale.
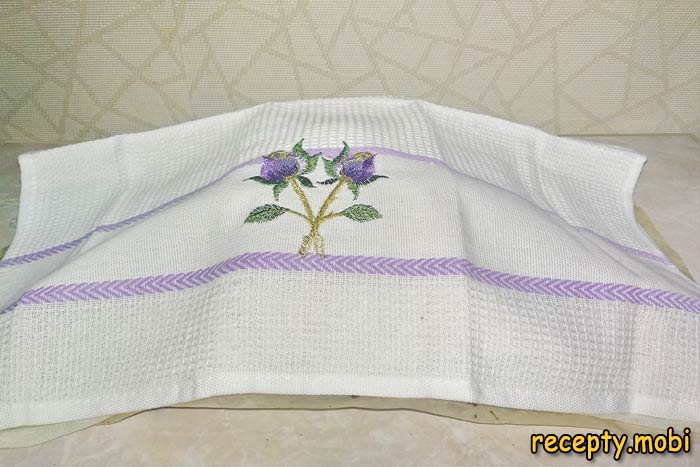
I cover the bread with a clean towel and let it "rest" for 15–20 minutes until it is warm. The garlic bread in the oven "Snail" is ready!The garlic bread in the oven "Snail" is now ready. With its spiral shape and fragrant garlic-herb filling, it makes a real decoration for any table.


Tips
- 1
Leave a GAP of 0.5–1 cm between the strips when shaping the Snail – the dough increases during baking and fills the space.
- 2
Grease the work surface with oil, not flour – flour "clogs" the dough and makes it dense.
- 3
Brush the hot bread immediately with a mixture of oil and water (1:1) – it gives shine and keeps the bread from going stale. I bake Armenian lavash on a similar principle.
- 4
Use fresh garlic and herbs – dried ones will not give the garlic bread such a "lively" aroma.
FAQ
What can replace fresh garlic in the filling? +
Suitable options are: granulated dry garlic (1 tbsp instead of 3 cloves – less "sharp" but convenient), fresh or pickled wild garlic (ramson) (2 tbsp chopped – a seasonal spring option with a delicate flavour), green onion with green garlic (for a "delicate" aroma), dried garlic powder (½ tsp – the "mildest" option), or pickled garlic (1 clove cut into cubes – an unusual note). Fresh garlic is the "classic" with an intense aroma. In season (April–May) try wild garlic for a gourmet touch. The dried options suit those who do not like the sharp smell of fresh garlic.
Can I bake the garlic bread in a biscuit tin? +
Yes, a detachable biscuit tin (22–24 cm in diameter) gives a "proper" round Snail with even edges. Grease the bottom and sides of the tin with vegetable oil. Shape the Snail from the strips directly in the tin – it is easier and more precise this way. The baking time does not change (40–45 minutes at 180°C). Before slicing, release the sides of the tin and transfer to a dish. It is ideal for a festive presentation – a Snail "like from a bakery". You can also bake it in a ceramic baking dish with high sides (which gives a tasty crust underneath) or in a cast-iron pan (a golden crust all around).
How long does garlic bread keep? +
The finished bread keeps at room temperature in an airtight bag or container for up to 3 days (thanks to the butter in the filling it does not dry out). On the second day the flavour is even richer, as the aromas combine. In the refrigerator it keeps for up to 5 days under cling film – before serving, reheat it in the oven for 5–7 minutes at 150°C under foil to restore its softness. You can freeze it for 1 month in an airtight bag – before serving, thaw it completely at room temperature for 1 hour and warm it in the oven for 5–10 minutes at 150°C. Sliced pieces can be dried separately in the oven for 5 minutes into "croutons" – a tasty snack with soup.
What to serve garlic bread with? +
It is ideal with soups and hot dishes: Ukrainian borscht (a classic pairing), Georgian kharcho, Uzbek lagman, Italian minestrone, vegetable cream soup, pea soup or lentil soup. With grilled meat: pork or beef shashlik, lyulya-kebab, chicken wings, beef steak. With pasta and Italian dishes: spaghetti bolognese, lasagne, risotto. With a cheese board and wine. For a picnic or a country lunch – with shashlik and grilled vegetables. For drinks, dry red wine (Cabernet, Merlot) or beer (dark Guinness); for children, fruit drink or compote. It is perfect for a family dinner or a get-together with friends.
- Comment
or post as a guest
Be the first to comment.


